Battle Fleet: Ground Assault — Intense Tank Command Decisions
Intense, exciting, turn-based armored warfare.
Since I was already getting knocked off my fleet(s) in the Pacific and Atlantic Oceans (as well as most other Seas you can think of) during Mythical City’s Battle Fleet 2, I jumped at the opportunity to motor into some tank warfare in their brand new Battle Fleet: Ground Assault.
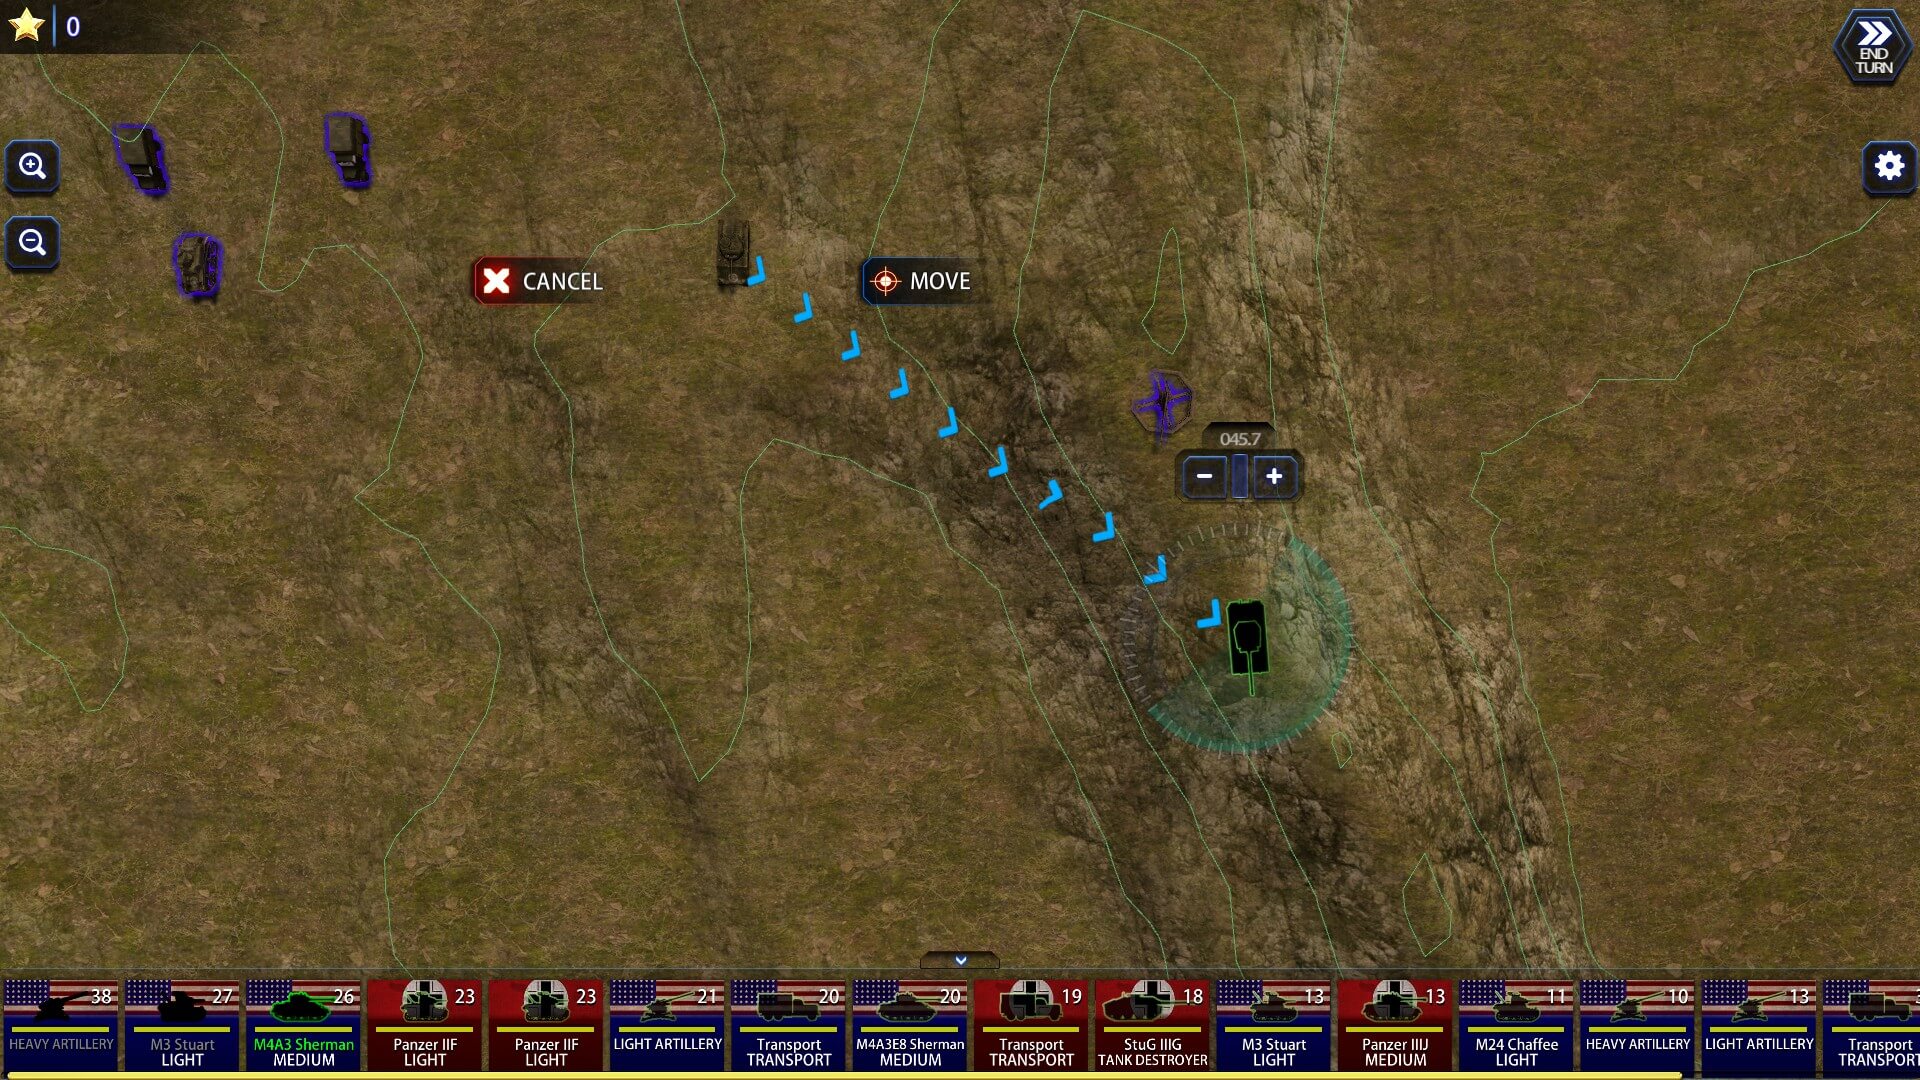
Obviously, the major change is from sea to land, but the mechanics work pretty much the same: choose your target, set the aiming angle, guess at the distance, then hope you hit ‘em hard enough to really hurt ‘em. Other than the obvious terrain differences, you’re trading battleships for Panzers and cruisers for Shermans or vice versa — along with all the other floating versions being switched for tracked variants.
As I mentioned, the mechanics of the game are pretty simple: move (if you choose), set the trajectory, set the distance, hope you hit. However, you also have to consider terrain, height (extremely well done with contour lines) and intervening trees and buildings.

It’d be really easy to use the cliché ‘Easy to learn, hard to master’… so I will. You get your individual tanks’ turns (mostly) randomly at first (shown at the bottom of the screen). Later, the better-performing ones get higher initiative. From the very first turn, it’s nail-bitingly intense. Where are they? What are their plans? Are they better than mine? Is their equipment better? Who has more? How am I going to come out on top of this?
Starting with the most simplified Battle Fleet: Ground Assault scenario option (Quick Battle), I simply chose to play as the Americans to go up against the Axis. New to the series is the (fantastic) option to choose a random map, so that’s what I excitedly did. I’m guessing I was somewhere in France.
I was more than a little distraught when I saw how our forces were assigned. Initially, I thought Yay! I got eight tanks to their six! but my enthusiasm instantly wore off when I saw the lineup at the bottom. While I did get three Wolverine tank destroyers, the other five were little, teeny-weeny M3 Stuarts.
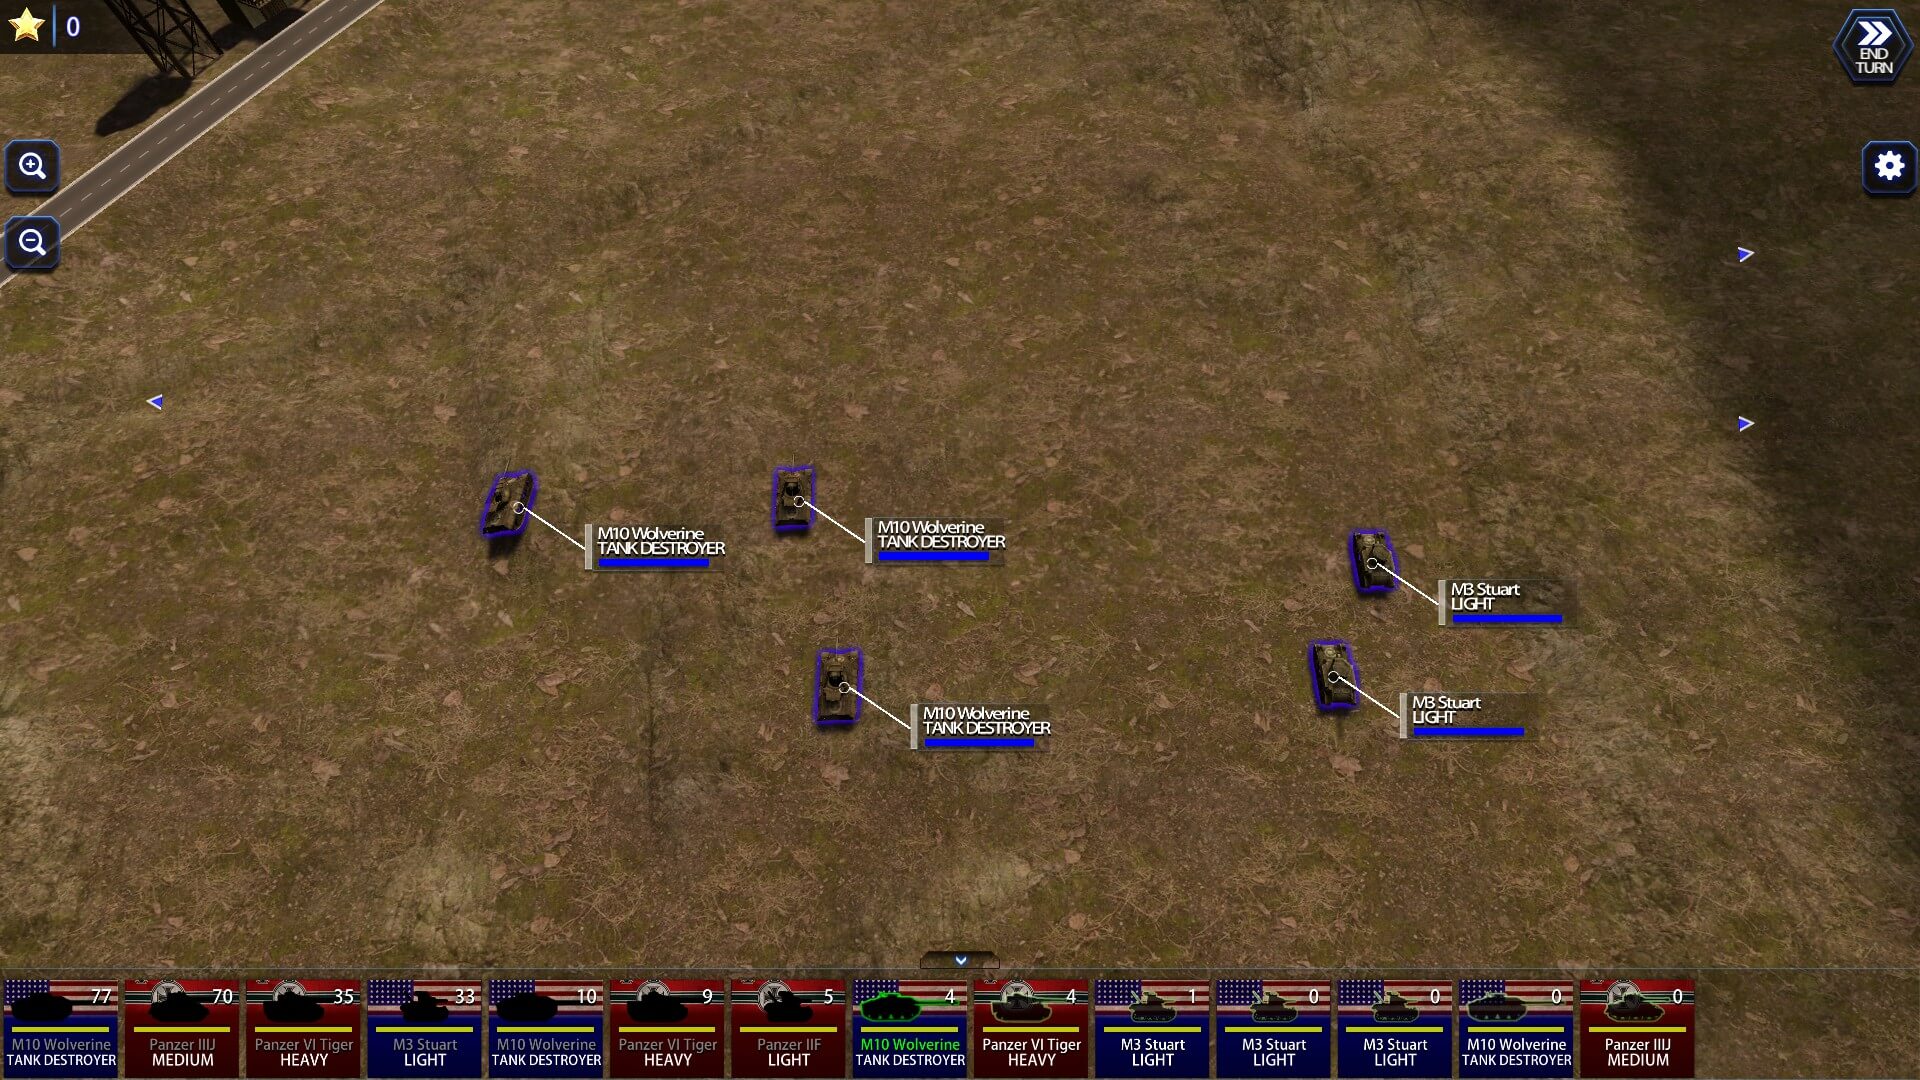
You might think Oh, but they’re quick and agile… True, but the six beasts the Germans were dealt were all Panzers — three of which were Panzer IV Tigers. Oh, <expletive> come on! Yeah, that’s going to be fair. Especially important are their armor values: Front/Side/Rear…
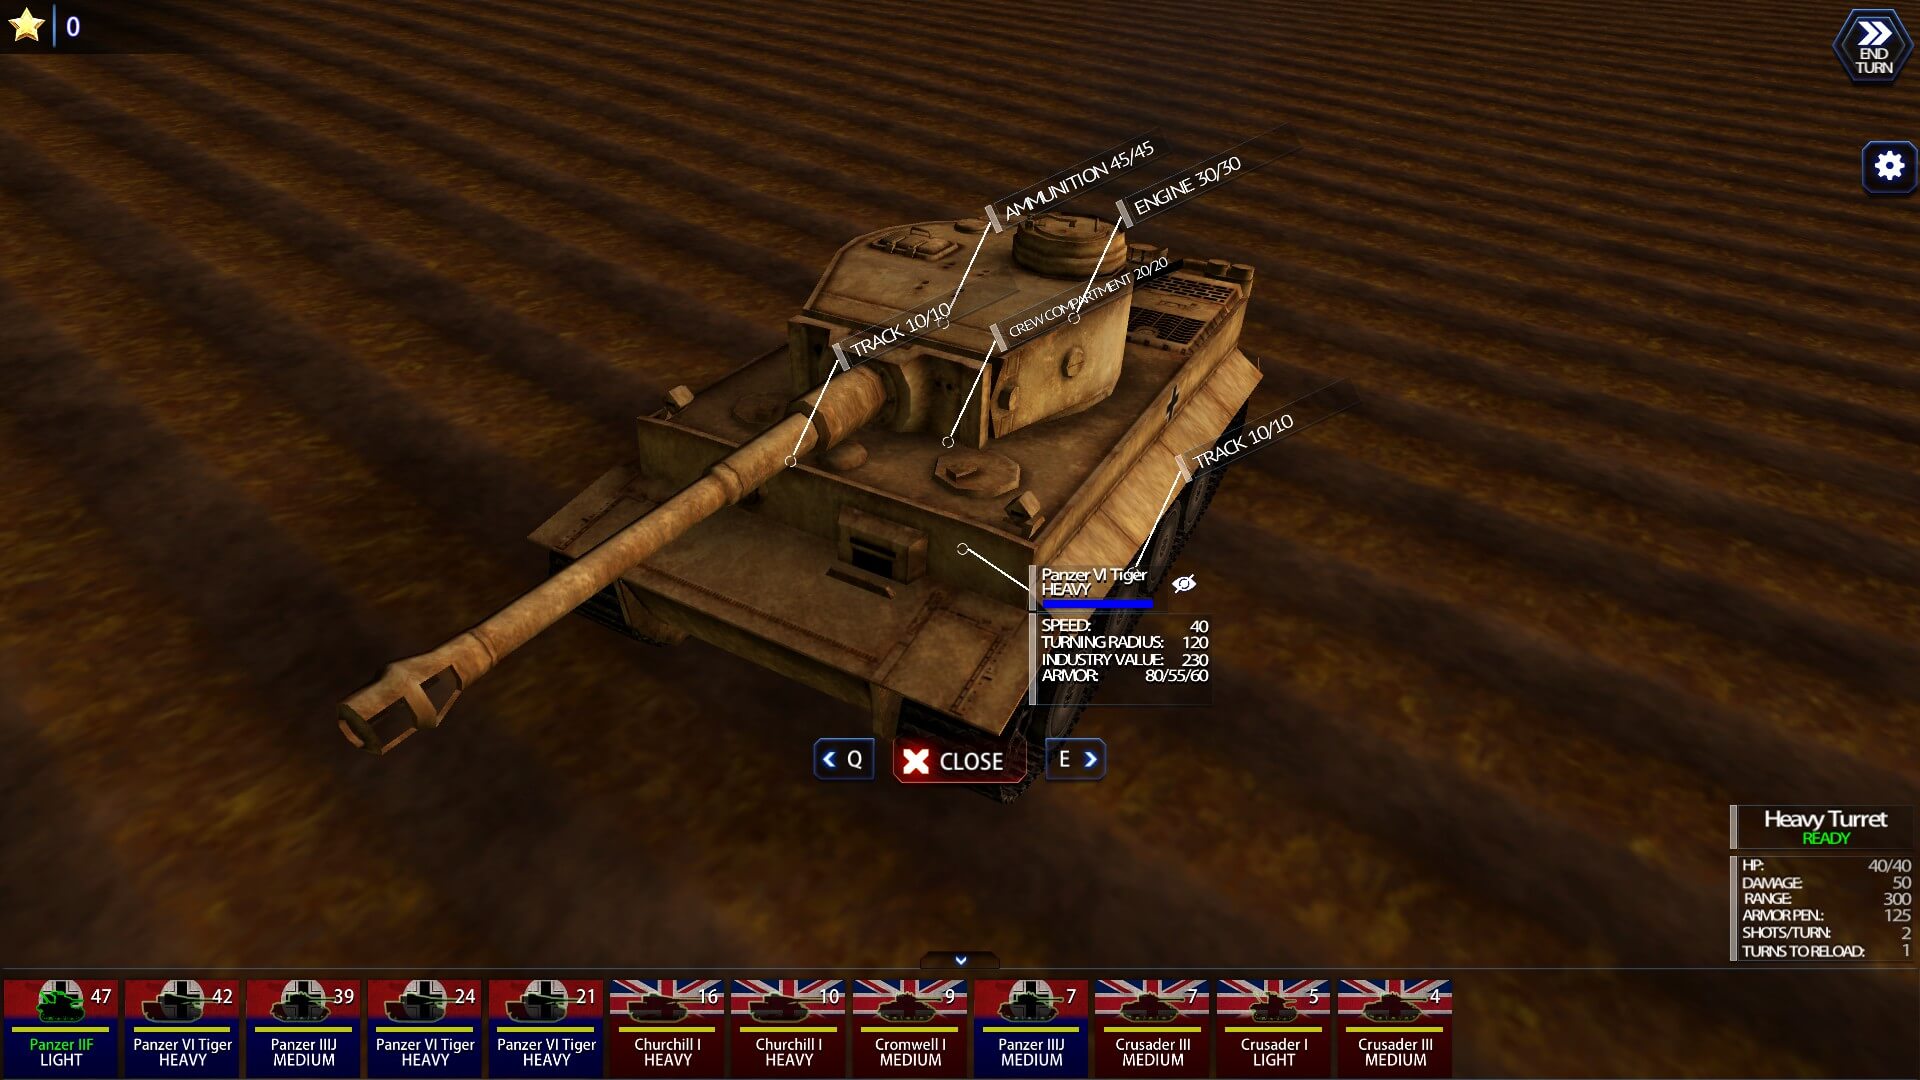
Once we were all placed on the map, they were all hidden within the fog of war. Before ever seeing them, I only had one plan in mind: I was going to have to speed around behind them if I was going to stand any kind of chance. Hopefully, I’d be able to find some kind of height advantage as well, while also praying they wouldn’t bunch up. No armor on the Western Front is going to go head-to-head with a Tiger, much less three of them.
There was a large ridge to the north. If that’s where they were, and they decided to set up shop there, I’d be doomed already. After a little bit of movement, shots started heading my way from the west-northwest. At least I knew where one of them was — and they could see me, but not the other way around. I shifted all my tanks toward the direction the fire was coming from, almost using the lead M3 as bait. If I could find the one shooting, I would be able to adjust accordingly. Except for him, I was ending each tank’s movement behind a ridge line, hoping to pop up when my next turn(s) came around.
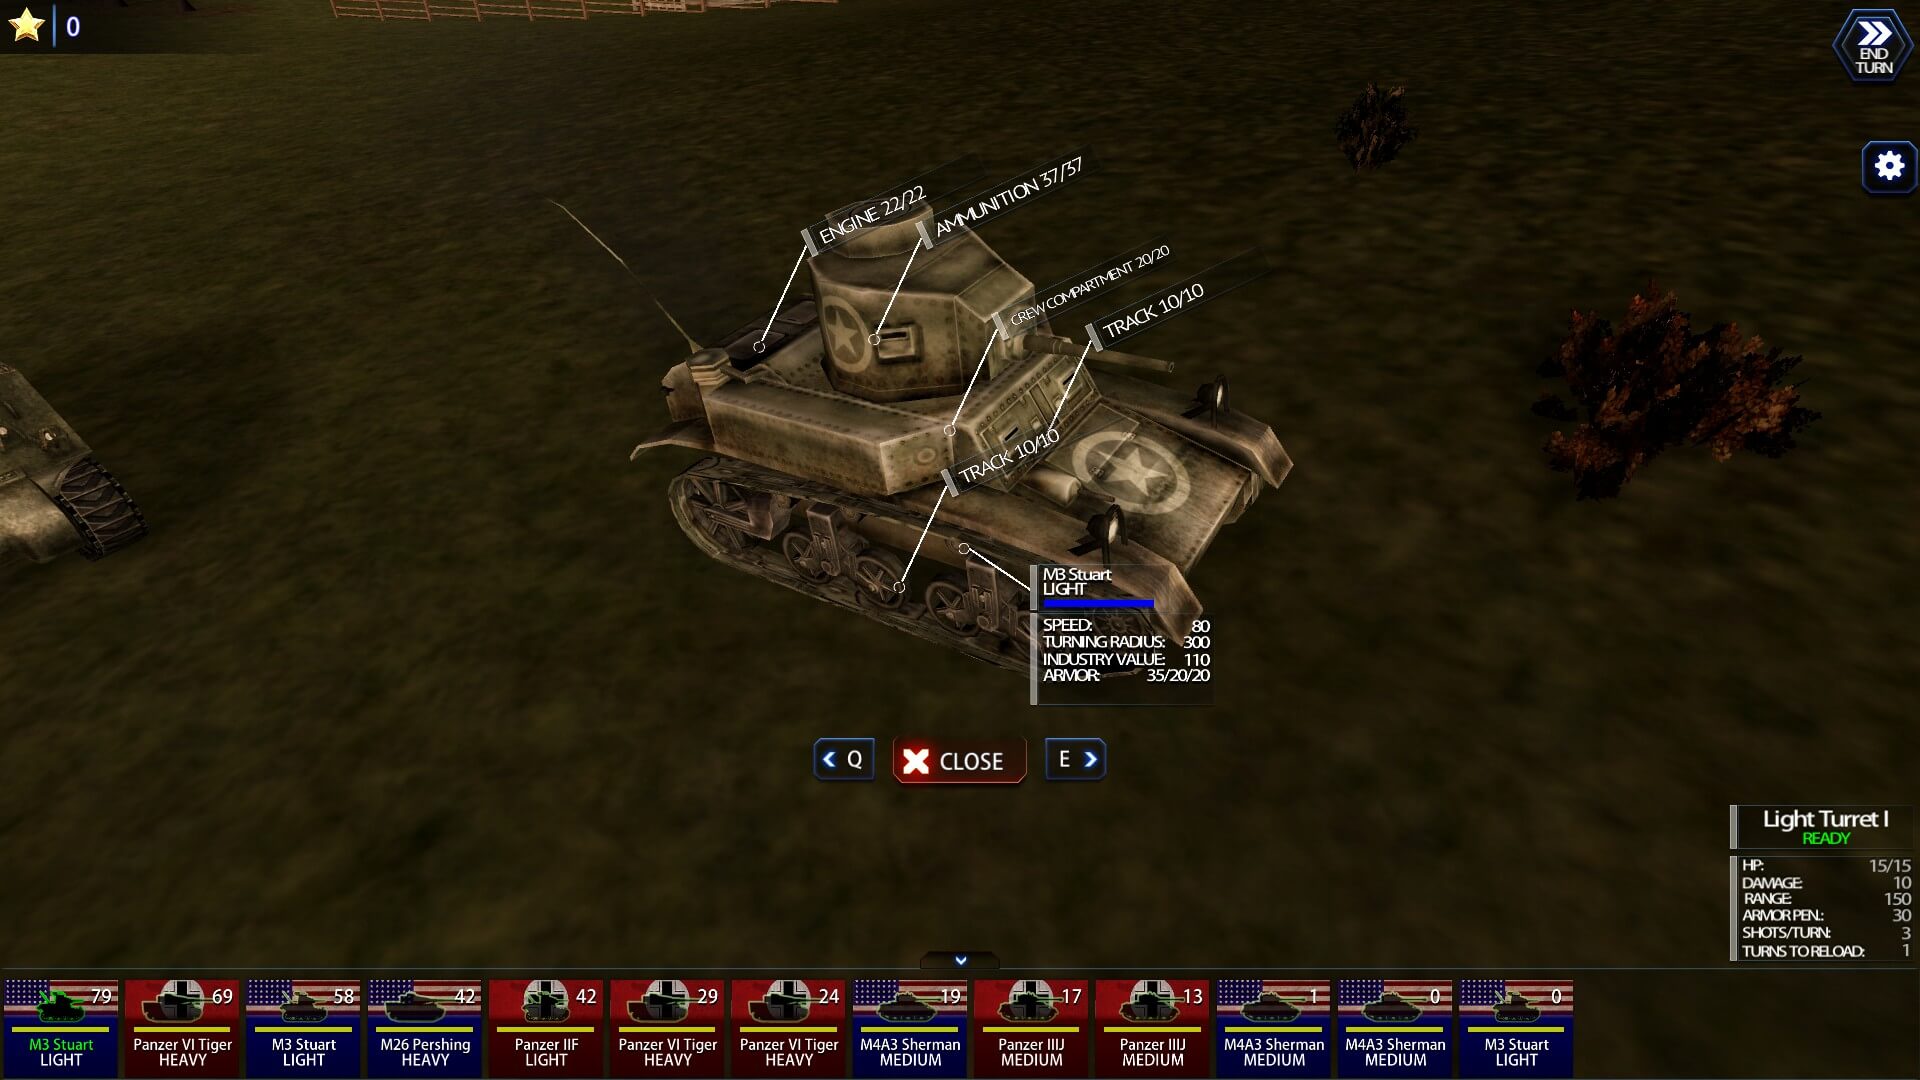
When the majority of the Axis tanks moved they didn’t care if I spotted them or not. They were after my poor, small Stuart. Poor little Stuart. By the time I saw the fourth Panzer come into view, little Stuey was crippled, but not dead. They had connected with both the engine and crew compartments, as well as his ammunition.
Yes, one of the greatest parts of Battle Fleet: Ground Assault is being able to hit/knock out specific parts and compartments. In a different scenario, I had a Sherman hit early, then stuck in one spot for the duration after having its tracks destroyed and the turret hit, limiting its arc of fire. It still managed to score two kills.
With most of the German force exposed (and unfortunately on higher ground), it was time to put Operation Sprint into action. Each tank gets two actions: you can move twice, or move once and shoot (or, obviously, not move and shoot more times). With a few clumps of trees to hide behind, I would move the M3s twice, trying to end their turn behind a hill or tree.
On the other hand, I’d move the Wolverines (obviously out of the Panzers’ arc as much as possible) once, then take a shot. Since I was still not even close to being behind them, when I did hit, it was to their front (Crap!) or their side. Generally, the front hits (predictably) ricocheted away, while a few of the side shots did as well. However, I would score an occasional track or turret hit — taking away a few of their hit points and even doing a little immobilization.
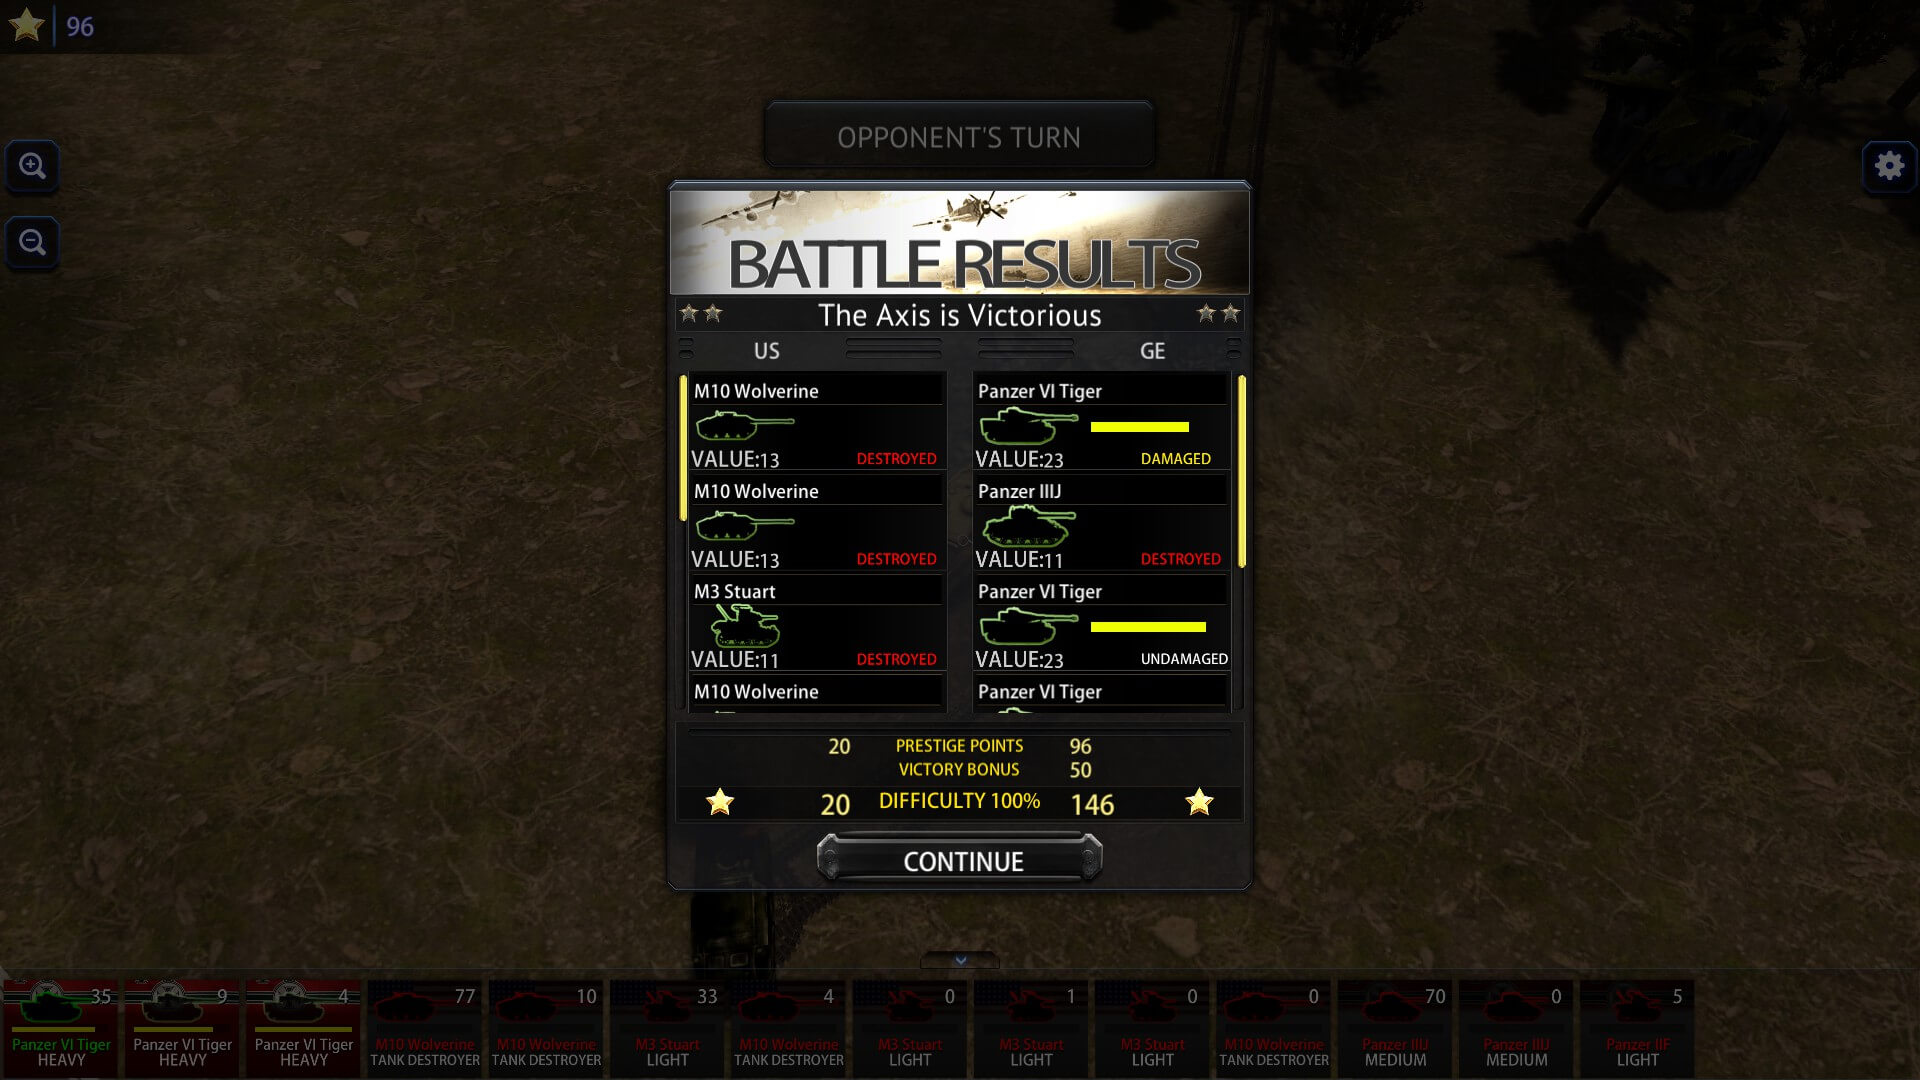
But, when it was their turn, all Hell rained down on my parade. Little Stuey was the first to go, followed quickly by a couple more M3s and a tank destroyer. Once I finally figured out where most of them were (after taking out three of their monsters, by the way), it was as I had feared: they had two Tigers side-by-side in part of the little town to the northwest. To add insult to all my injuries deaths, they even brought in a Panzer IIIJ to join their little Tiger Party.

By the end, I had a lone Stuart against their Panzer Pizza Party. Wonder where the other Tiger is? I’ve never even seen it. It’s probably with its crew just sitting around somewhere drinking Erdinger Weissbräu, waiting for me to die. Even though I managed to take out the IIIJ, it was too late. I did feel kind of good that it was my first game and I did hurt them a bit, all while being massively outgunned the entire time. At least I didn’t feel like painting a big ‘L’ on my head.
My next outing of Battle Fleet: Ground Assault was using the Custom Battle feature. Again as the Americans, this time I chose the Norway map. With Custom Battle, you buy your own equipment. I chose two Shermans, three Wolverines and yes, two Stuarts. Then, you have the option to choose your opponent’s tanks. I passed on choosing their side, to let the tracks fall where they may once again.
Luckily, even though I was outnumbered, I wouldn’t have to deal with any Tigers this time. I was at an eight-to-twelve disadvantage, but again, not against any IVs. Whew. (There is a bar at the bottom of the screen, where the tanks are listed, which is scrollable. Thought I’d pass that important information along, as I had found it the hard way: How come they’re still moving tanks? Isn’t it my turn yet?)
This map was incredibly different and very interesting. There was the left side with a couple of small towns (theirs); a huge, wide river which ran all the way from north to south; then, the right side, with a bunch of trees and a huge mountain area in the far north (my side). Finally, there was one bridge, just south of center which linked the two halves. Hmm, wonder where the hot spot and action will be this time?
Unfortunately, when my forces were placed, four were at the north, four at the south. If I had the option to place my own, I obviously would have put them all closer together, even though there is no ‘command and control’ at play. My plan this time was to use an M3 at the top, on the mountain, to ‘spot’ by moving it to the highest ridge crest, then move the other three down to the lower group to try to take the bridge — preferably before the Germans did.

Something I haven’t mentioned so far: In Battle Fleet: Ground Assault, there are little boxes with green circles around them, lying on the ground. Once run over, they uncover Strategic Command Cards, which are extremely valuable. These cards can give you anything from repairs to recon, to bombing runs to other non-spoiler things. The game notifies you when one is discovered/uncovered — by either force.
The bad part of this particular scenario is I kept getting the notifications — except I knew it wasn’t ever me finding the boxes. The Axis found two early on. Unfortunately for me, they were both bombing runs. (I got some SCCs in a different battle: it’s a red cross-hair, you line it up where you want to bomb [sometimes, it’ll have a directional choice/marker], the planes fly over and bomb where you told it to.) So, it’s not fun when you’re the recipient. In their two runs, they destroyed one tank, took out pieces of two others and crippled another.
As expected, the Germans seemed as concerned about the bridge as I. However, by the time they started rolling over it, I already had my bottom force in a position to attack them as soon as they began crossing. The results were ugly for them, great for me.
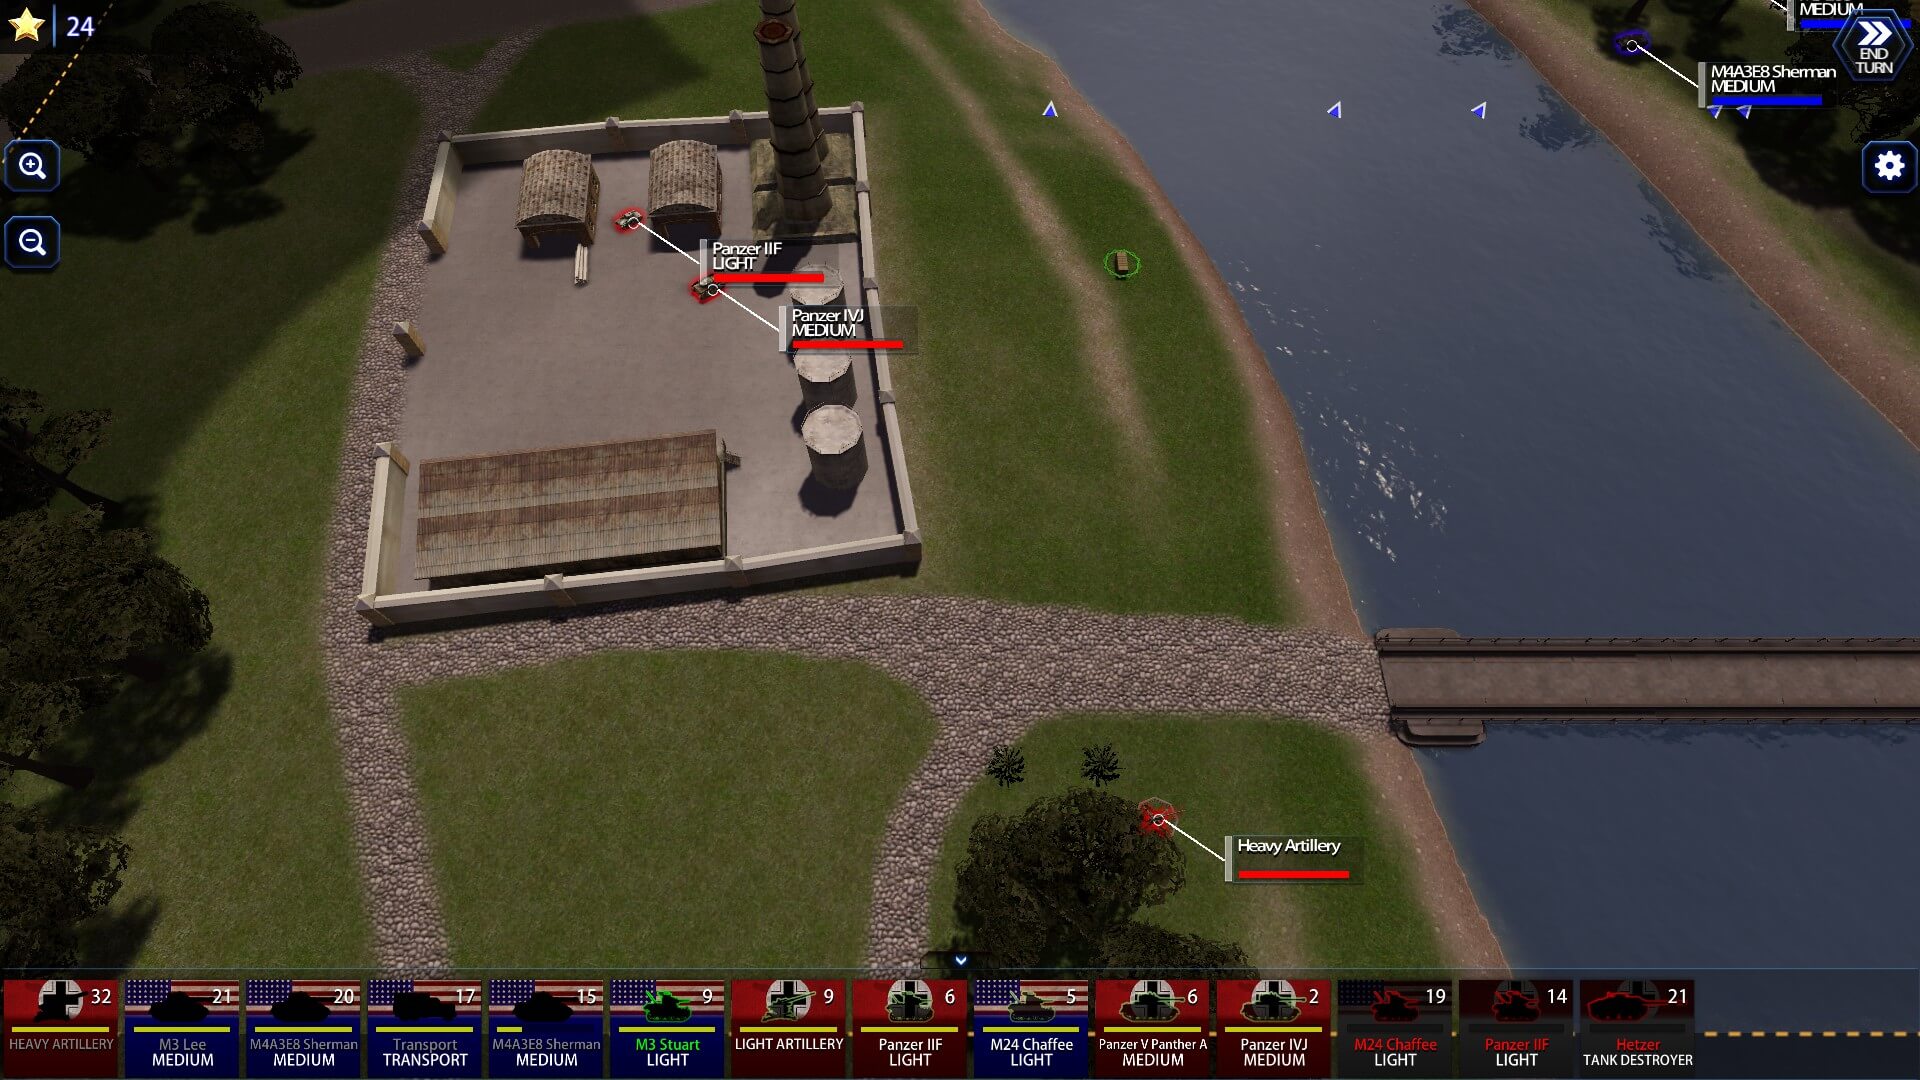
Now that my tanks were all relatively close, it was time to cross and take out whatever the Axis had remaining. Luckily, it was merely two Panzers, way up high in the town. As only the single road was connected to the bridge, my main problem was the terrain leading up to the village. The contour lines were very close together, in both directions. Let’s be real careful here guys, they could easily take us out piecemeal if we just go charging up this narrow, winding passage.
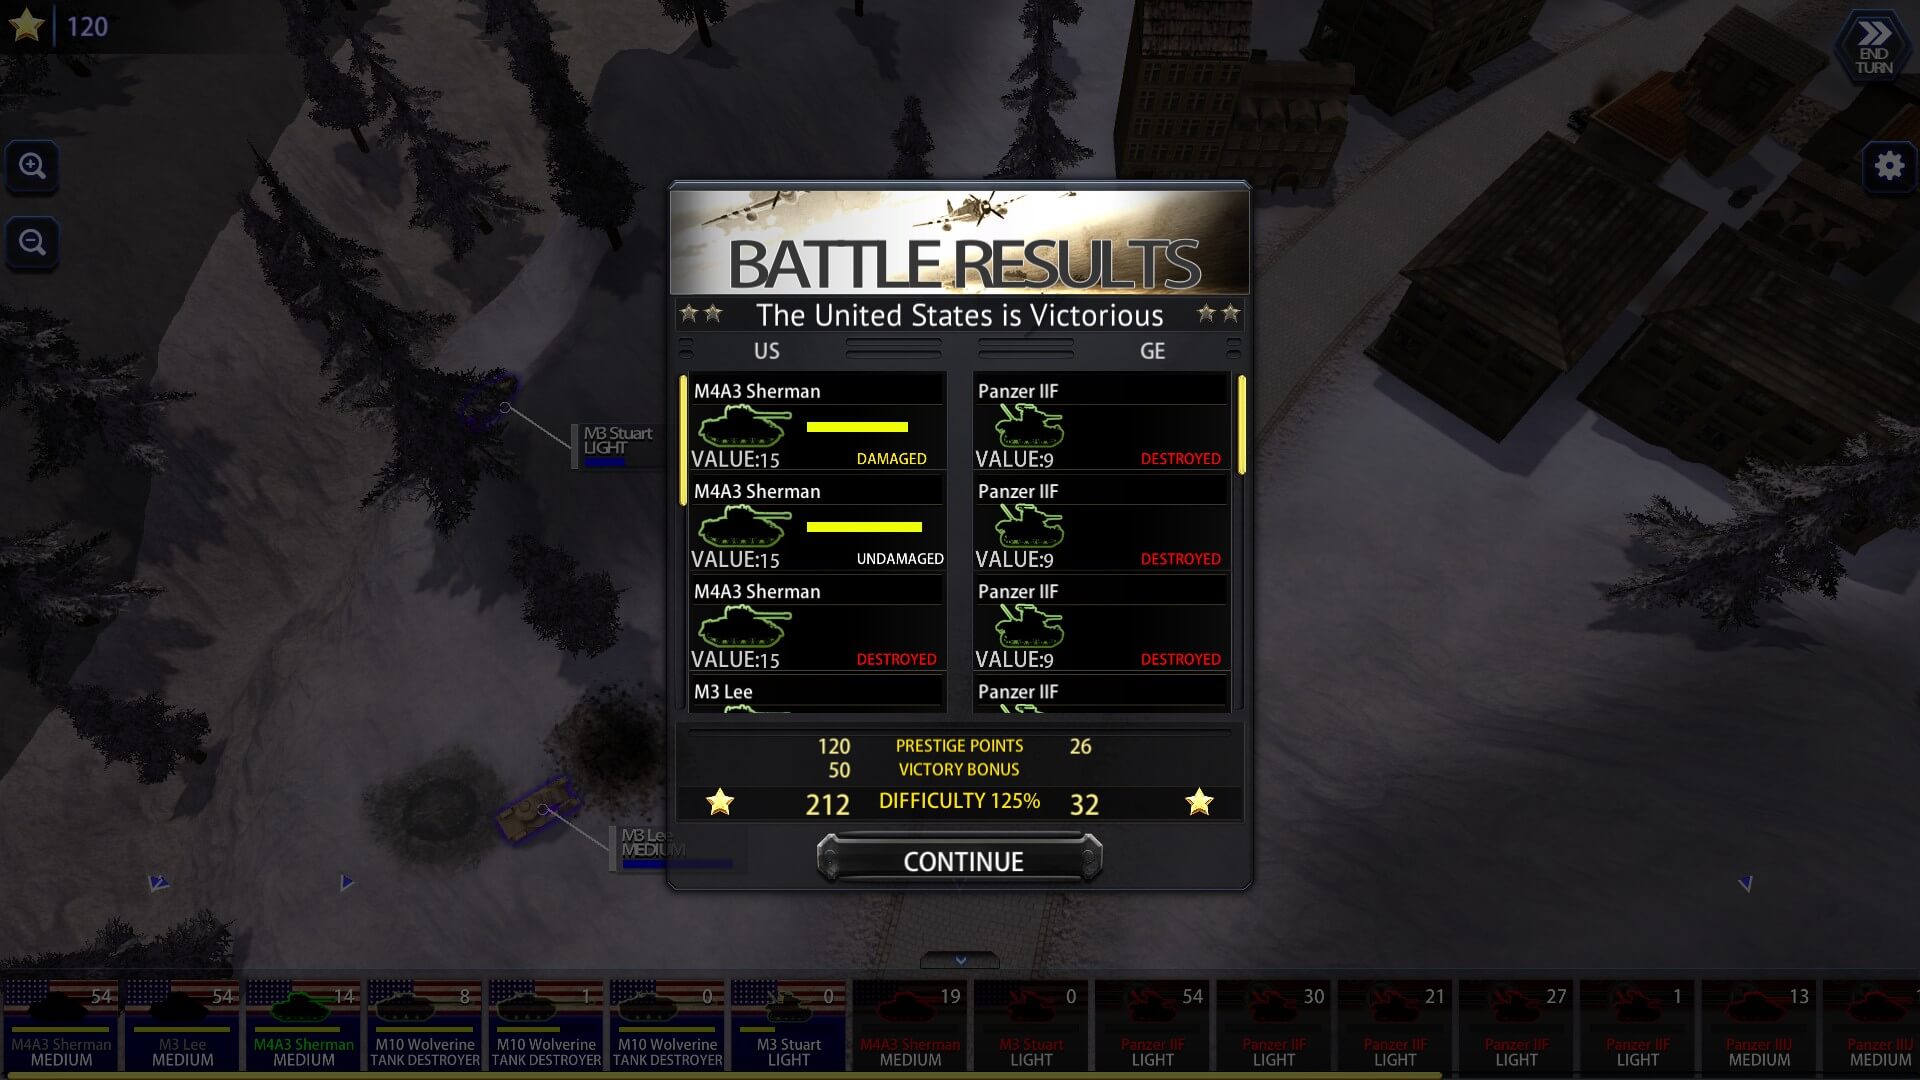
As we crawled our way up and around, we made sure to end each vehicle’s turn on the back side of a hill. This meant a string of temporarily spotting their tanks on and off, but at least we had a general idea of where they were. Once ready, we all simultaneously stopped on high ground to start the barrage of fire. Although we took some damage (but no casualties), it didn’t take us long to blow them to tiny, bite-sized bits. Victory!
Whether you have read any of my previous articles or not, the meat and potatoes of any game for me is the campaign. I really enjoy the long, drawn-out slug-fests involved in taking over a large area. Although each battle’s mechanics are the same, there are a few differences when playing the campaign.
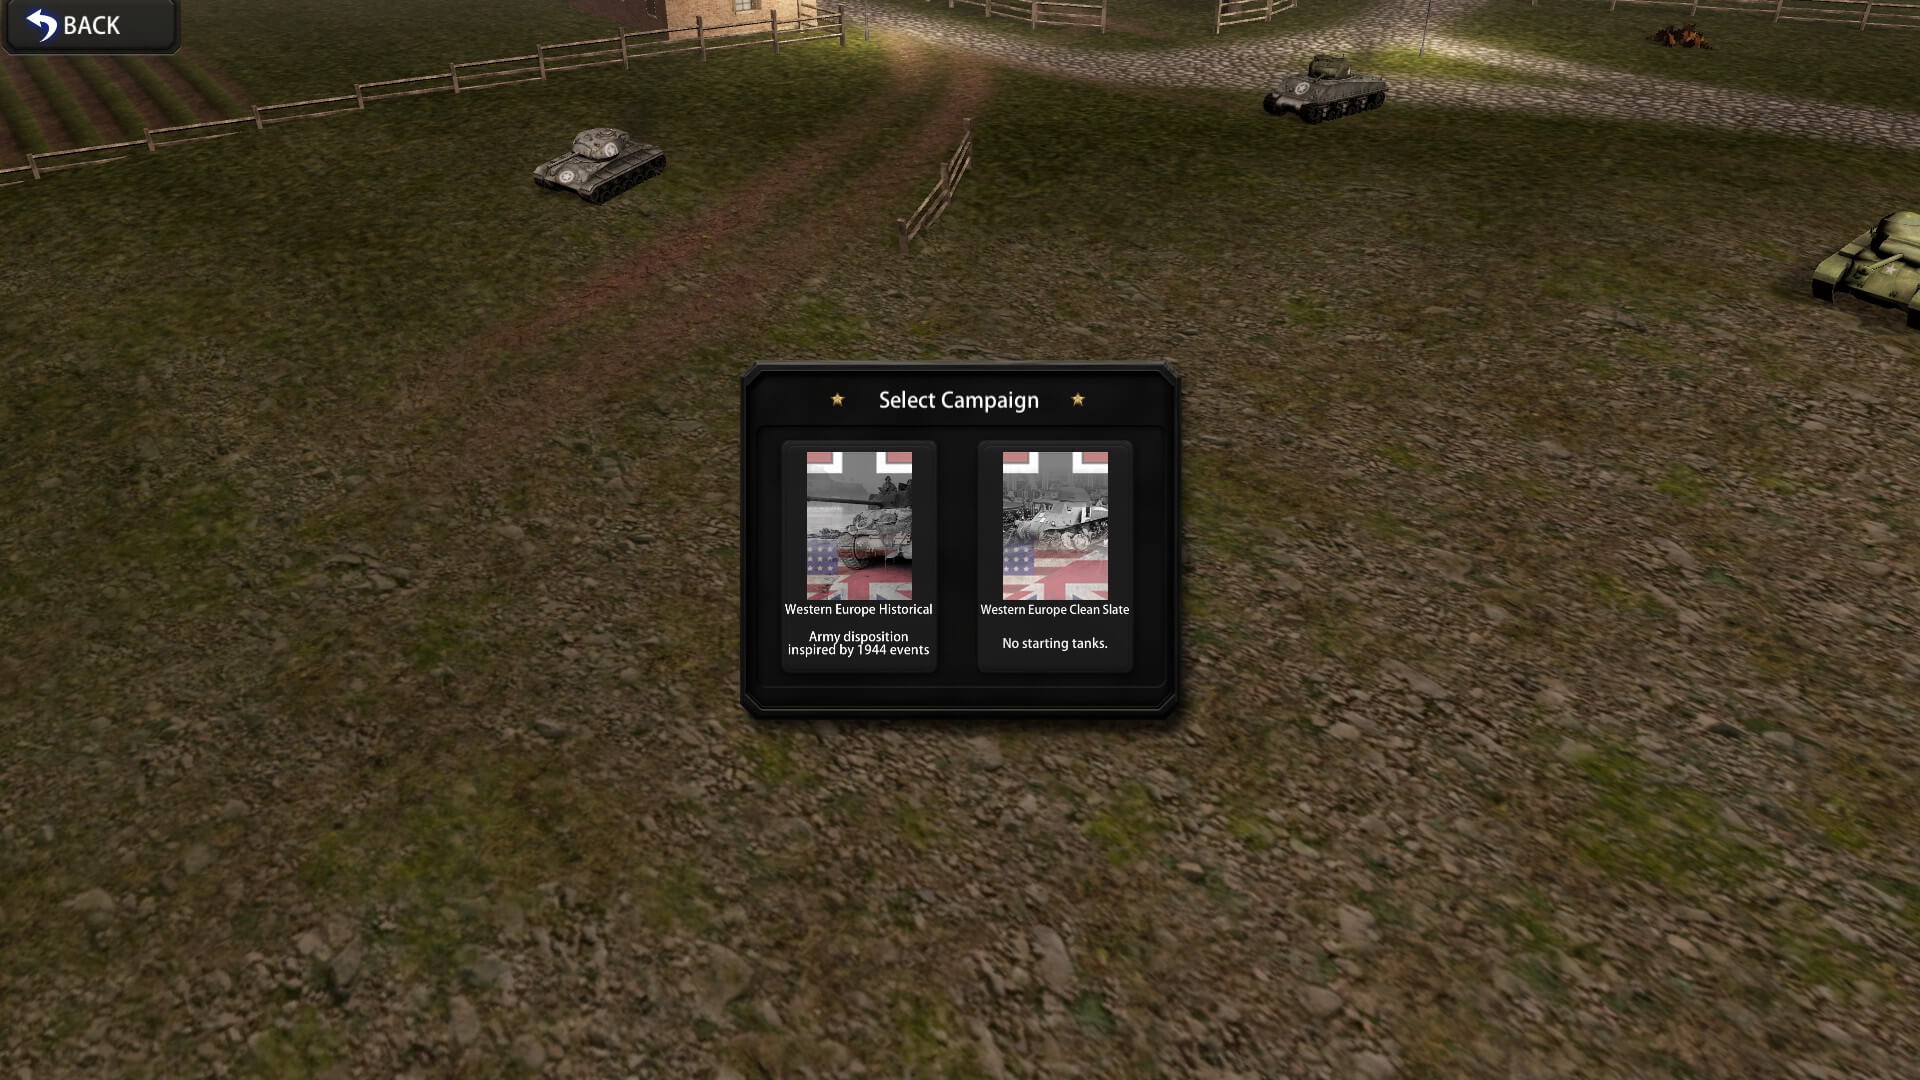
First is the initial map itself. It’s the Western Front, so it’s Western Europe divided into territories. The victory goal is to capture them all. Regardless of who you choose to start with, the Axis control most of the map. Each territory has a different (battle) map, while some contain factories, airfields and/or stationary artillery.
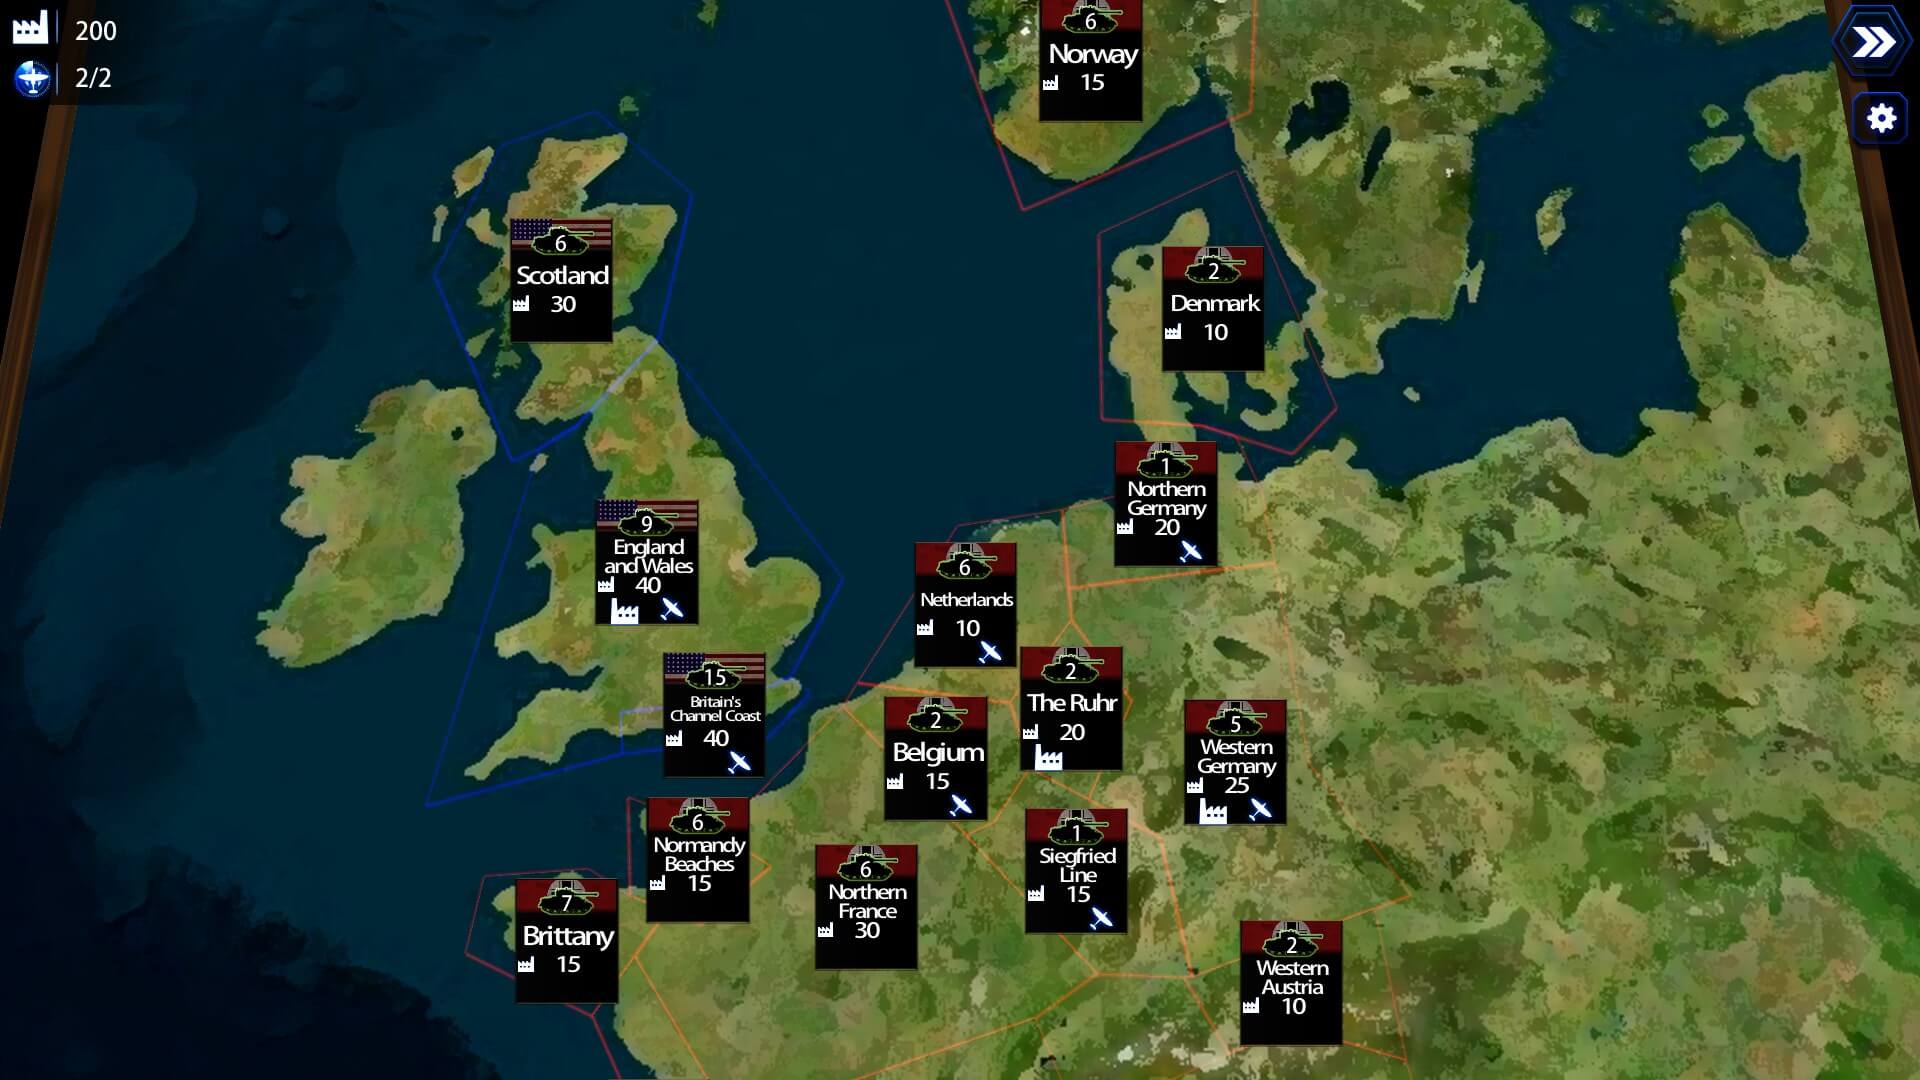
Each turn, you also receive a random amount of recon missions. You can select a specific territory to recon and gather intel. This is especially important if you are planning an attack on that sector.
If your territory has a factory, you can build tanks there — up to five — which cost Industrial Points. Also, if your armor has been damaged from the previous fight, it will automatically repair if a factory is present. However, if your tank has hull damage, it must spend an entire turn there to be repaired. Also note: you cannot use the tanks/transports you build on that current turn; they won’t be available until your next turn.
Choosing the Americans once again (There seems to be a theme forming here…), and avoiding spoilers, all I will say is that once a little bit into the campaign, the Germans attacked me first. Oh, shit! Here they come and they definitely have the numbers, as well as the odds in their favor. I could only brace for impact, pee a little bit, then hope for good placement when it switched to the battle map.
However, the most important item to consider, either while attacking or defending, is whether there is artillery in that section. Luckily, I had three artillery pieces to help my otherwise weak defensive posture. As I could only hear their terrifying armor rolling in, I did have an idea. I could always fire potshots into the FoW… and maybe get lucky?
Conversely, when you (or your opponent) fires artillery, even while ‘hidden’, it leaves a small yellow circle — denoting the approximate position the shells came from. So, I decided against that, worrying they’d beeline toward my arty locations. I decided to use more of a ‘Don’t fire until you see the whites of their eyes’ approach. (Yeah, yeah, I know: Bunker Hill, not WWII, tanks are eyeless… but you get the point.)
Most of what I did was move the tanks to the highest ground possible, while simultaneously giving me the best vision. However, not too far to the southeast was a crate (holding a Strategic Command Card) — and I really wanted it, as it was the only one I could see. So, on the east side, I had a little valley between two hills. I was hoping to move through it, get to the higher ridge on the far east hill, pray the monsters weren’t there, then run and grab that box.
No such luck. By the time I got to the top of the far east hill, there were two Panzers waiting for me. Guess all of the rolling tank engine sounds were all in the west. Crap! My only option then was to try to lure them close enough so my artillery (on that side) could reach them. It worked! Well, mostly. As they came after my new Little Stuey, they moved into my arty’s range, which eventually took them both out. (Yes, I lost the M3, but still.)

The west side of this encounter was extremely tense as well, actually more so. As a probe, they stuck their nose in with a little IIF. It was out of all my troops’ ranges, so I simply had to chew my nails and wait. The very next turn, they brought the heat, man. They trudged in two IIIJs, an IVJ and, just to add to my nightmare, a StuG IIIG tank destroyer. Counting the initial light tank, that’s five, all on that west side.
For luck’s sake, they weren’t in too much of a hurry. That’s where they made their mistake. They would move, then shoot at my higher-vantage-point tanks, without ‘much’ damage given. (Yeah, they did beat me up a bit, though.) On my turns, though, since they were mostly in range, I rained down hell (shells, really). Yes, they were facing me, so I had quite a few ‘tink, tinks’ as my APs ricocheted off, but I was hitting turrets, tracks, and other various components.
Many a turn, I had to inch forward because they’d backed up ‘just’ enough. Wanting to stay on the hills, sometimes I’d switch to high explosive — because if my range limit was two hundred meters, they would have already backtracked another meter. The bastards. If I couldn’t get direct hits, I could wear them down, even five points a shot, until I destroyed them. A couple of top hits from my heavy artillery in the west… and I finally beat them down… to a victory! A few losses for me, huge losses for them.
That was just one campaign battle, with tons more to come. This is what Battle Fleet: Ground Assault is all about. This isn’t an RTS tank-rush. This is deliberate, strategic, methodical planning… and adaptation when your plans go sideways. It’s about paying careful attention to terrain, buildings, trees, hills and contour lines. It’s about knowing your strengths and weaknesses, as well as trying to figure out the enemy’s. Battle Fleet: Ground Assault is fantastic armored warfare… which sometimes feels like an inch at a time.
Battle Fleet: Ground Assault is available now on PC and Mac.