A typical run of Fights in Tight Spaces goes through five distinct sections, with different challenges and different enemy types in each. This guide is structured around those different sections, with early-game and more basic tips for the first sections and more specific help and niche topics later on. This guide does contain spoilers for the content of the final mission. Fights in Tight Spaces is not exactly a story heavy game but, if you want to preserve the surprise, play until you’ve hit the Final Mission at least once before reading this guide.
Death’s Head Biker Gang
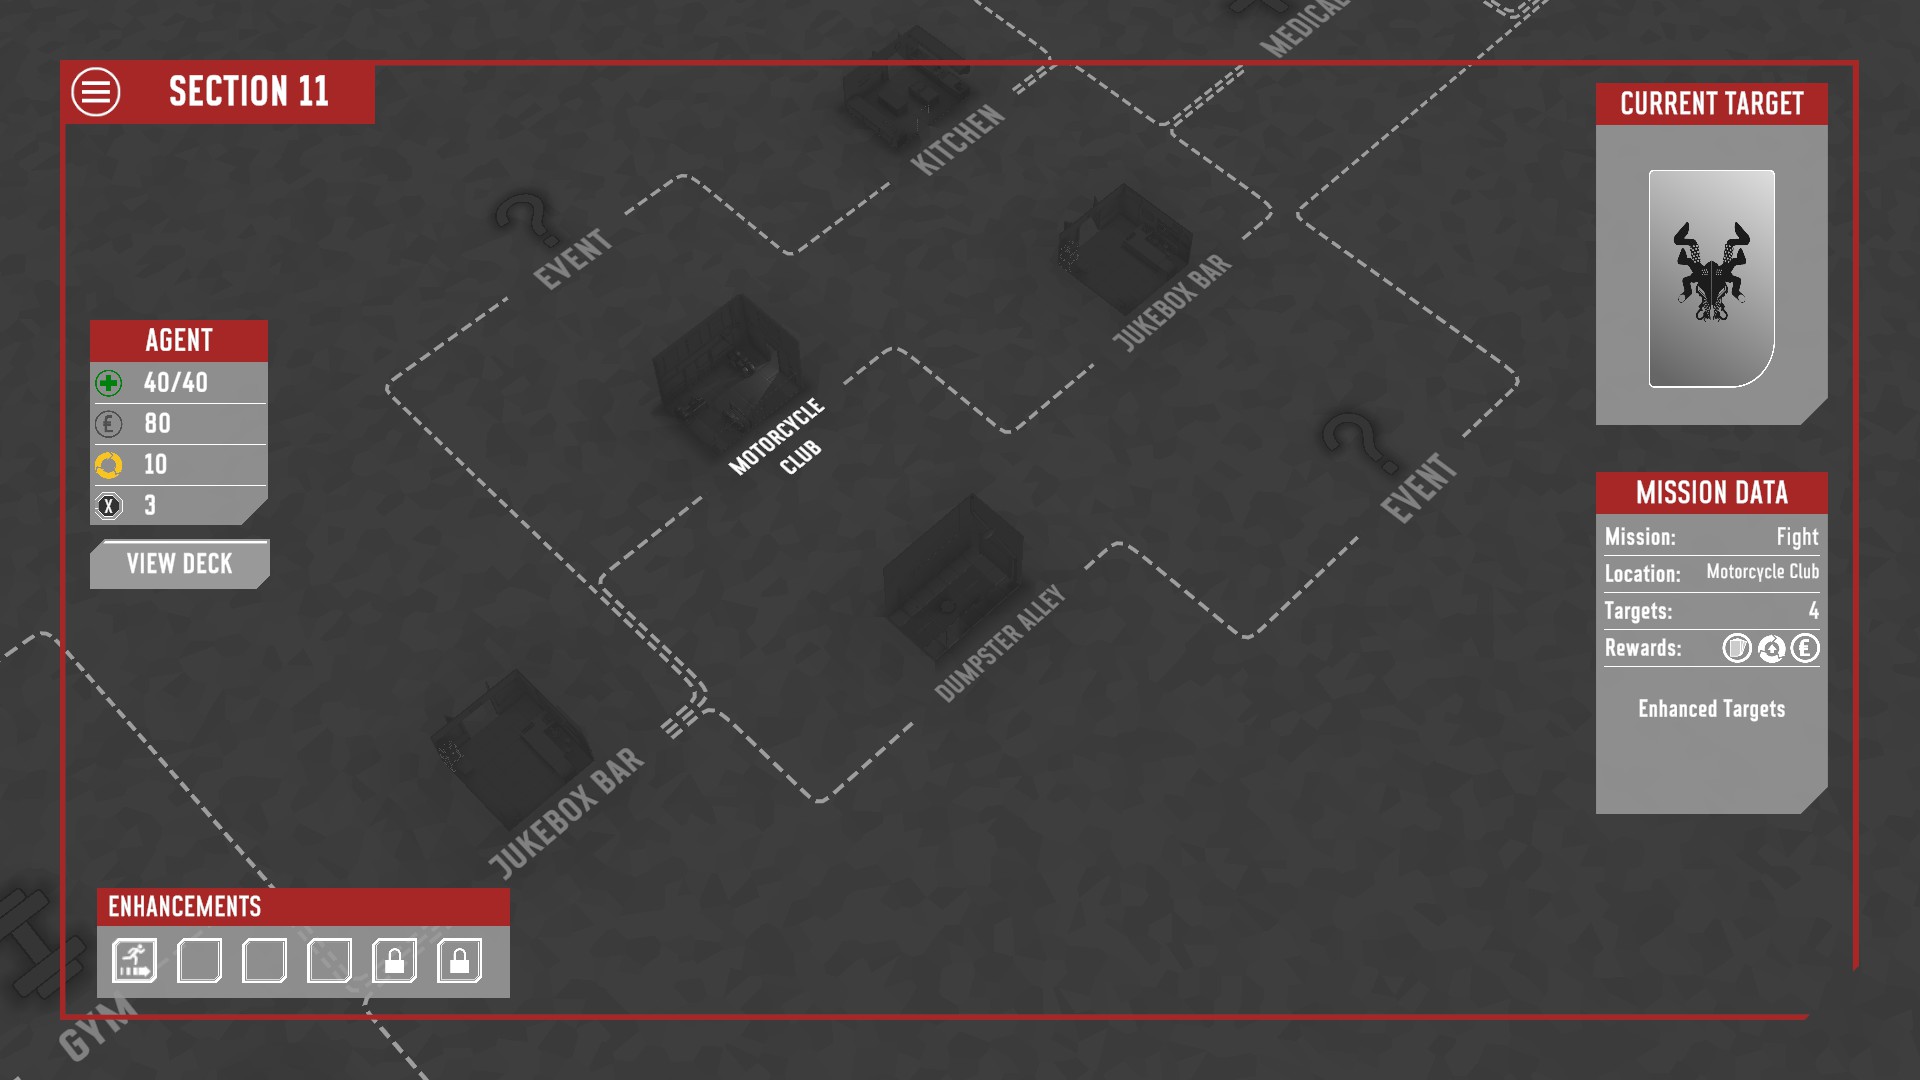
Plan Your Route
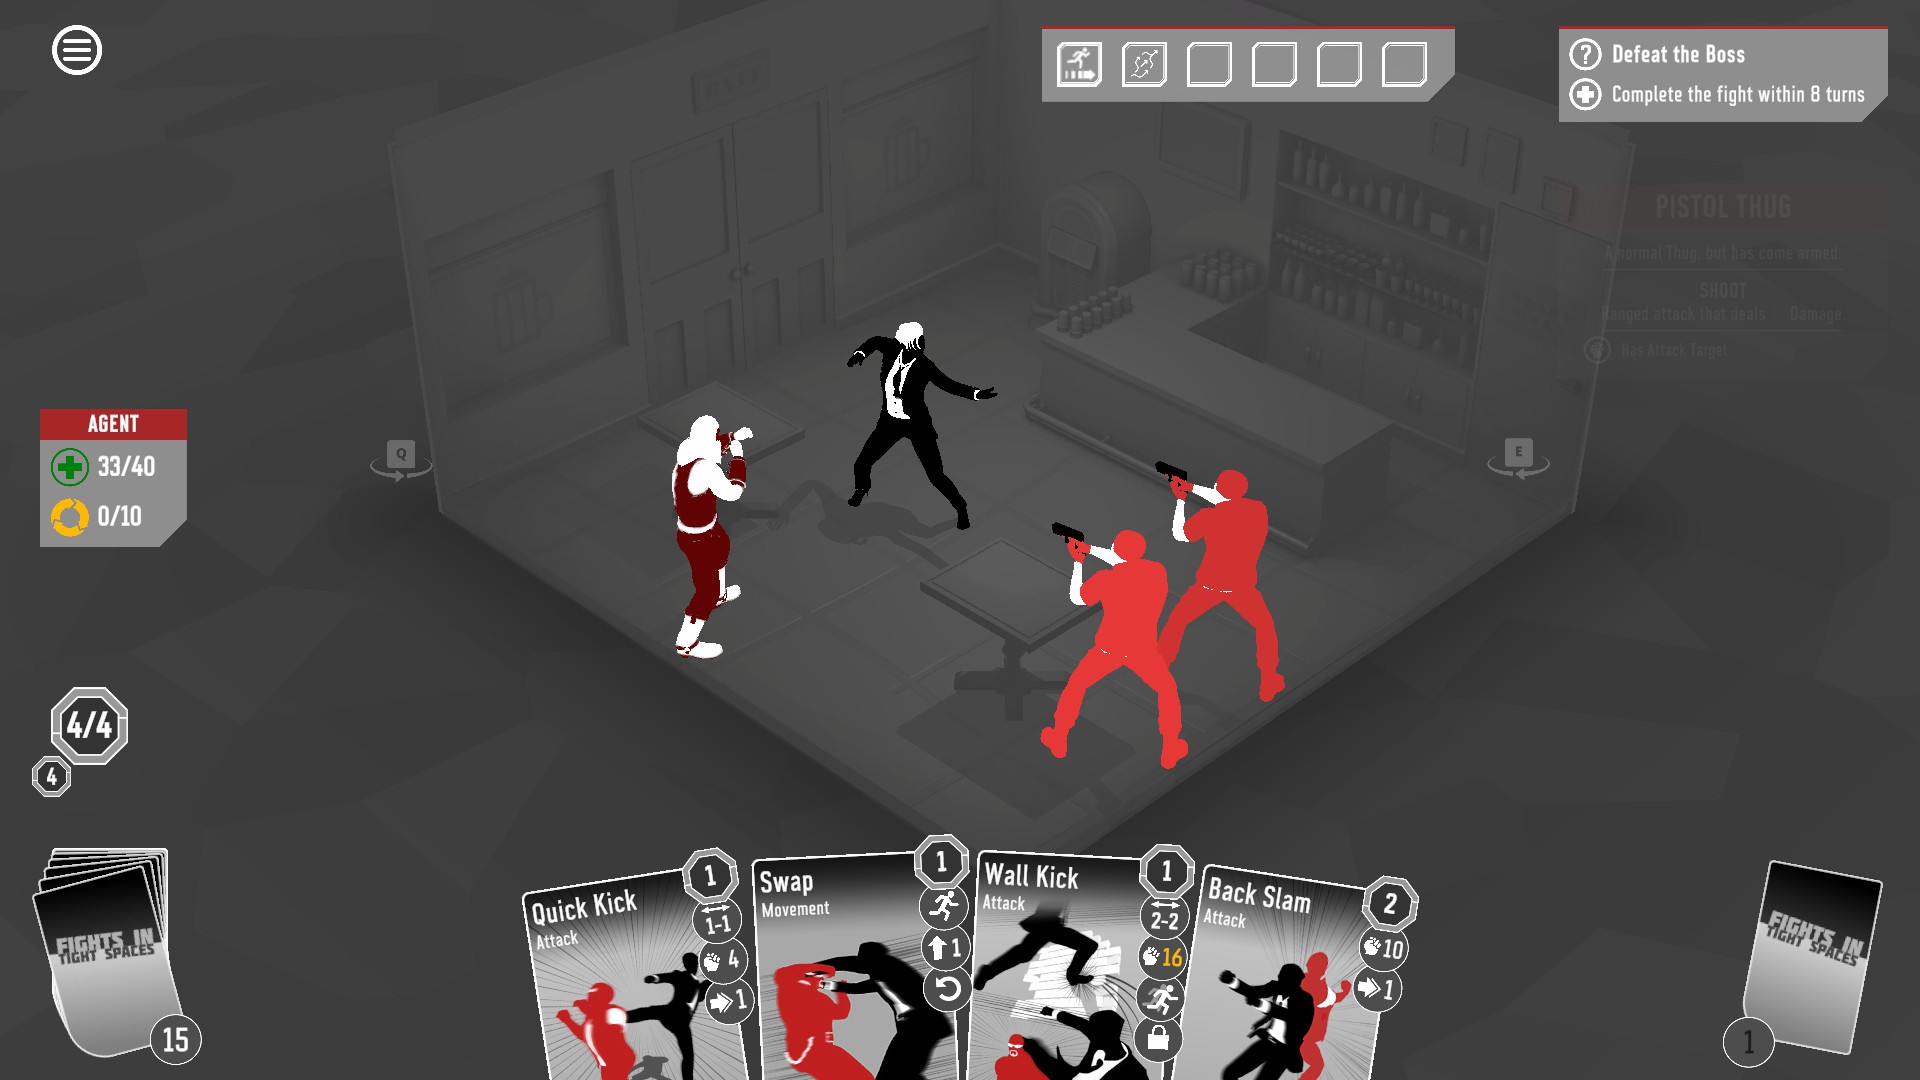
The first enemy you encounter in Fights in Tight Spaces is not a particularly tough one. Unless you’re playing Draft Mode and had a particularly tough draw you shouldn’t have too much difficulty with the enemies here so it’s a good opportunity to try and get some early optimisation in. One place you can do that is to pay careful attention to the route you take through the different rooms to the boss fight. Hovering over any room will tell you the rewards available for beating it. In particular look out for rooms that give permanent momentum, maximum health or maximum combo boosts. Picking these up early can set you up for a strong run right out of the gate. Also note rooms with healing available if you’ve taken a couple of hits and a room that gives you an upgraded card reward rather than standard is basically like getting 50-150 free money. The only thing to bear in mind with these rewards is that they are tied to specific objectives in the room. These can vary from picking up briefcases to protecting innocents to taking limited damage to pushing enemies off the board. Always take a moment to check the objectives in each room at the start of a fight and which are tied to which rewards. Lastly, try and avoid visiting medical facilities. Gyms let you upgrade your cards and set you up much better for the long term than spending that money healing from injuries. As already mentioned, you can get healing as room rewards and that is a much more efficient route to victory.
Don’t Bloat Your Deck
Fights in Tight Spaces differs from the likes of Slay the Spire and Monster Train in several ways but the key one for this point is that, unlike those games, the deck you start with is not trash. Sure, there are Step and Quick Strike cards that are pretty underwhelming but there are also plenty of very nice abilities in there. This means that you’re not under the same pressure to take whatever card rewards are offered just to bring up your average card quality. If, at the end of a fight, none of the card rewards fit your deck style, or are just not great cards, don’t be shy about skipping. You want your deck to be as lean and focussed as possible. When you’re starting out you won’t have a strong idea of which cards are good and which aren’t but it should be reasonably self-explanatory which cards belong with which strategies so pay attention to that.
Some Cards Are Just Good
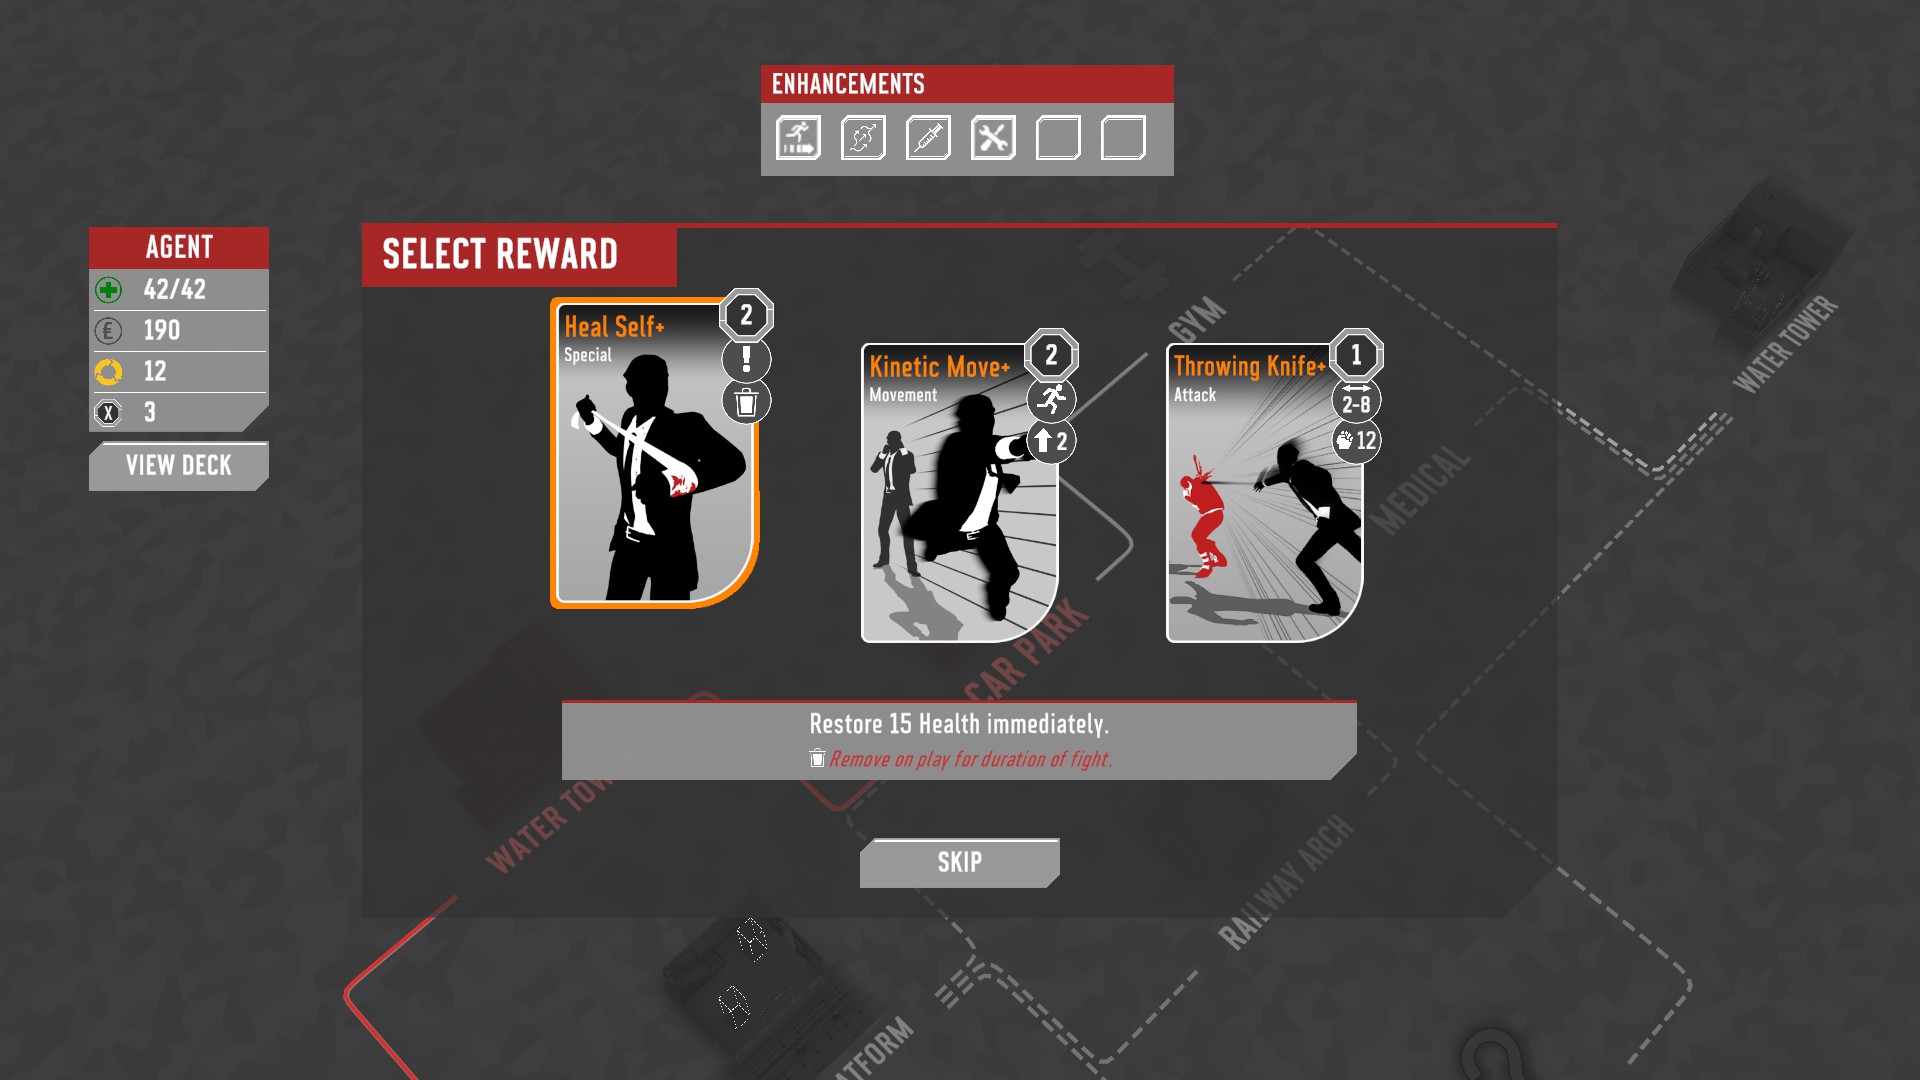
Having said that, there are some cards in Fights in Tight Spaces that are strong choices in every deck:
- Attacks that move you or the enemy such as Flash Kick or Front Kick are a lovely seasoning to any deck. The same is true for attacks that stun an enemy such as Throat Punch, Pocket Sand and Headbutt. Lastly, there’s often a home for any card that downs an enemy, such as Throw, Shoulder Throw and Roll Throw.
- On the defensive side, I don’t believe there is any block or counter card that belongs in a deck that isn’t focussed on that side of things but any card that gives you dodge is a different matter. The strongest of these is probably the eponymous Dodge card. Get it upgraded and it just negates an attack for zero momentum and you always want that (even in a Counter deck as the counter will still be triggered).
- Movement cards, as a whole, are ones that it took me a while to realise the strength of. Unless you’re playing on Super Agent difficulty the game will always ensure that you have at least one movement card in hand but having two is very rarely a bad thing. Maintaining a good weight of movement cards across your run is very important. Getting cornered in Fights in Tight Spaces can spell disaster so particularly look out for movement cards that will get you out of those, well, tight spaces. Slip and Shift are often pretty commonly available and rarer cards such as Vault and Flip can really save your bacon too.
- There are a few special cards that are pretty much must-takes whenever you see them because they come with almost no downside. Chief among these is Recall. When upgraded it will let you pick two cards back up from your discard for one momentum. This is almost always something you want to do (unless you draw it when you have no discard, of course). There are plenty of other lovely effects in the special cards that should be considered too. You can get healing from Painkillers or Heal Self, prep for future turns with Forward Thinking or False Surrender or just get some force multipliers for your deck’s focus with things like Brass Knuckles, Jolt or Power Through.
The Golden Rule
In general you’ll see the theme here is that cards that negate enemy actions are pretty prevalent in my mentions; whether that be by canceling their attacks, moving other enemies into the way of those attacks or moving Agent 11 out of the way of the attacks. The golden rule of Fights in Tight Spaces is DON’T GET HIT. Healing isn’t easy to come by, it will either cost you a card and momentum, money or inconvenience you during a fight so the best thing to do is not need it. If you have a choice between getting an extra hit on an enemy, even taking an enemy out, and getting out of harm’s way; get out of harm’s way. There are exceptions to this; later on there are some enemies that you have to just take out when you get the chance, but that is a good rule of thumb.
The Insiders
Don’t Rely on Block
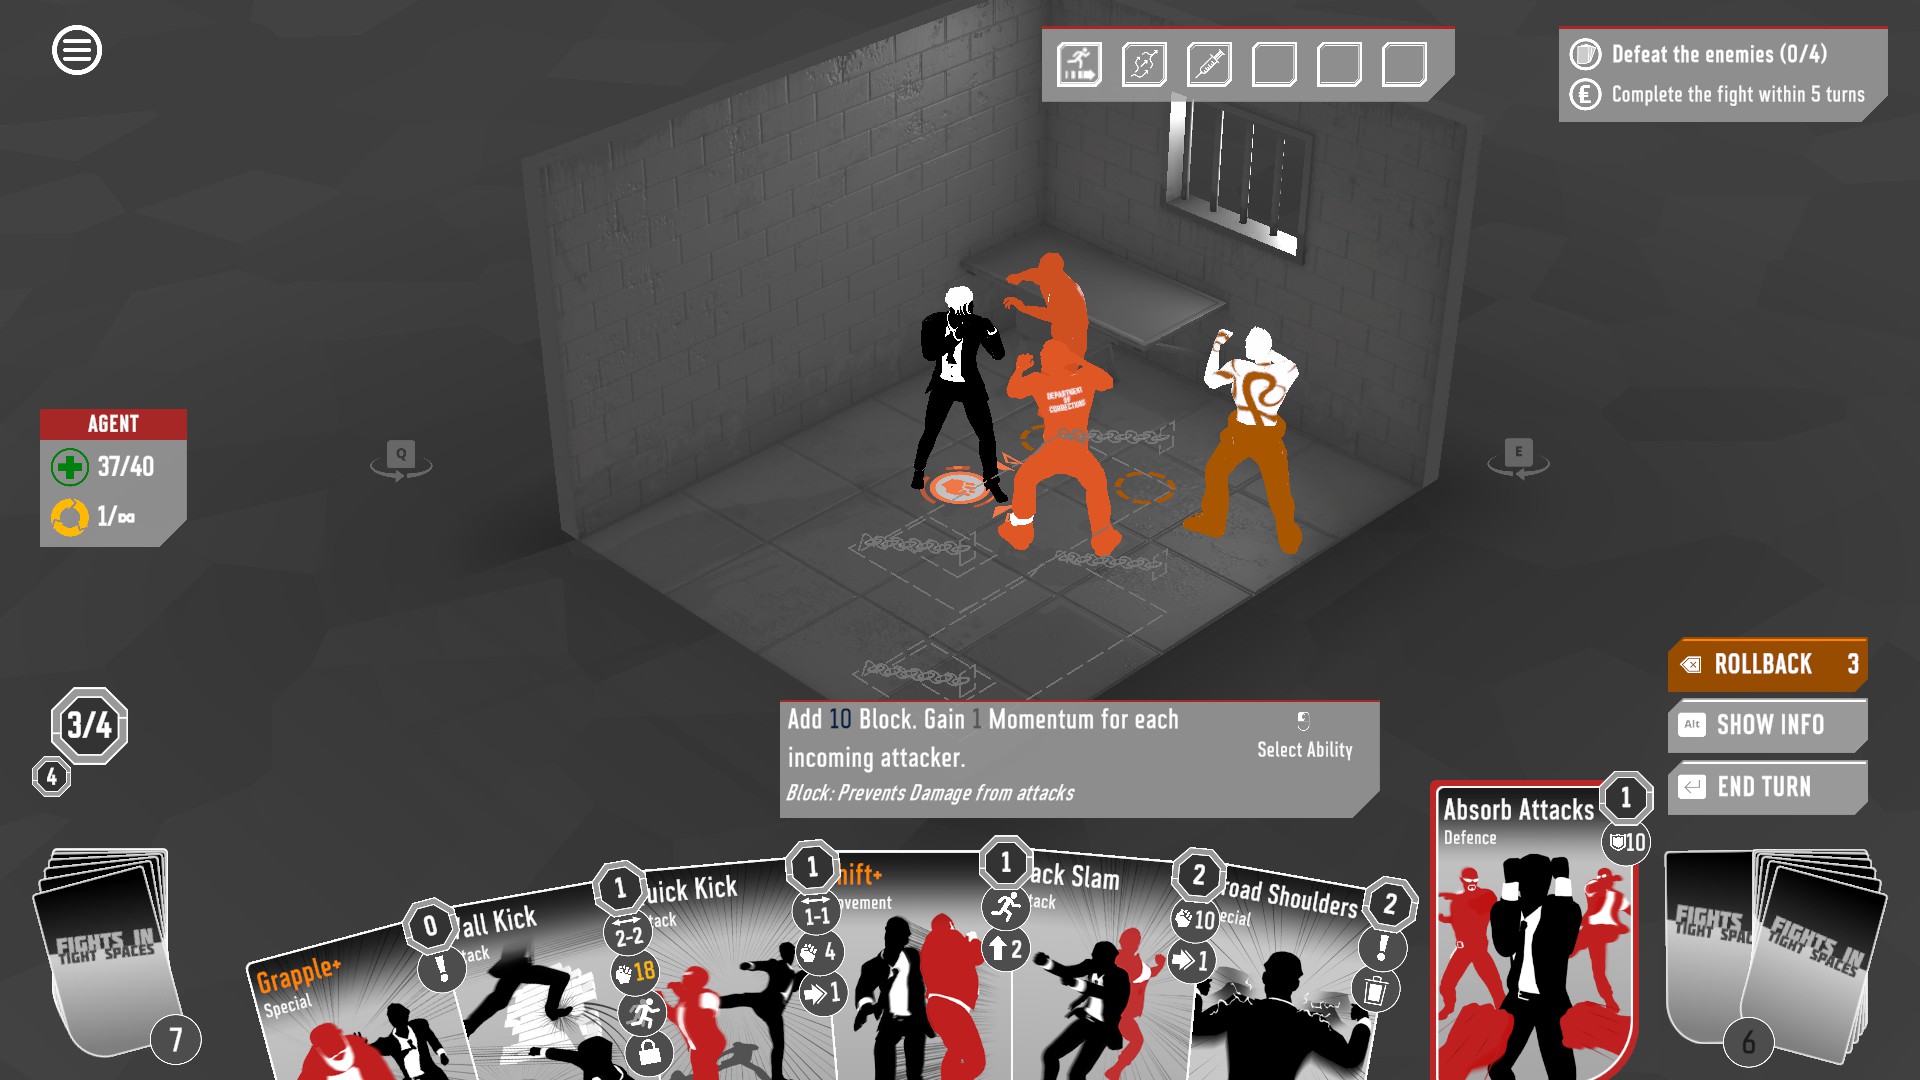
Now you’ve made it through the first mission things will start to ramp up in terms of enemy strength. The Insiders mission is the first place you’re likely to run into trouble with the enemy types and one of the first things you might notice is that the enemy attack damage scales much faster than the block your cards provide. For my money, the block/counter deck is one of the hardest to win with for this reason. You need to be upgrading your block and counter cards any time you get the chance but, even then, you will find that enemy attacks are often too strong. The Insiders is your first introduction to that, both because there is an enemy that ignores your block completely and because you will start to find that tanking more than one hit at a time becomes tough. This is a problem that will only increase in later missions where you will find you need to be able to regularly block 50+ damage a turn. None of this is to say that block and counter doesn’t have its place, just be aware that you will need other tactics too. Mix in some grappling and throwing to negate attacks or get some strong attacks in there to be able to take out weakened enemies before they can hurt you.
Choose Enhancements Wisely
In Fights in Tight Spaces you will start with four open slots for enhancements, one of which will be filled at the start of the game. These give you strong passive buffs that can help out a huge amount… or not do much of anything. The latter can happen if you choose an enhancement that doesn’t fit your play-style or just because some of the enhancements are less good than others. When you get the choice of a new enhancement (mostly from defeating bosses, though some events can give you one) carefully consider your choice. Here are some of the ones to look out for:
- Apprenticeship – Reward cards are automatically upgraded.
This enhancement is absolutely priceless, particularly if you get it early on. It literally makes every card you pick up (except those you buy from gyms) significantly better. It is possible to get a deck that is entirely upgraded with this enhancement and that will help a huge amount in later missions. - Bonus Move – Gain a free move card every turn.
The card this gives you is Positioning Move (zero cost, move 2, discarded if not the first card played each turn). This is a moderately weak movement card (you often want to strike then move away, not move first) but the game does not count this card when considering if it needs to give you a movement card or not. That means that taking this enhancement means you will always have not one, but two movement cards every turn and that is huge. It makes it much easier to do certain mission objectives (collecting briefcases, protecting ambassadors) and also means you should always be able to get to the optimal position from which to take your turn. - Fast Heal – Recover six health after completing a fight.
Not too much to say on this one beyond what was already mentioned about how hard healing is to come by. Getting a guaranteed six health after every fight goes a long way to keeping Agent 11 alive. - Impenetrable – Gain 25% extra block when block is added.
Most decks don’t want this but it is the enhancement you pray for in the block/counter deck as it is one of very, very few sources of block scaling available to you. - Lean Decker/Toned Physique – Get £20/5 health every time you skip a card reward.
As already mentioned, you do not want to bloat your deck and that means you will be skipping card rewards increasingly frequently as you go through the game. Gaining cash every time you do that to spend on upgrading cards, removing cards or increasing your maximum health is a great boost, as is getting free healing. - Momentum Boost/Momentum Mastery – Increase maximum and per turn momentum by one (or two for Mastery)
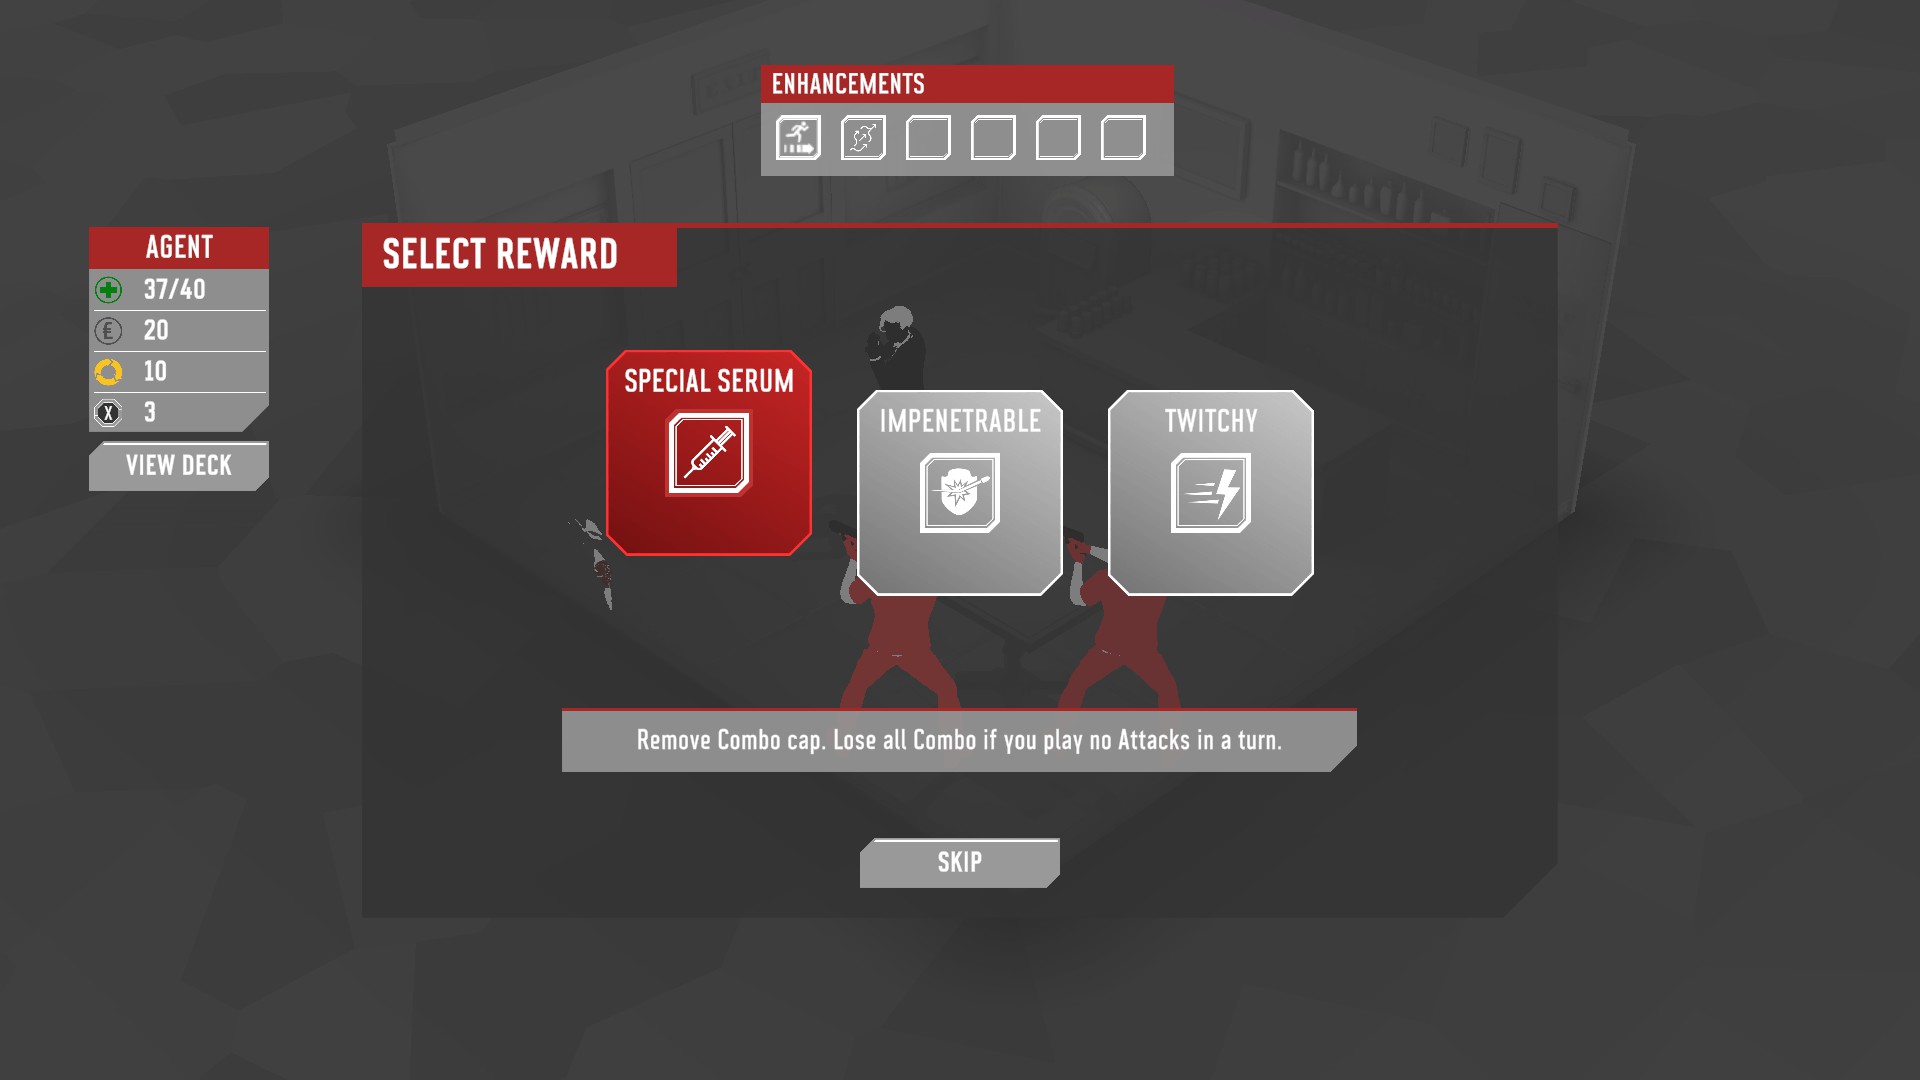
Pretty obviously, these are both great. More momentum means more cards you can use to pound the enemy into the dirt. - Special Serum – Remove combo cap. Lose all combo if you play no attacks during a turn.
This is a tricksy one. On the one hand, you can build some absolutely huge attack damage with no combo cap but playing an attack every turn can be harder than it sounds, particularly when Auto-Attack and Counter enemies become prevalent. Make sure you have a good weight of attacks in your deck and plenty that are almost always useful (you rarely have a reason not to play Throw, Pocket Sand or Right/Left Kick). - Tactician – Increase card draw by one.
Sounds very unsexy, do not overlook. - Versatility – Open up two additional enhancement slots.
As mentioned, you start with the ability to hold four enhancements but, if you make it to the Final Mission, you will have beaten five bosses. Without Versatility you have to choose an enhancement not to take with you by the time you tackle i Completi (or earlier if you got one from an event too). Versatility basically costs you an enhancement (because it does nothing else) for the ability to take every enhancement you find with you. Whether this is worth it or not very much depends on the strength of the enhancements you’ve been finding and, early on, it can be hard to know whether this will be worth it. What I would say is that you are usually better off taking this than any off-brand or weak enhancements you get offered (Twitchy in a non-Combo deck, Resilience in a non-Block/Counter deck, Card Shredder or Enhanced Facilities always).
Plan A Turn Ahead
The boss fight for The Insiders can be very frustrating to play through if you don’t have the right cards for it. The boss himself has an auto-attack that will hurt Agent 11 and push them away if they step into the space in front of him. Add to that two riot-gear equipped guards who ignore all damage from the front and you may find Agent 11 herded about the map like an unruly sheep until they finally get trapped in a corner and get the snot beaten out of them. In all likelihood this fight will be the first time your deckbuild is properly challenged. Are you able to maneuver around those riot-guards to punch them in the side of the head? Are you able to throw or throat punch the boss to prep him for having some smack laid down? Key to your strategy needs to be thinking about where you will be moving the next turn. Don’t let yourself be trapped in a corner, be mobile, move into spaces that should open up avenues to the larger areas of the room. The only time pressure in this room is a long one that will heal you for 20 at the end. Take your time, particularly if you don’t actually need that healing, and be patient; prioritise freedom of movement and avoiding being hit and just get your licks in where you can.
Jade Staff
Get Over Here!
Up to this point in Fights in Tight Spaces you may be used to the following pattern: every enemy gets as close to Agent 11 as they can, Agent 11 kicks them about the shop then moves away and leaves them scratching their heads. Well, things change here. The most common types of enemies the Jade Staff deploy have a range of two or three spaces and will actively look to stand as far away from Agent 11 as possible and still keep them in range. Remember what I said about the beautiful joy of having two movement cards a turn? This is where it really starts to pay off because you will often need to move Agent 11 into position to deal some pain and then move them out again.
Your options here are less limited than they may seem; you don’t strictly need two movement cards a turn for this to work. There are plenty of attacks that have the Advance ability (Agent 11 will move up to the target before attacking) such as Front Kick, Heavy Strike, Combo Finisher and Jump Kick. There are also some longer range attacks that will maintain distance, allowing you to get licks in and move Agent 11 away without needing two movement cards. There are also some more unusual abilities that can help, such as Pull, Close In and Get Over Here. The key takeaway here is probably for players with a Combo deck. Every step you take will reduce your Combo so try and prioritise ways of closing the distance without losing Combo earlier in the run. Look out for cards like Linking Move, Maintain Combo and Dynamic Move as well as some of the special moves already mentioned.
You Did It To Yourself, You Did
One of the trickier concepts to get the hang of is working out if and when enemies will attack each other. I’ll be honest, I still haven’t got this 100% nailed down but it seems to be that, if at any point during your turn, they had an attack on Agent 11 they will perform that attack at the end of your turn, even if Agent 11 isn’t there anymore. What this means is that you can move enemies around with Shove and Grapple, or sometimes just move, and watch them attack each other. There is little in the game more satisfying than just moving Agent 11 one step during your turn and then watching every enemy on the board go crazy and beat each other up.
Even if it can be slightly fiddly this is a technique that you need to get down. The prevalence of enemies with sweep attacks, long-range attacks and counter attacks at this point of the game means that getting them to attack each other is an increasingly rewarding angle of approach. Particularly look out for opportunities to make one enemy attack another with the Counter ability (two for one!) or to put them in the way of an auto-attack. The boss in the Jade Staff mission also has a particularly annoying ability that will hurt anyone who attacks them. Honestly, the best way to take him out is either kick him off a roof (which is usually the best way to take anyone out) or just have all his minions attack him and kill themselves in the process while you move Agent 11 to the corner and play the Laugh Hysterically card.
i Completi
That Damn Rifleman
The i Completi mission is the acid test in Fights in Tight Spaces. The basic enemies all have counter so you need to have ways in your deck firmly established for dealing with enemies that don’t involve just jabbing away at them. The advanced enemies all pose their own problems too. The hatchet man has good range and will follow you around the map, the batters will injure you if they catch you and there is a guy with a shotgun who will turn to face you if you slip past him. These enemies, my friend, all pale in comparison to my nemesis; the Rifleman. I hate this guy with a fiery passion, and you will too. He is a ranged attacker, like the gunmen present in the game throughout, but he can auto-attack three times during a turn. That means that any time you step into a space in a straight line from him you’re getting shot. Yes, ANY tile, because he also has “turn to face”, so if you move to the side, he’ll just turn and shoot you there. Even if you start your turn next to him you might struggle because he has too much armour for a throat punch to get through and, if you push him away, he’ll just shoot you anyway.
There are enemies who deal more damage in one go than this guy (he only does eight damage thankfully) but he’s going to do that damage every time you move or do anything to him. So what do you do? To be honest, I’ll take answers on a postcard, but he is the exception to the rule that you don’t take damage to take an enemy out. If you can hurt this guy, you do it. There are other things that will help you; no amount of block will stop you throwing this guy around like a rag-doll. Get him on the ground and stomp on him. Chuck him off the roof. Throw other enemies in his way. All this stuff works, the question is just how much hurt you will have to take to do it.
There is also one secret weapon in your arsenal; auto-attacks only trigger if Agent 11 plays a movement card that ends in one of the targeted spaces or an attack card from one of those spaces. Look for cards that move Agent 11 but aren’t movement cards; Linking Move, Change Tack, Close In and Get Over Here will be your best friends. Also, for some reason, Option Play doesn’t seem to trigger Auto-Attacks. I don’t know if that’s a bug that might be resolved but take advantage of it while you can.

An Offer You Can’t Refuse
The boss fight for i Completi is, in my opinion, the hardest fight in Fights in Tight Spaces; harder even than anything in the final mission. The boss himself will move every time you do, making him very hard to get out of the way of, and he can’t be pushed, denying the quick kill. On top of that he will spawn with two assassins. These ladies deal a huge amount of damage (30 and two bleed) over a good range, have over 100 hit points and also have a counter ability that deals the same damage. Lastly, gunmen (not riflemen, thank the Lord) will spawn throughout the mission. These guys are more of an annoyance than a serious threat but they can’t be ignored.
Speed seems to be key here; as much as you can, ignore the assassins and ignore the gunmen and concentrate on the boss. He himself doesn’t have a counter of any sort and also doesn’t have any block. He is susceptible to anything that stuns and anything that throws. For the counter/block decks, his 20 damage is nothing to sniff at but if you can position yourself such that it is the only attack you take it should be manageable. Combo decks perhaps have the easiest time here. If you can build up your combo nice and quickly with Dynamic Moves and Virtuous Circles then a Combo Finisher can take him out on turn 2 or 3.
If you can’t beat this fight, don’t be discouraged. It is very doable with the right tools but you can always get screwed by bad draws or unfortunate enemy positioning. Or maybe your deckbuilding wasn’t quite strong or focused enough. Before you abandon the run, take a look at your deck. How big is it? How many cards are in there that actually don’t play into your strategy? Are your movement cards all Steps, Dashes and Panic Moves rather than Slips, Shifts and Tactical Retreats? If you find yourself frustrated, play a different starter deck for your next run. They all play very differently and some are easier to win with than others (personally I have found the Grappler deck and the Slasher deck to be the easiest).

Final Mission
Like Clockwork
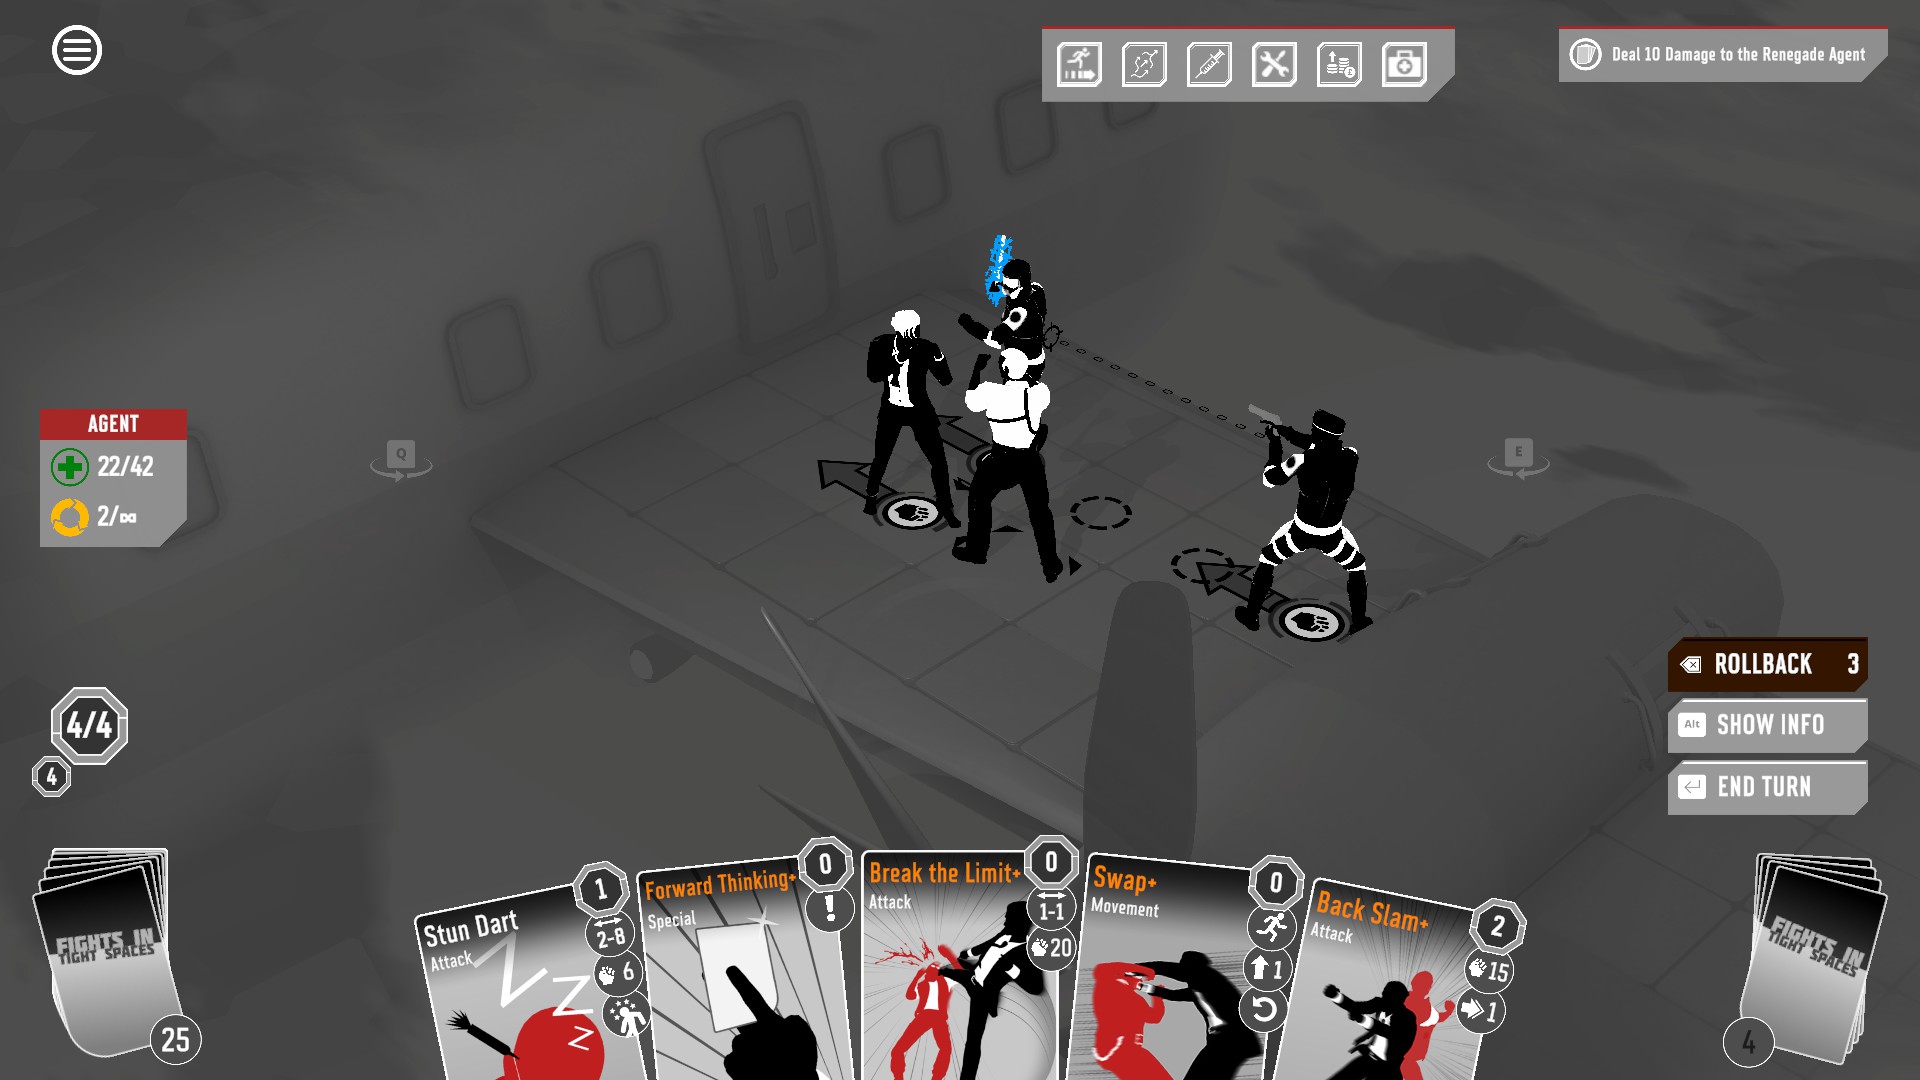
The final mission in Fights in Tight Spaces consists of four rooms and, in each one, you’ll have to fight the renegade agent and his goons. The locations are slightly randomised (though the wing of the plane always seems to be first) but the objectives are the same. In the first three rooms you have to deal 45 damage to the rogue agent (not counting block, of course) and in the final room you have to take out four enemies (including the agent but not including any of his summoned grunts).
The key thing to beating the agent is to learn his pattern. It’s the same in every fight and goes something like this:
- The Rogue Agent will attack for 25 damage at range 2. He has 18 block, can’t be pushed (he can never be pushed) and will turn to face Agent 11.
- The Rogue Agent will push everyone on the board one space away from him. He has no block but does have one dodge (and can’t be pushed as always).
- The Rogue Agent will deal eight damage three times to the space in front of him. He has 18 block, can’t be pushed, will turn to face Agent 11 and will move every time Agent 11 plays a movement card.
- The Rogue Agent will summon a grunt. He has no block but does have a vicious counter and can’t be pushed.
You can see from this that there are natural times to go defensive and to go offensive. Here are some tactics for each step:
- This is not a bad time to go on the offensive providing that you can
- Get to him
- Get through the 18 block
- Get out of the way
Getting out of the way isn’t too bad. He will turn to face Agent 11 but won’t move other than this so a simple step to the side will avoid his punch back. If you can’t get through his block though it’s better to take the turn to work on some of the minions in the room or back off to set up future turns with Heal Self, Forward Thinking or similar.
- Welcome to your prime window for attack. Beyond the one dodge, the Rogue Agent has no defences in this step and, also, no attack you need to fear. Make sure you’re not standing next to an edge and you’re golden.
- By contrast, this is the turn you just need to survive. The triple punch will deal 24 damage, usually over half your health, and can be very difficult to avoid as the Rogue Agent will move every time you do and will also turn to face. He can be thrown, however, and you can still grapple and shift to get the grunts in the room in between you and him. Unless you can take the Rogue Agent out before the end of your turn though it’s best not to go on the offensive here unless you know you can get through the block to stun him or can get him to the deck before the end of the turn.
- Whether you can take advantage of the fact that the Rogue Agent isn’t going to attack this turn or not depends on if you have ways to mitigate his nasty counter attack. He has no defences other than this so a stack or two of dodge can let you get a couple of good hits in. This is also a step (along with step 3) to try and stop him from acting. If you let the Rogue Agent summon a grunt every four turns the rooms can quickly start to get cluttered so it’s something to be avoided unless you have a good reason not to.

Overall, the first three rooms of the Final Mission shouldn’t be too bad. If you’ve got to this point of the run then 45 damage shouldn’t be something unreachable, even bearing in mind the block the Rogue Agent gets in some turns. A grappling deck will be able to consistently interrupt his actions and get him on the deck. A combo deck should be able to quickly and regularly dish 45 to 65 damage in a single attack. The slasher and counter decks may find it a little harder as neither tends to disrupt or deal the big damage quite as well. With the slasher you need to take your time and just get some cuts in where you can. Once the Rogue Agent has nine stacks of bleeding, that’s him done (albeit, in nine turns so maybe try and speed it up) so just get stacking. If you’ve got this far with a counter/block deck then I’m not going to give you any advice as you’ve done better than I ever have. Keep doing what you’re doing! Victory over Fights in Tight Spaces is a few good choices away!
Fights in Tight Spaces is available now for Xbox and for PC on GOG or Steam.
Thanks for the great guide!