One of my favorite wargames has had its second DLC released: Tigers on the Hunt: Normandy. This excellent turn-based game is the closest thing I’ve ever found to Avalon Hill’s Squad Leader. There are many phases during each turn, but they all flow smoothly together.
Since you are reading this, I’m assuming you have at least the base game and knowledge of how the mechanics work. What I’ll do is just give a brief synopsis of each of the six new scenarios and the two new campaigns. One thing about this Normandy DLC, as in WWII, is that the Allies are at a disadvantage in every scenario and campaign. Some more than others, but I’ll get to that. Of course, I had to try all of them out as the Allies.
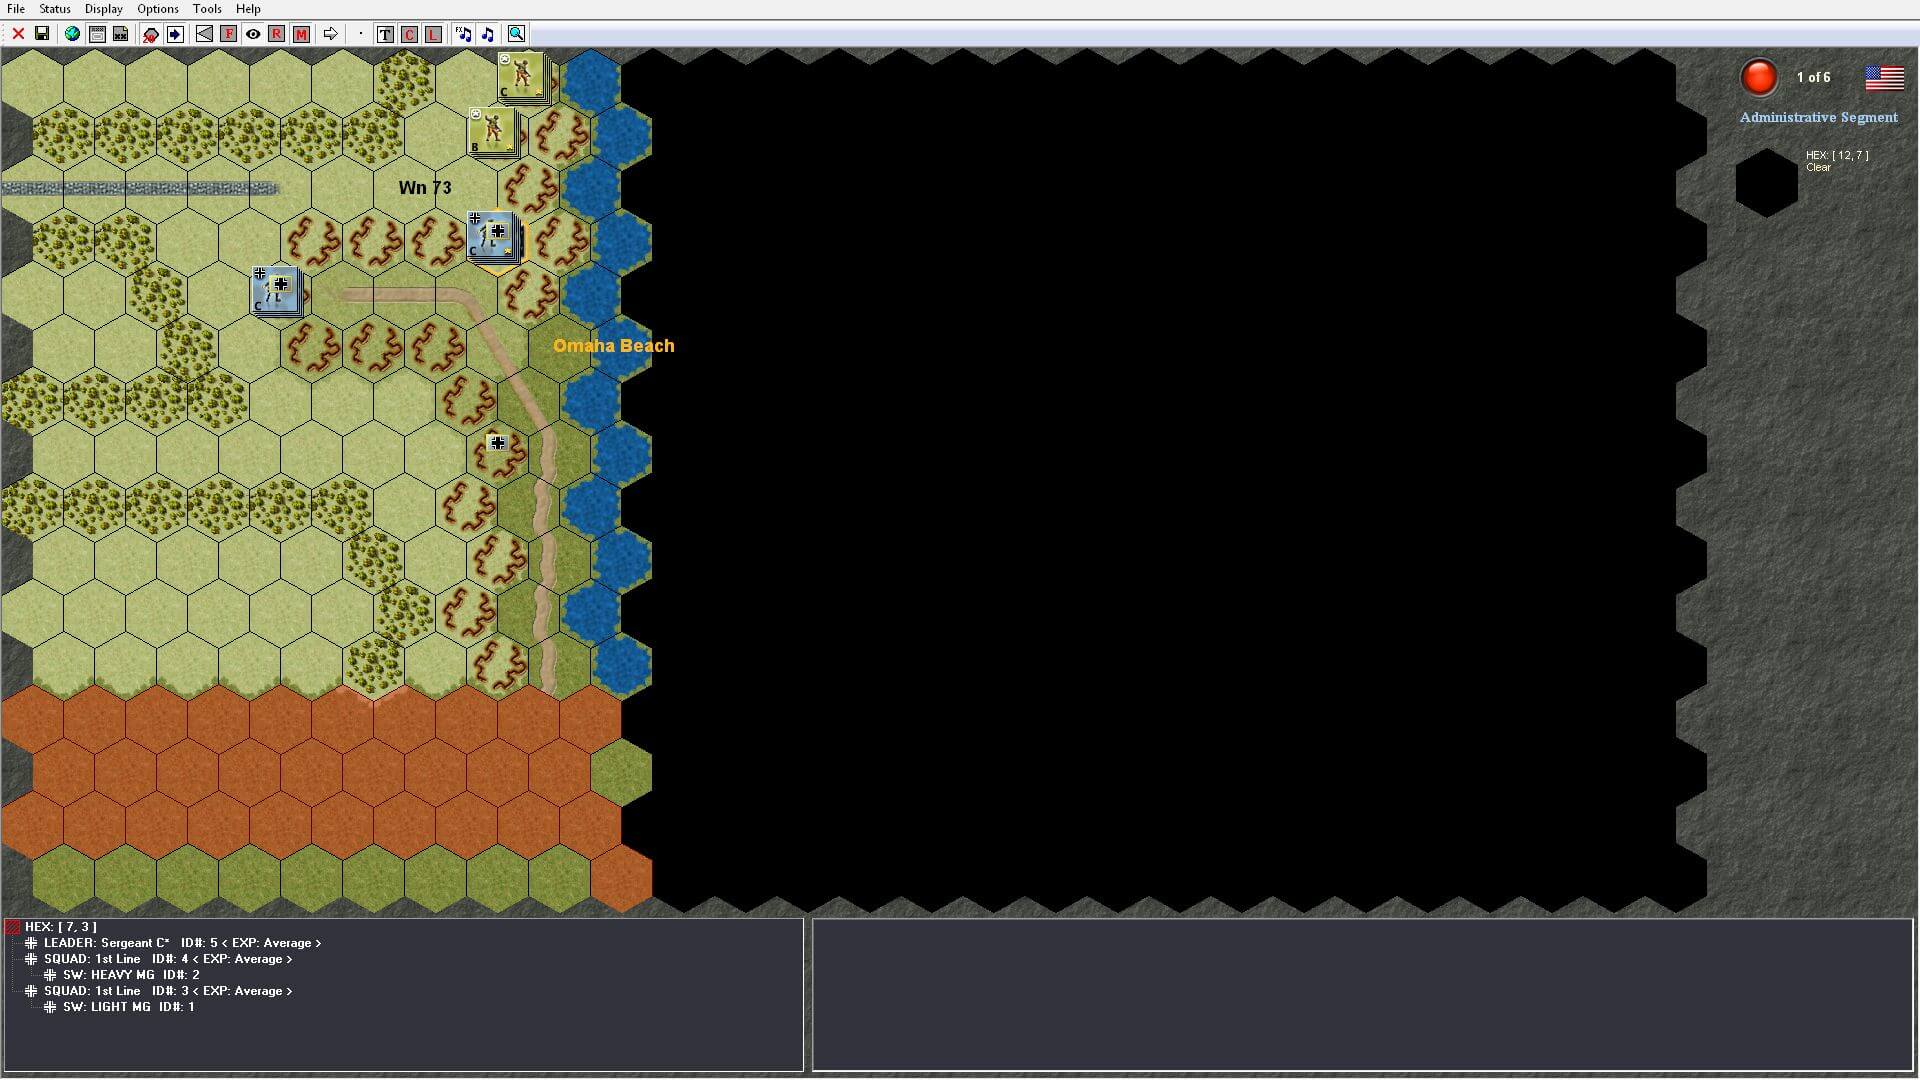
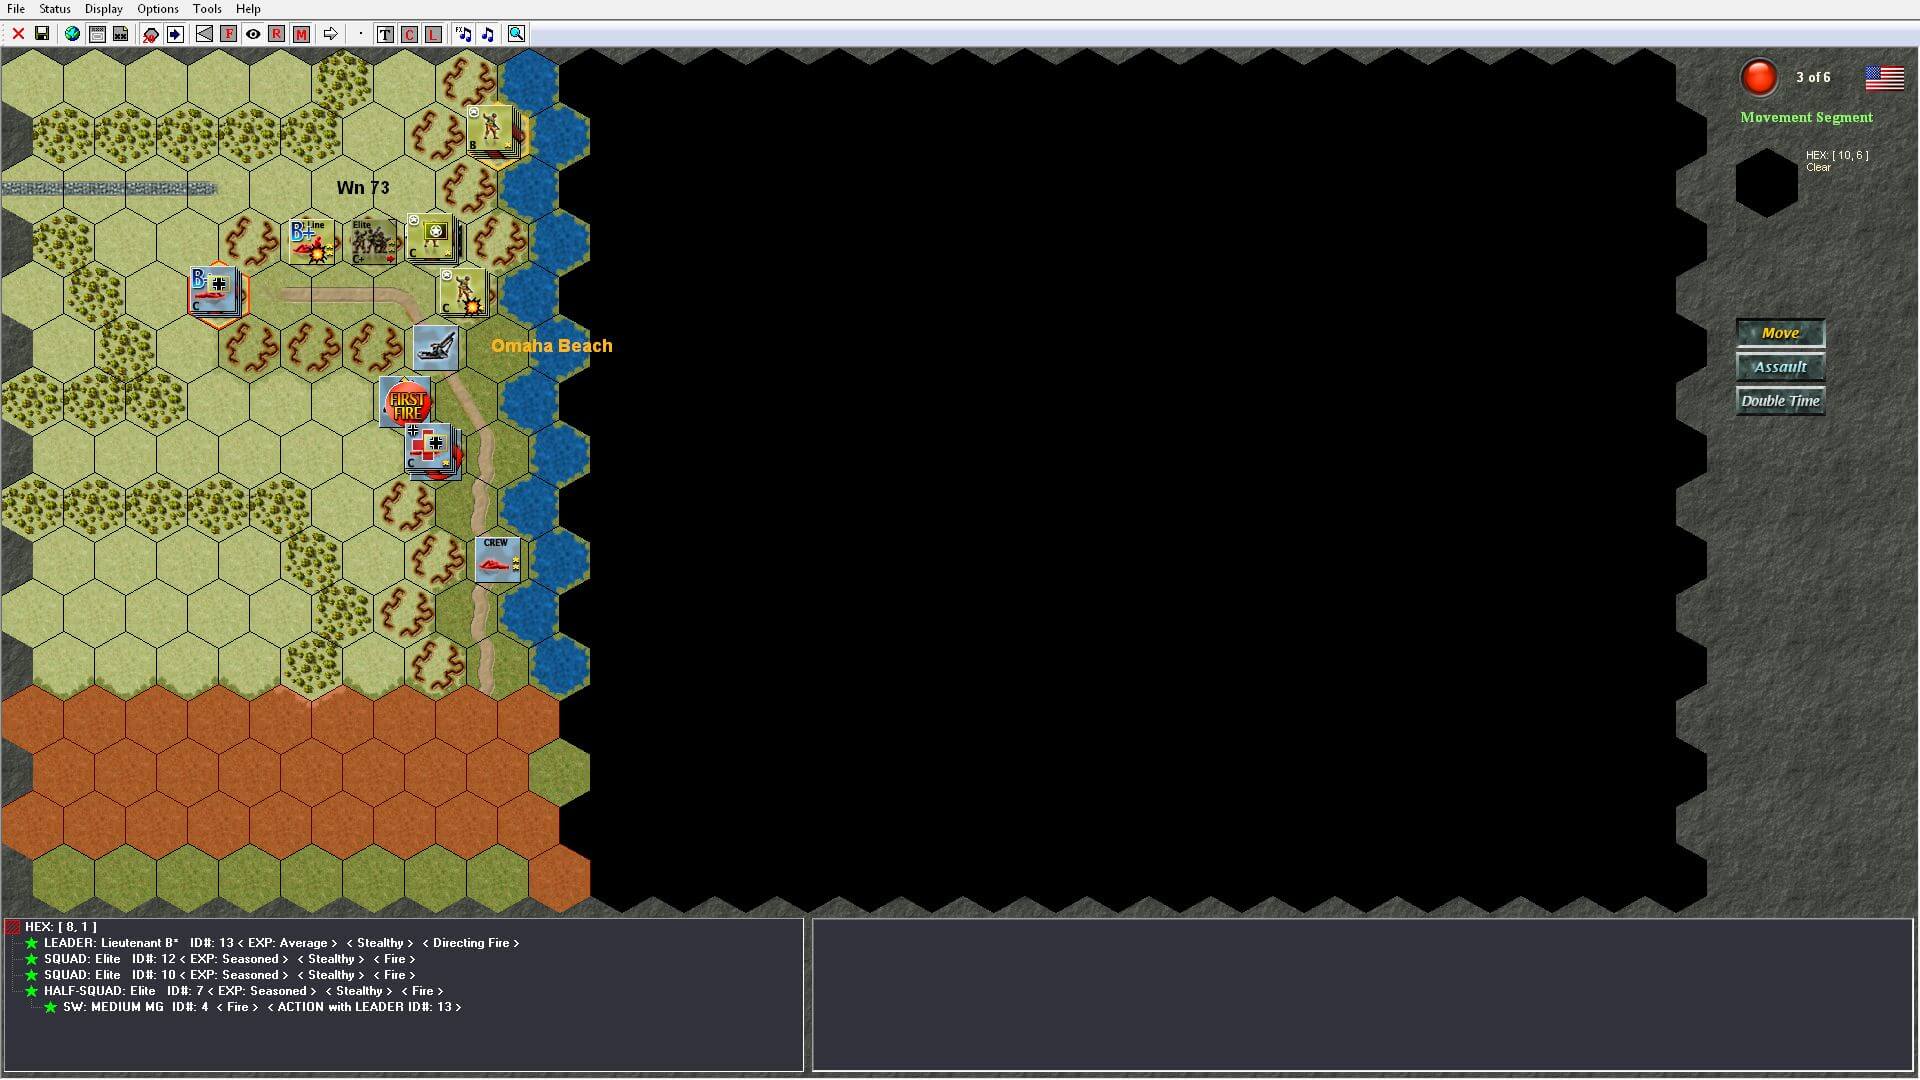
The first scenario is ‘Wn 73’. It’s about Company C of the 2nd Ranger Battalion, specifically their landing on Omaha Beach. The problem is that they have to climb the cliffs — right in front of German-held strongpoints. Although there are trenches and the Allied units are marked ‘stealthy’, they either have to attack immediately or are attacked on the German turn. Things can get ugly quickly for the Americans if the RNG is against them. It’s a very small map with only three objectives. The fighting is very up close and personal. You get a few reinforcements on turn three. I had to play this one a lot before I could 1) figure out the correct approach and 2) catch some dice-roll breaks along the way.

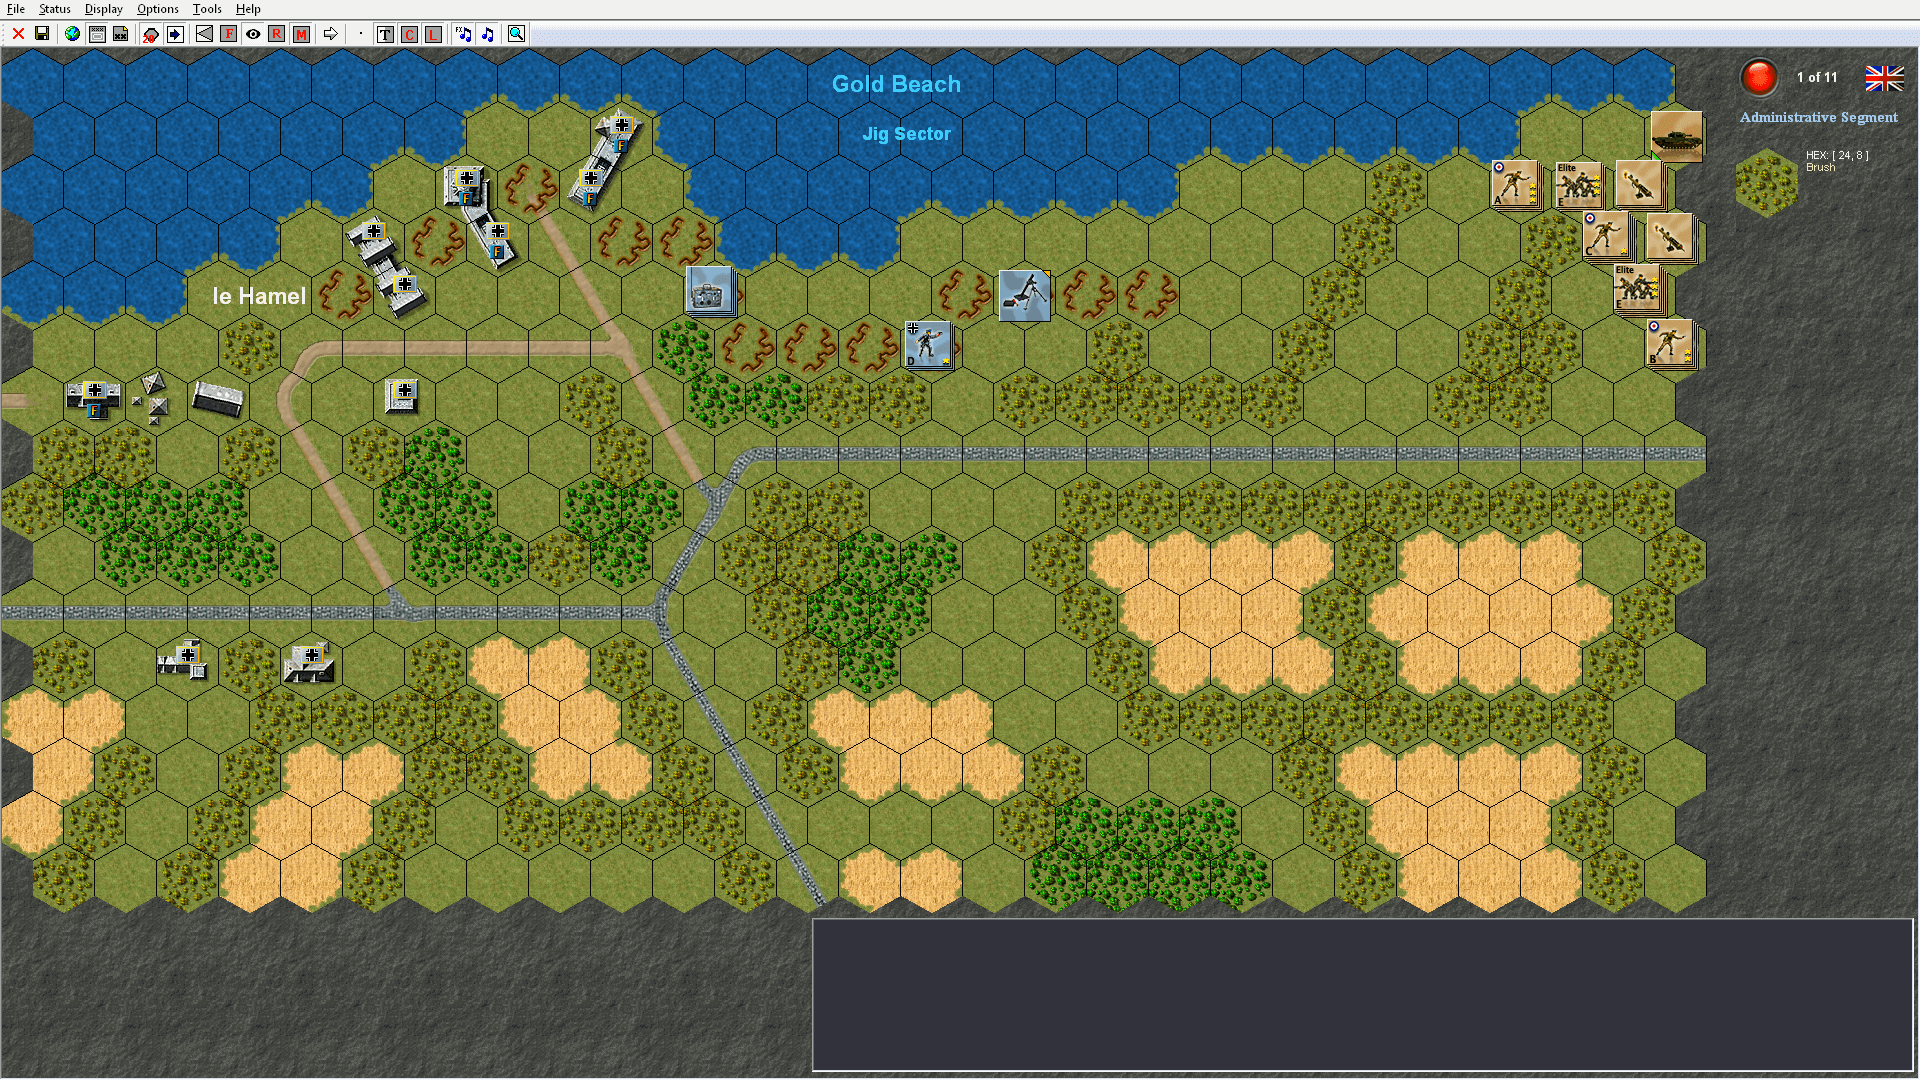
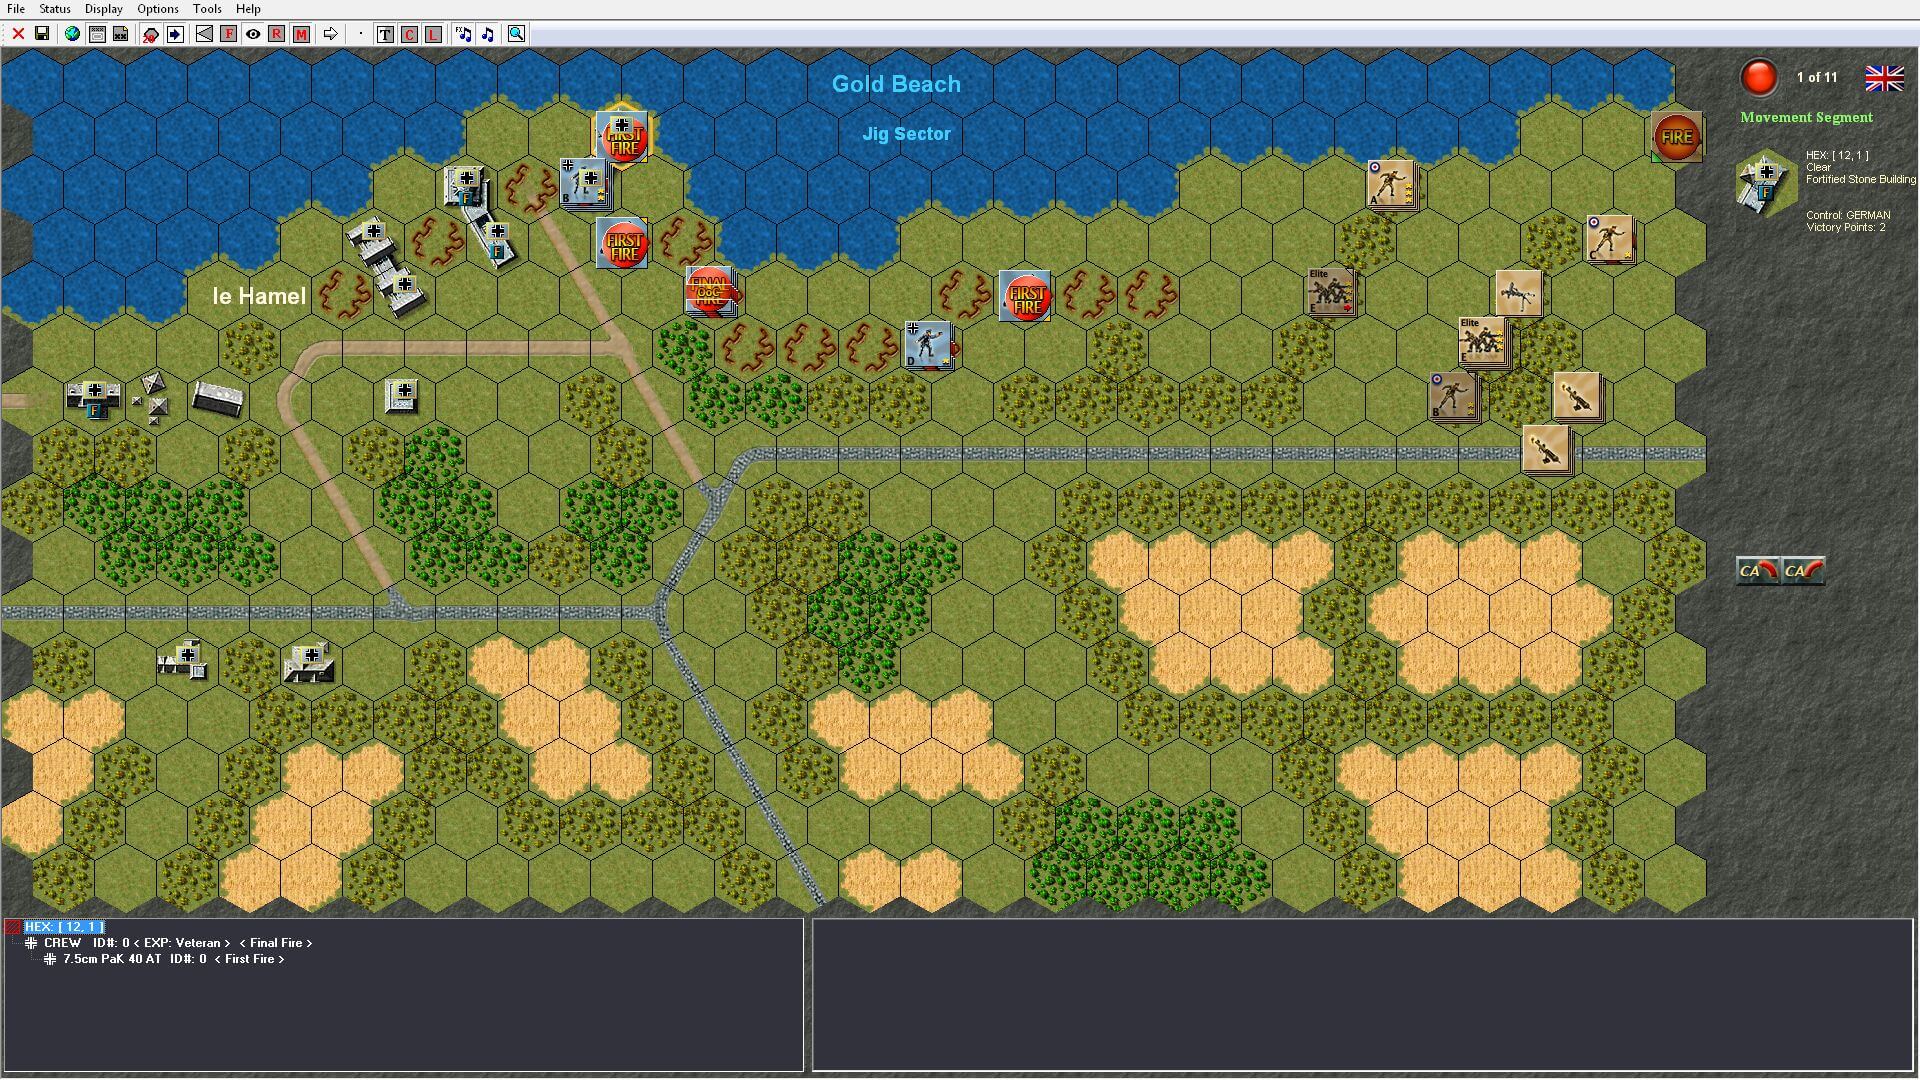
I’m going to skip the second scenario for right now. I’ll return to it later. The third of Tigers on the Hunt: Normandy’s scenarios is ‘Le Hamel’. It’s the British 231st Infantry Brigade landing on Gold Beach. The Germans’ 75mm gun emplacment immediately wreaks all kinds of havoc for the British landing party (which only contains one tank). A couple of close German mortars do not help the situation, either. No British reinforcements for this scenario — they’re all on their own. Very enjoyable. I did pretty well with this one, but took a lot of casualties — more than I should have, anyway.
‘Assault on the Merville Battery’ is the fourth scenario. In reality, only about a fourth of the British 6th Airborne Division actually made it to the assignment to neutralize the Merville Gun Battery. The Germans greeted them with personnel bunkers, trenches, machine gun nests and Howitzers. Once again, no British reinforcements. This one was highly enjoyable because, first of all, the bloodshed didn’t start immediately; I got to breathe for a couple of turns. Secondly, there’s a four-hex visibility limit, which was engrossing because 1) I could actually sneak around parts where I wanted and 2 ) it’s very suspenseful, then very surprising, when you stumble upon a German unit, even if it’s ‘only’ a Conscript.

The fifth and sixth scenarios are kind of tied together/very similar. They both deal with the Battle for the Pegasus Bridge. (‘Pegasus Coup de Main’ and ‘Pegasus Bridge Night Battle’, respectively). Even though the ‘Coup de Main’ is not specifically marked as a night battle, it still only has a two-hex visibility, like the ‘Bridge Night Battle’. Since the British gliders landed at 00:20, it’s a night battle regardless.
Here’s where something really cool comes into play with Tigers on the Hunt: Normandy. While playing any scenario or campaign, you can always hit the ‘Quick Setup’ button if you don’t want to personally set up your forces. I generally set mine up, however, in these two scenarios and the two campaigns, it’s best to use the ‘Quick Setup’ button because it simulates the possible and probable scattering of paratroop drops. I played a lot with all four of the choices above, just to see how different the setups would be. They varied… a lot!
Not only is Normandy already inherently, infinitely replayable, but having completely different setups due to paratroop drops is incredible to me. Sometimes you get pretty good positions, sometimes you get ‘Aw, shit’.
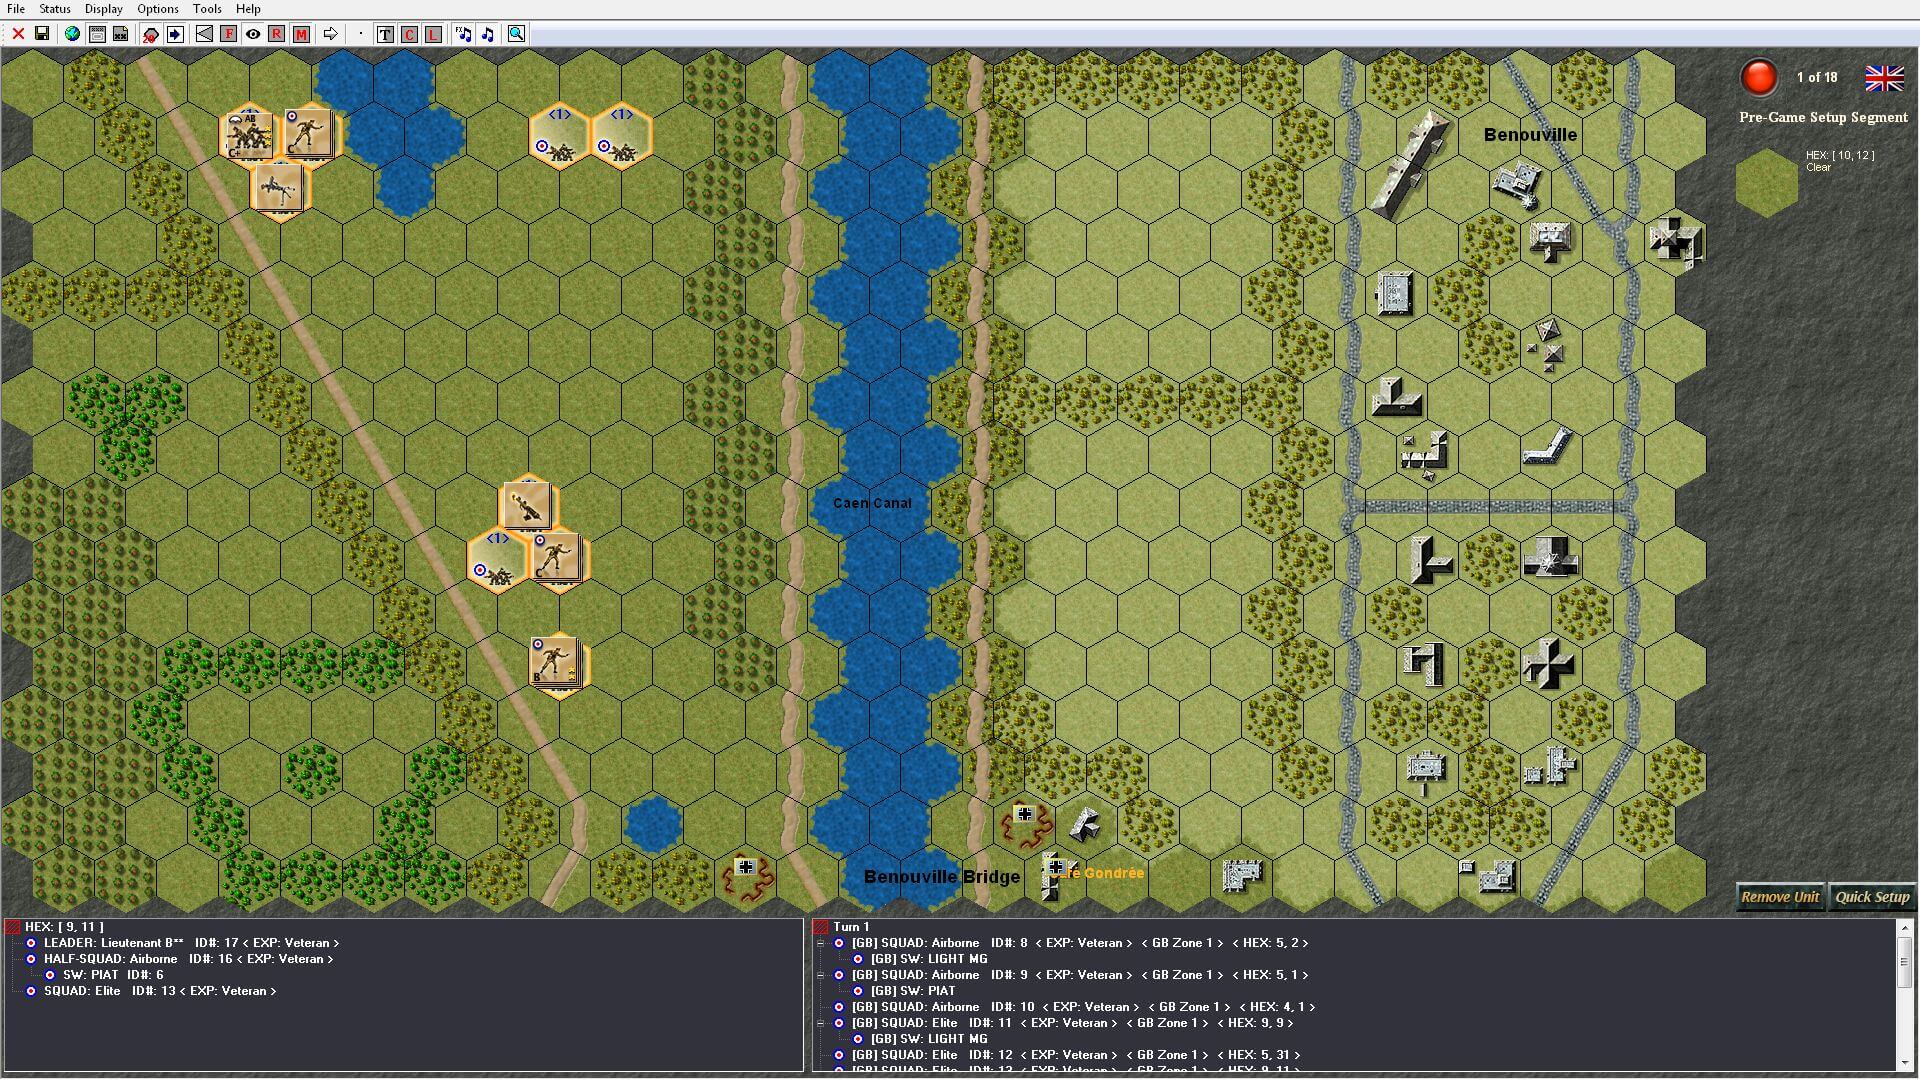
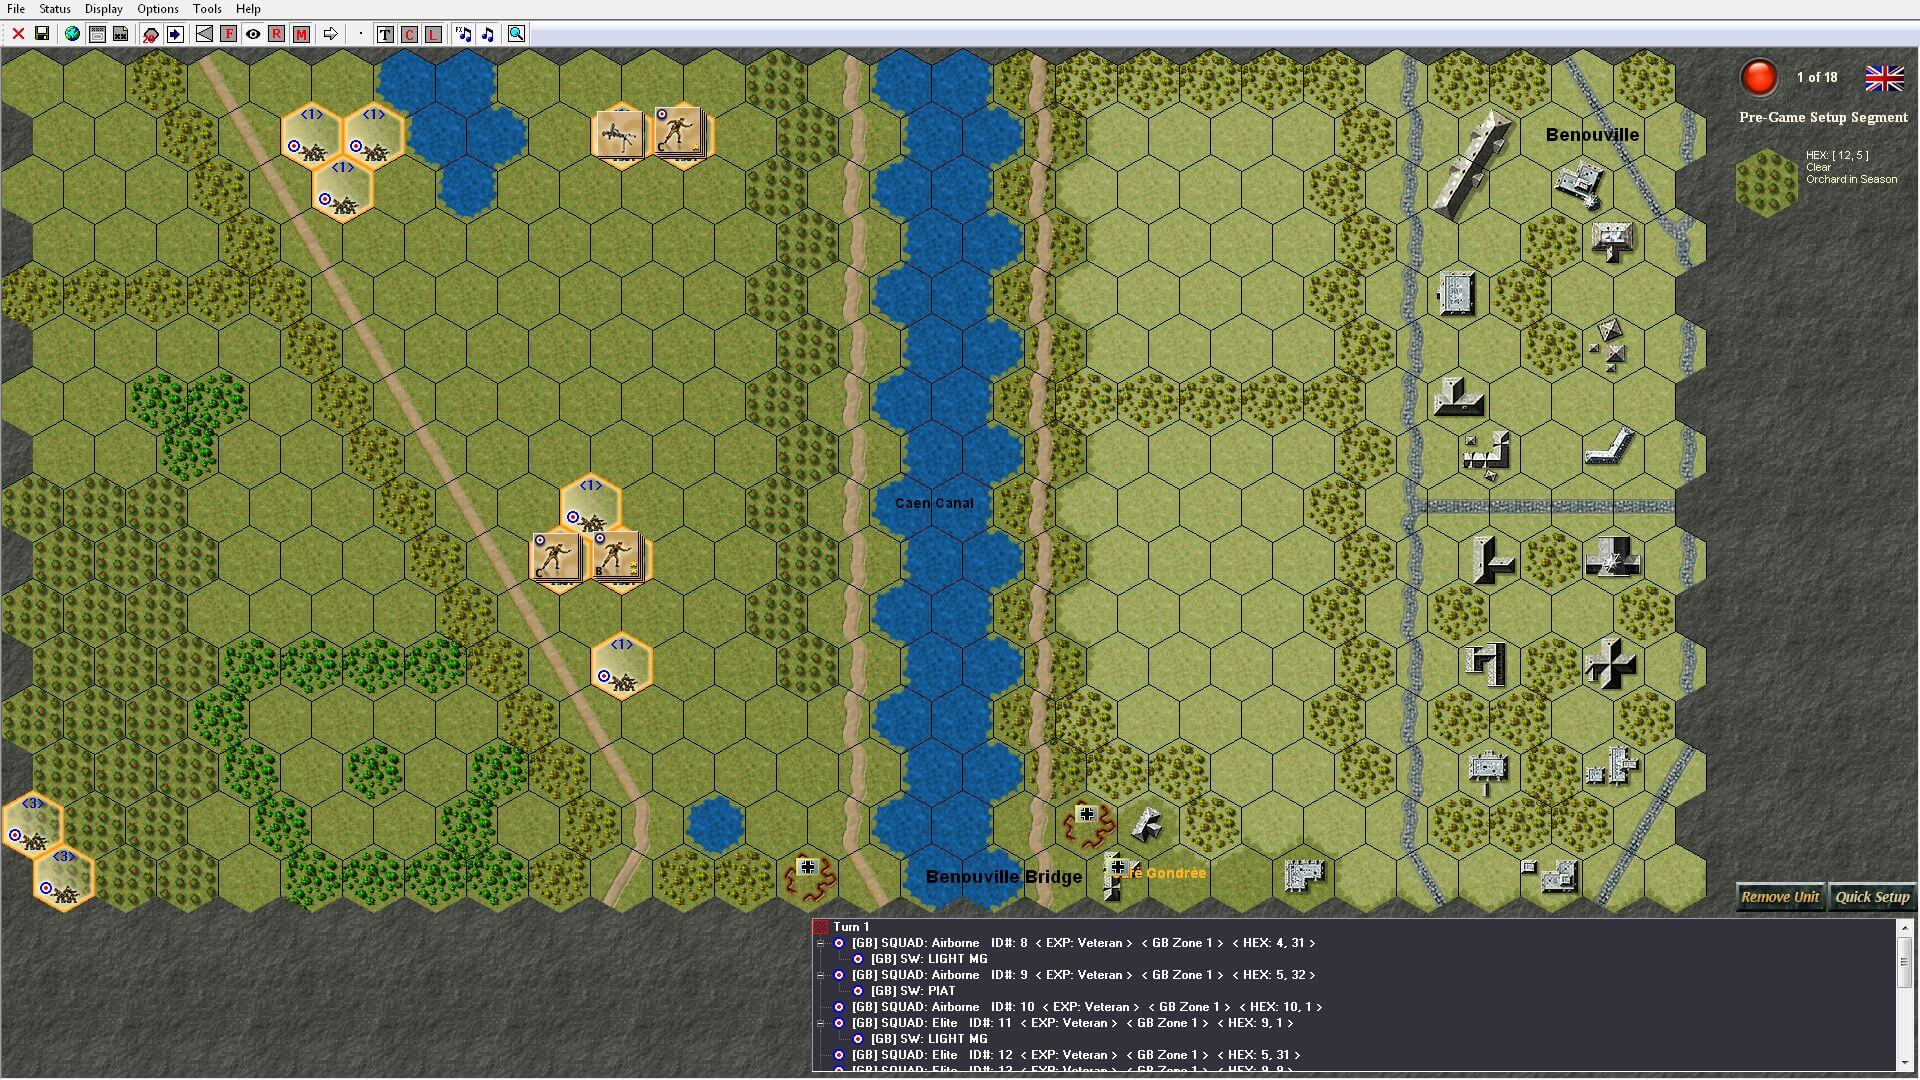

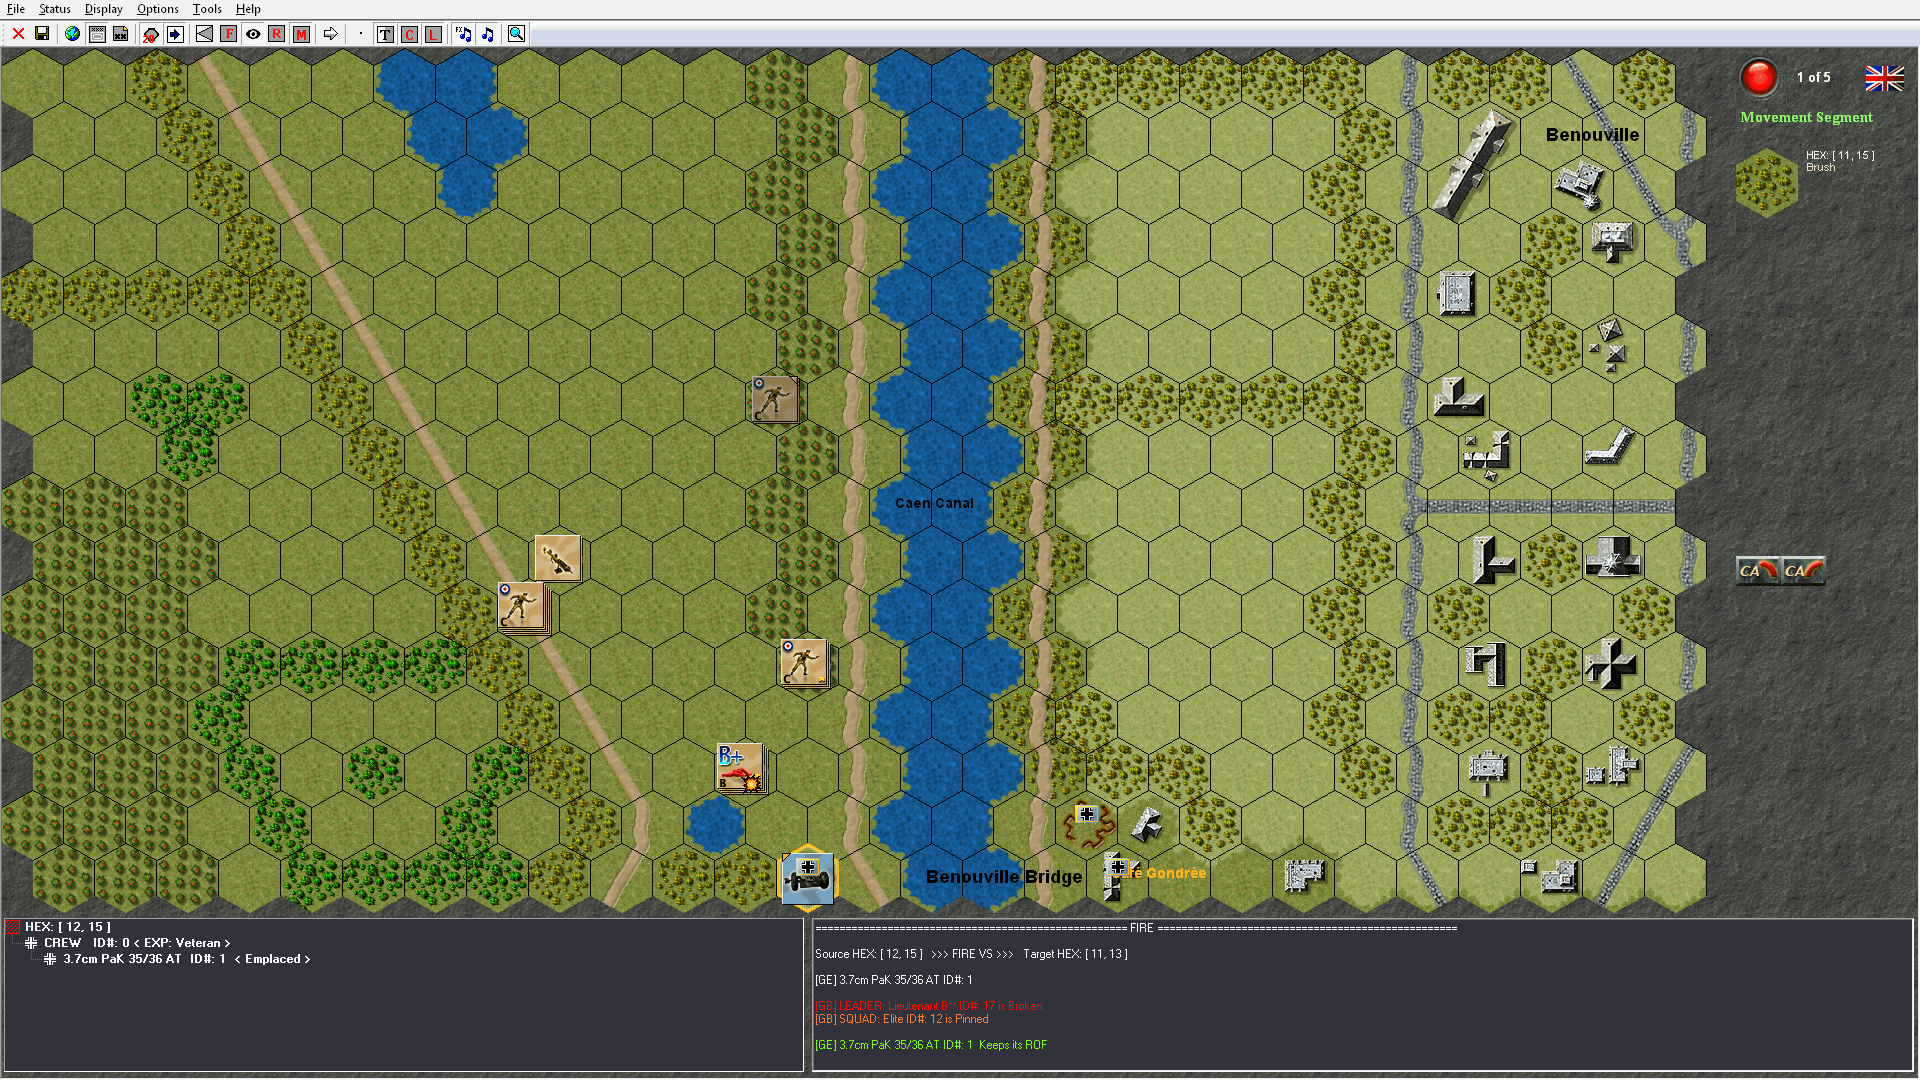
‘Pegasus Coup de Main’ is only five turns and is mostly about taking the bridge, although there are other Rictory Points to capture. ‘Pegasus Bridge Night Battle’, though, (at eighteen turns) is about taking the bridge and holding it (of course, along with the other VP locations) — against a barrage of German counterattacks.
If you’ve read anything of mine, ever, you know I like the longer, drawn-out scenarios… and especially campaigns. For me, de Main was fun; the night battle was awesome and incredible. Even I generally take for granted the usual unlimited visibility in wargames. Merville is four hexes, these two are two hexes — better plan on a lot of surprises… and some peeing.

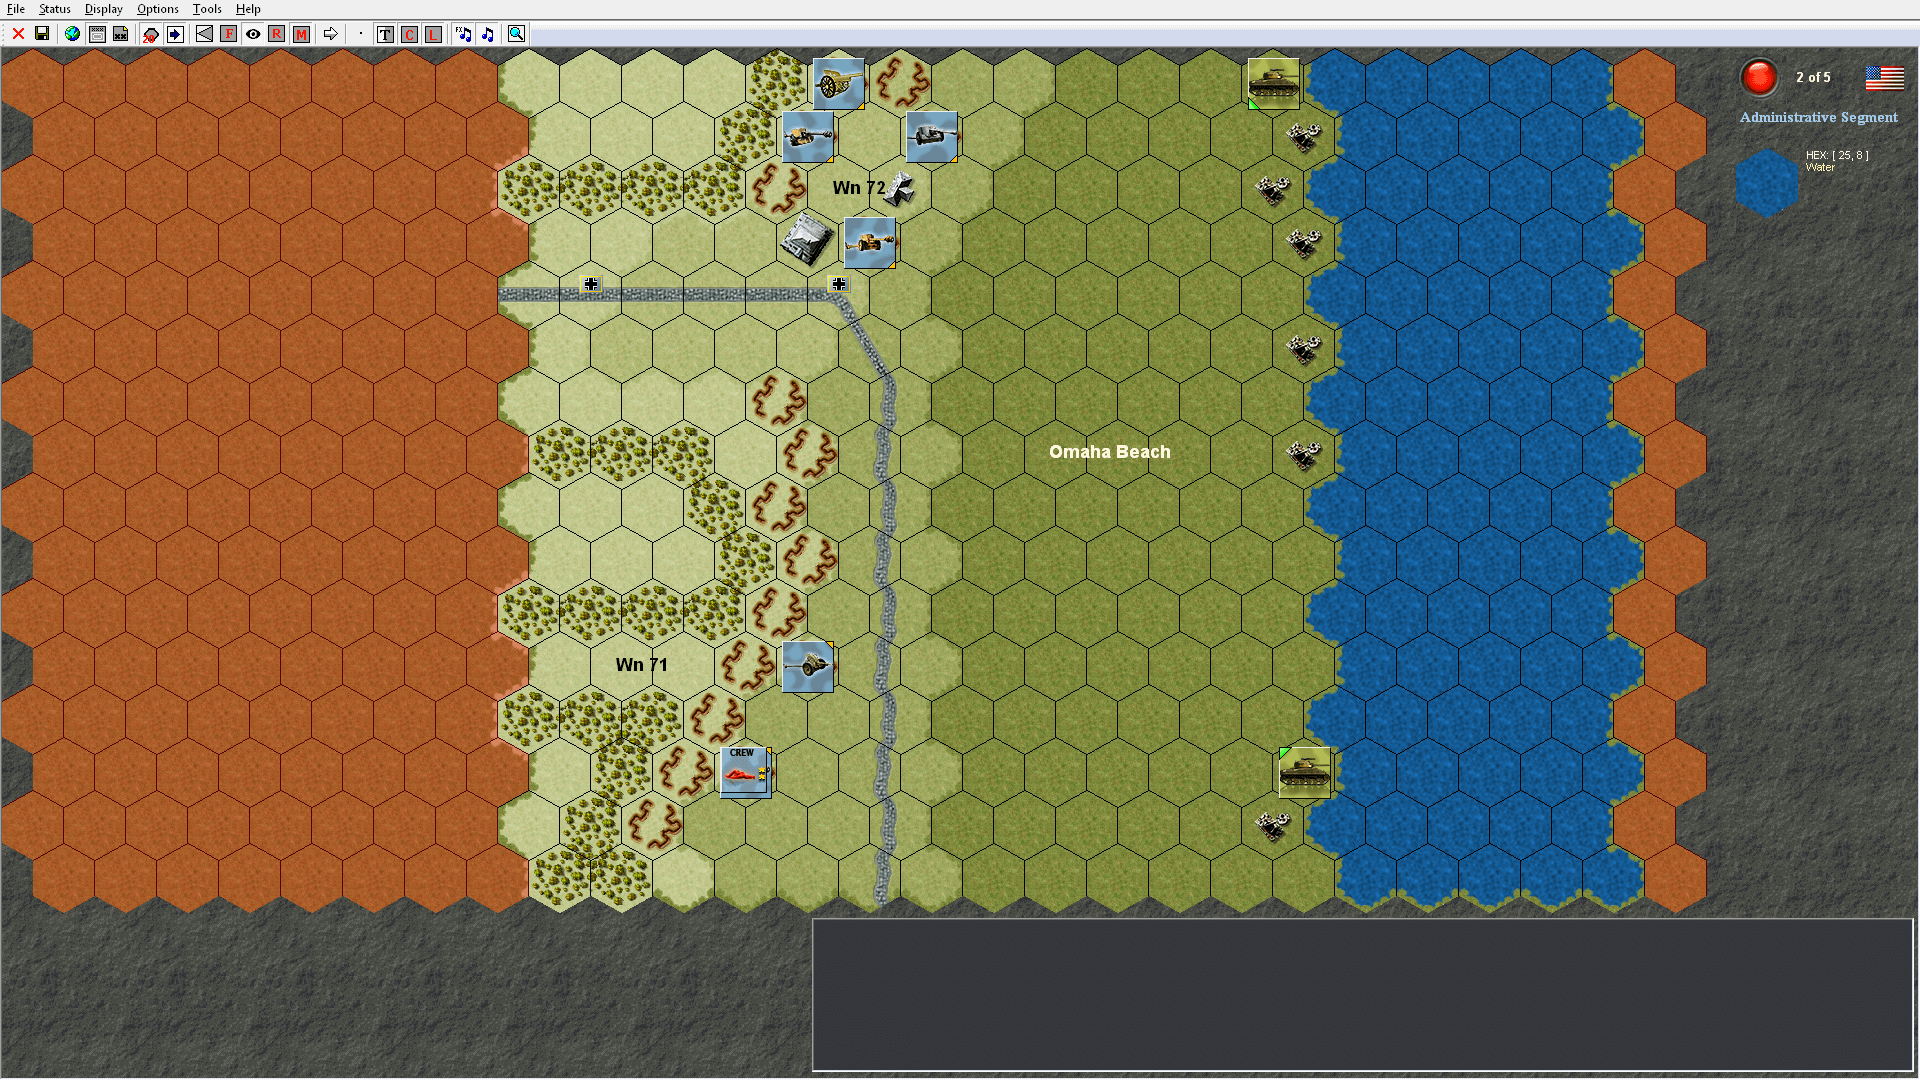
At last, the second scenario, ‘Left Alone on the Shore’. The American Company B of the 743rd Tank Battalion lands eight M4s on Omaha Beach. There are six German anti-tank weapons, all with line of sight to the tanks. Every time I played, it was simply a slaughter. The tanks get the first shots, but you’d have to be the RNG god to take out more than one or two AT guns. Man, I couldn’t figure this one out. I just don’t think it’s balanced properly.
I played as the Germans a couple of times — of course, the computer American side had great dice-rolls. I lost once, but still took out most of the American tanks. For the first time ever, I went into and played with the editor. I’d add an M4, try it… lose. Add another, lather, rinse, repeat. When I had added four additional M4s, I finally (easily) won. So, I went back to adding just three. With three extra tanks, I won about sixty percent of the time. I don’t know, I could just be a moron. For me, ‘Left Alone on the Shore’ is not my favorite scenario.
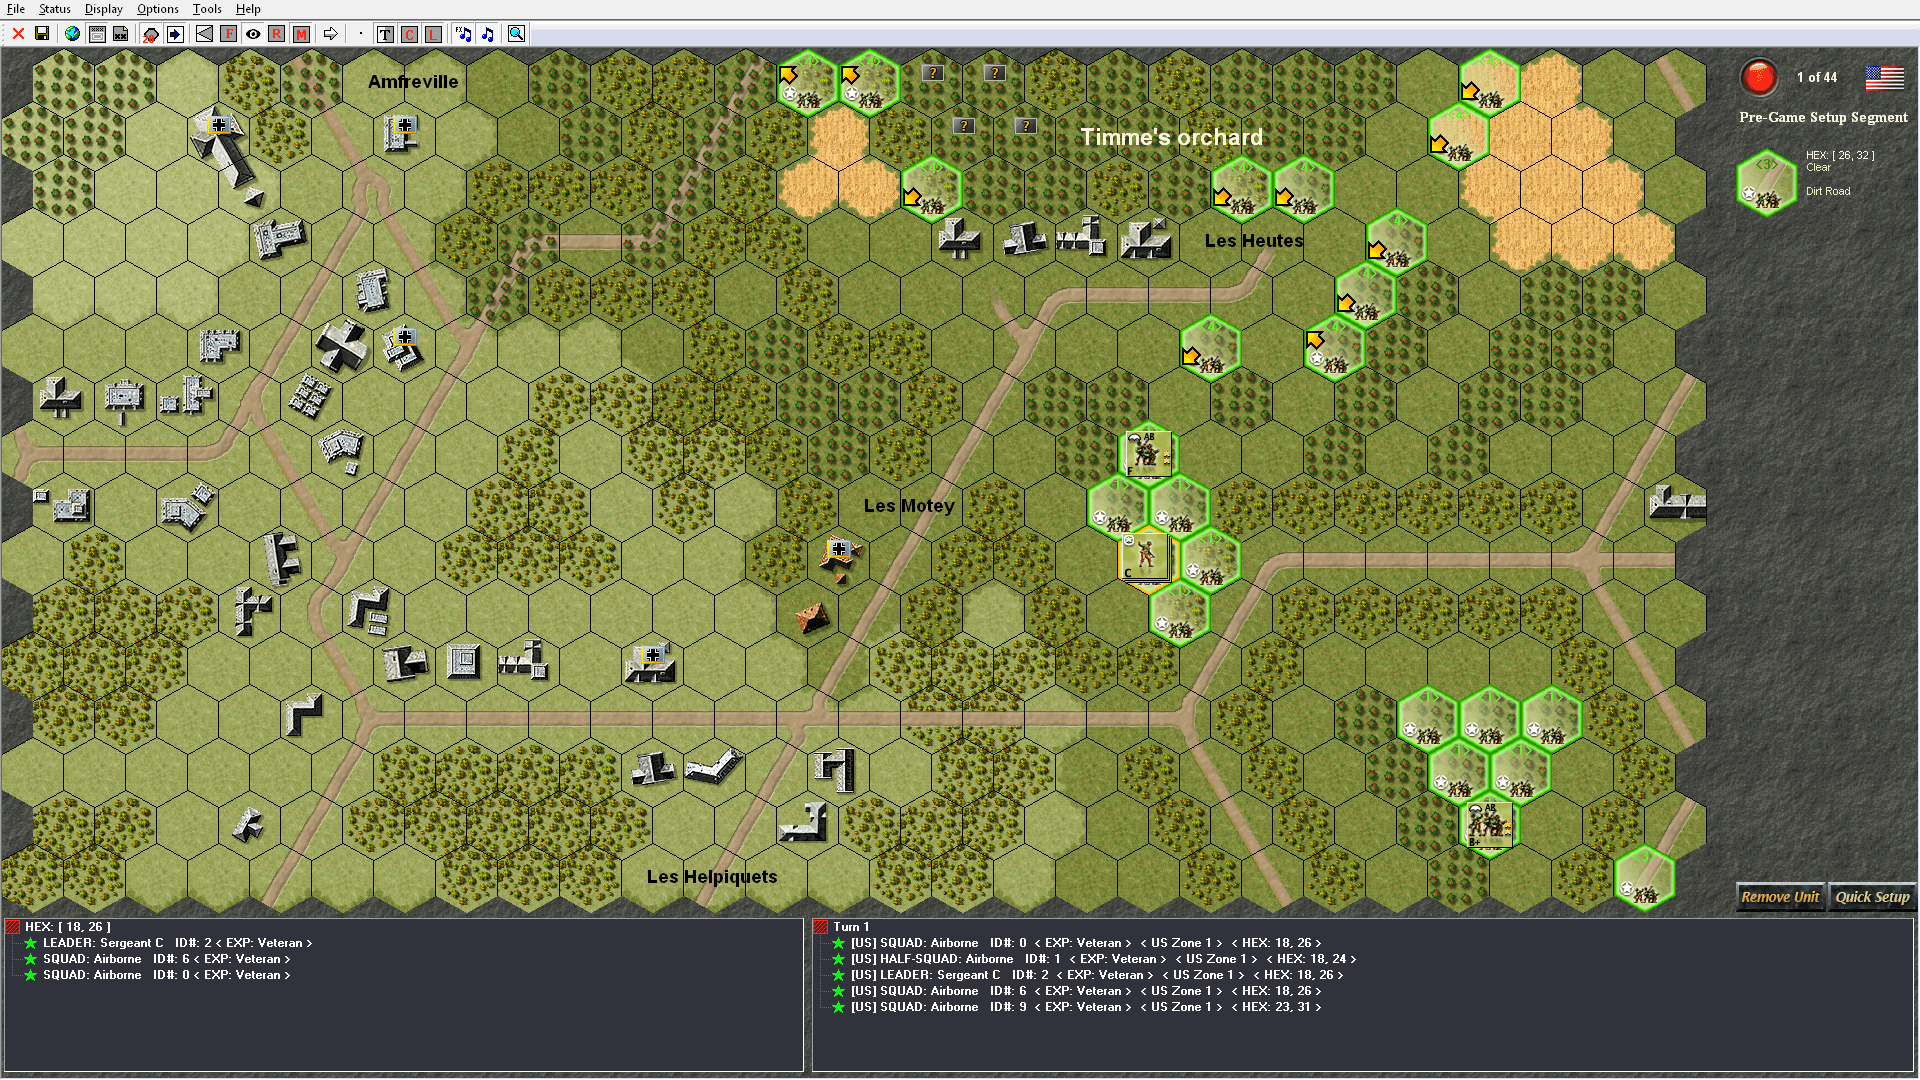
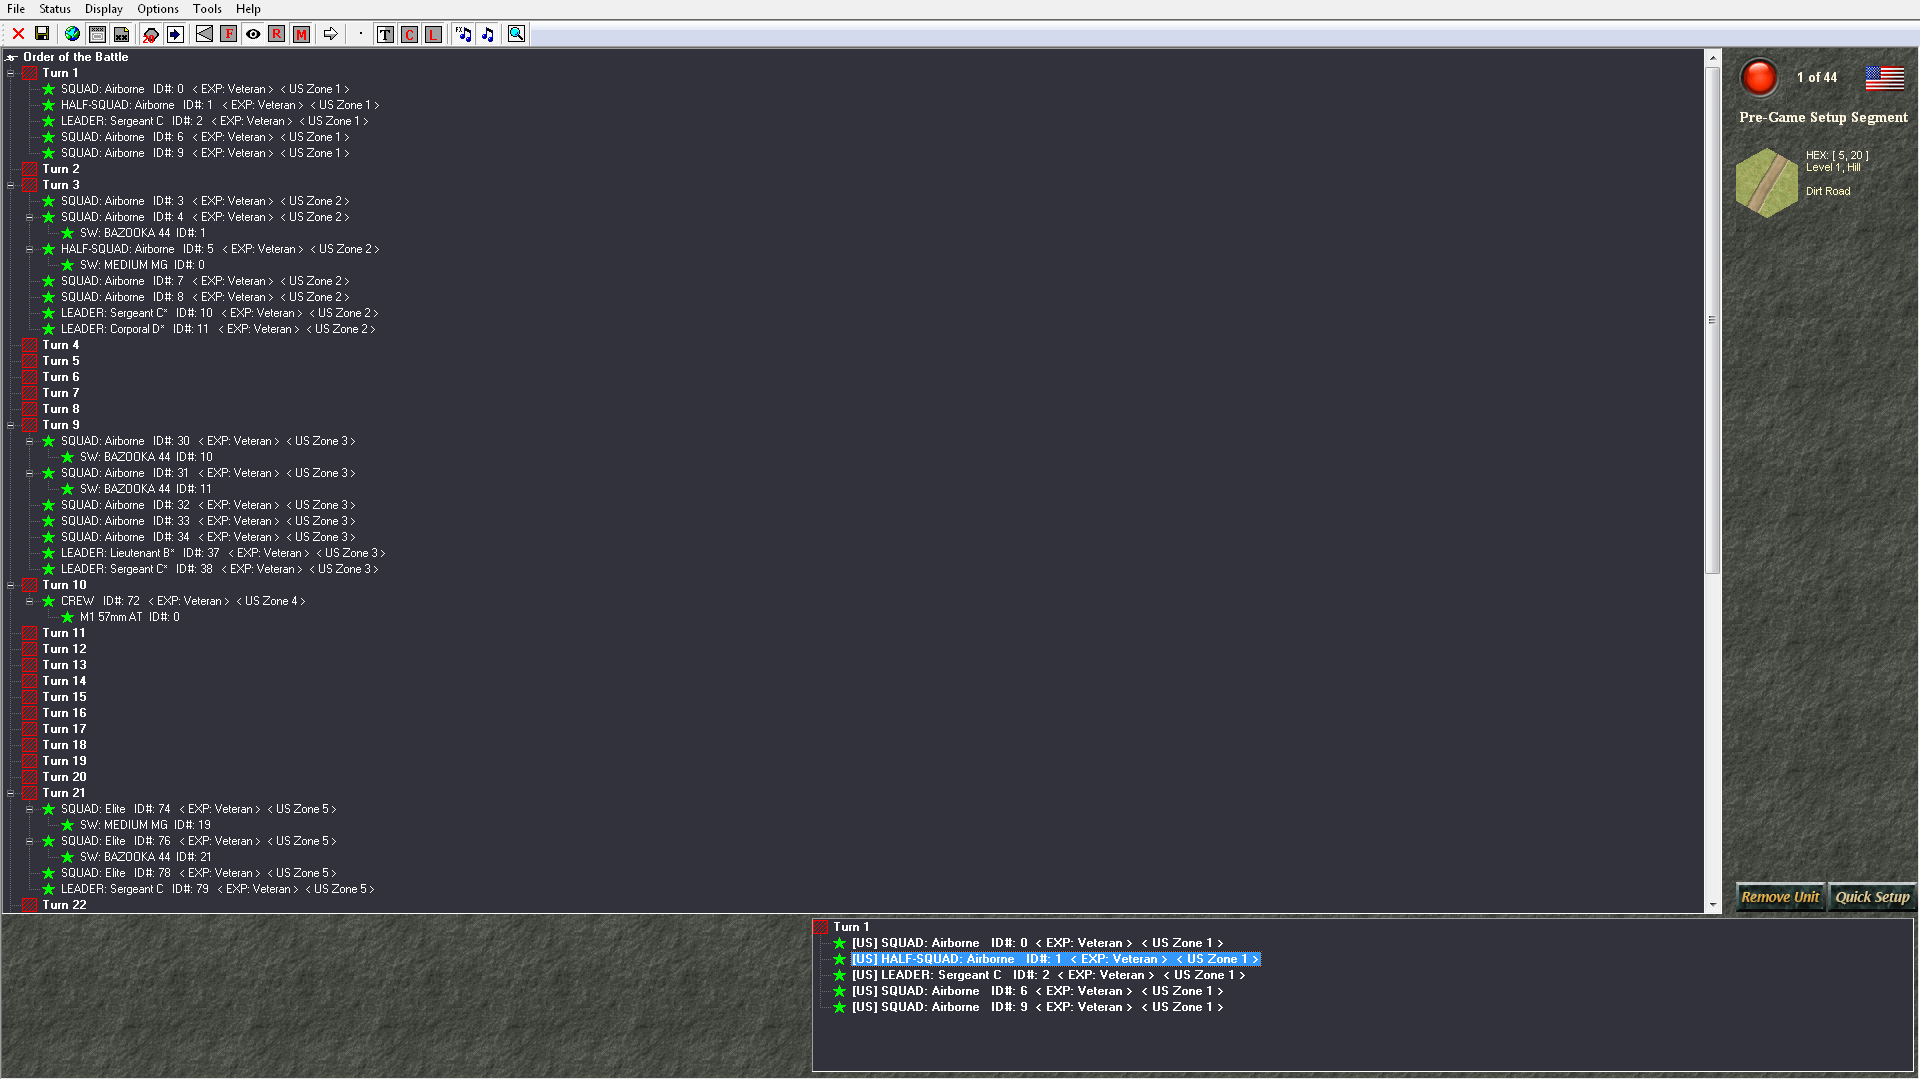
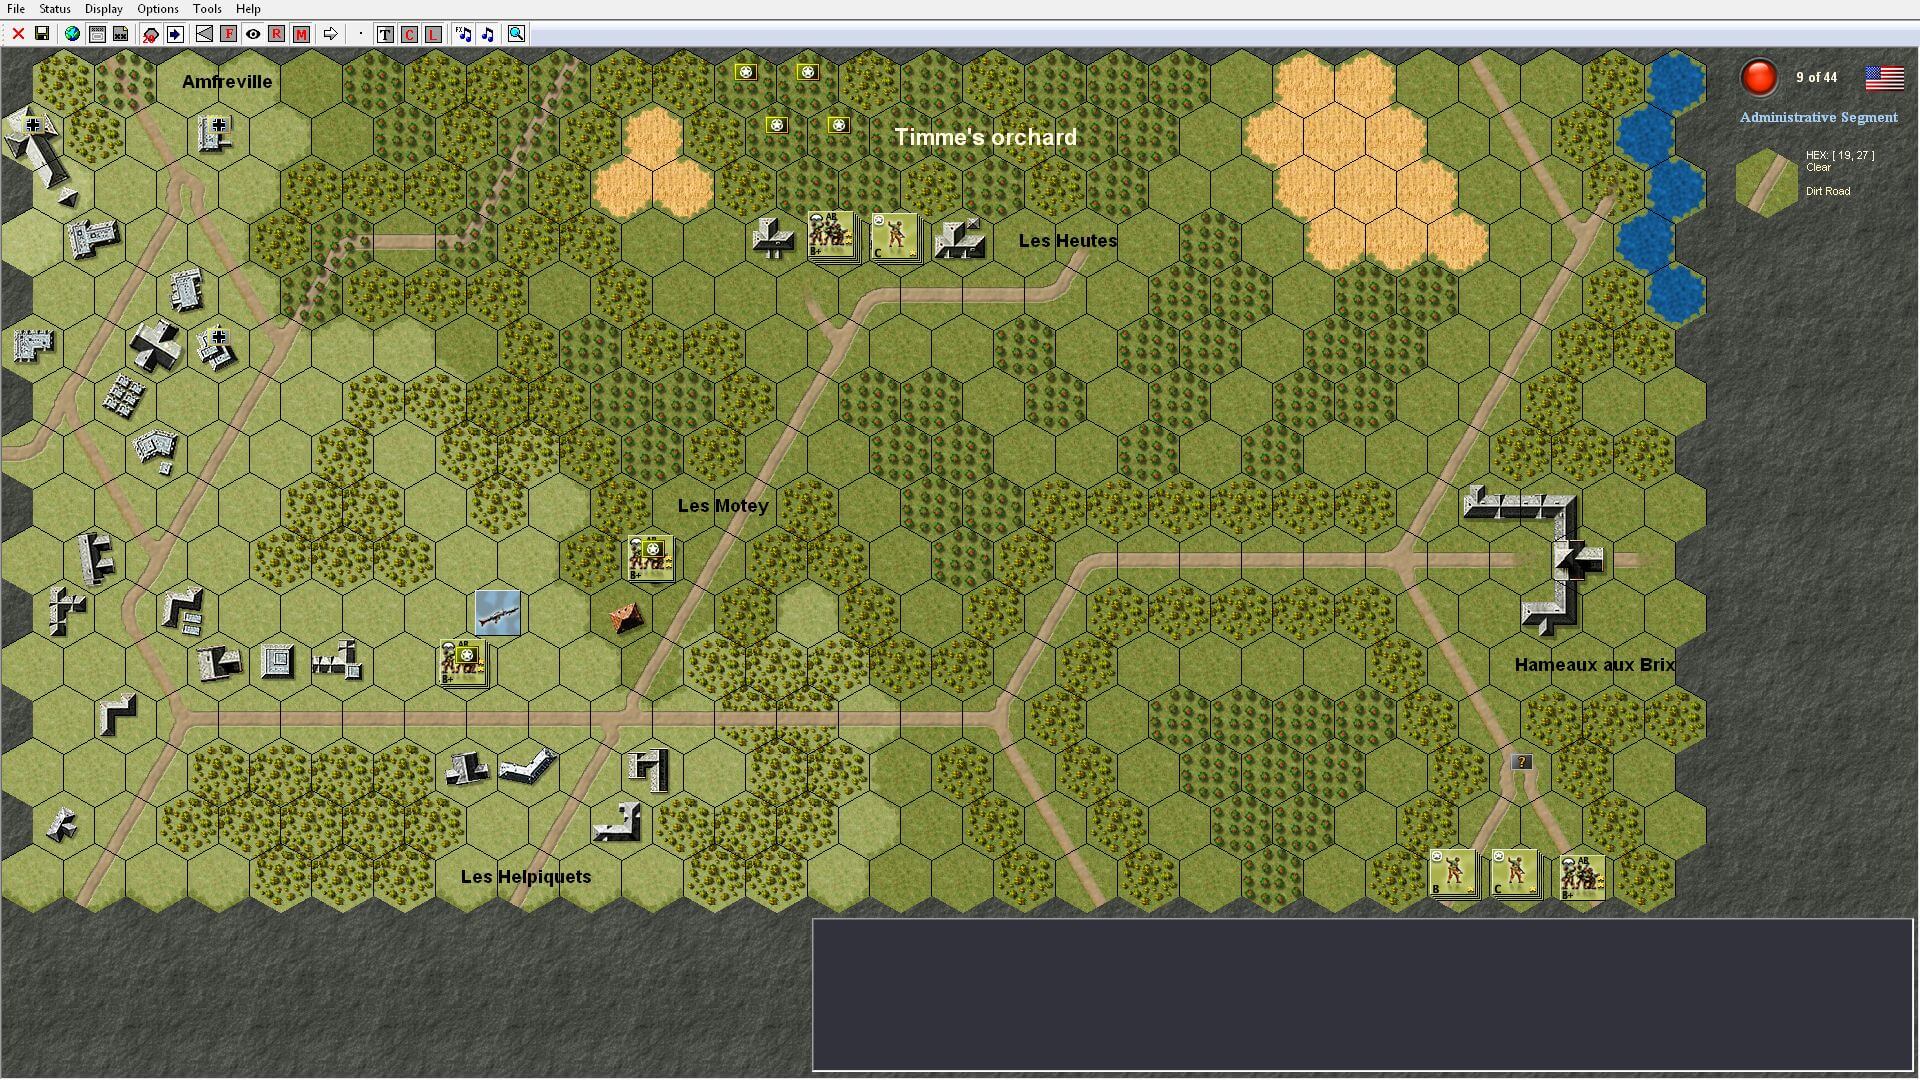
Finally, the reason I love wargames: campaigns. The first campaign of Tigers on the Hunt: Normandy is the ‘82nd at Amfreville’. It’s the Boston Mission which consisted of the landing of 82nd Airborne Division on both sides of the Merderet River around Ste Mère-Église — plus the ensuing march towards Amfreville.
Surprises were abundant. Again, I used the ‘Quick Setup’ button for my initial troops — of which there weren’t many. Plus, they were all 82nd Airborne, glider infantry and parachute units. There were quite a few reinforcements in this scenario, luckily starting at turn three. As I tend to be too aggressive most of the time, I had to restart (gasp!) a couple of times due to my own impatience. It’s a large map where your reinforcements arrive at different locations. The first few are still limited to the paratroops. Later, it changes a little. I had an absolute blast with this campaign. The Germans made me work (hard) for every, tiny VP on the map. Plus, they were throwing all kinds of crap at me. Strategy at its finest.
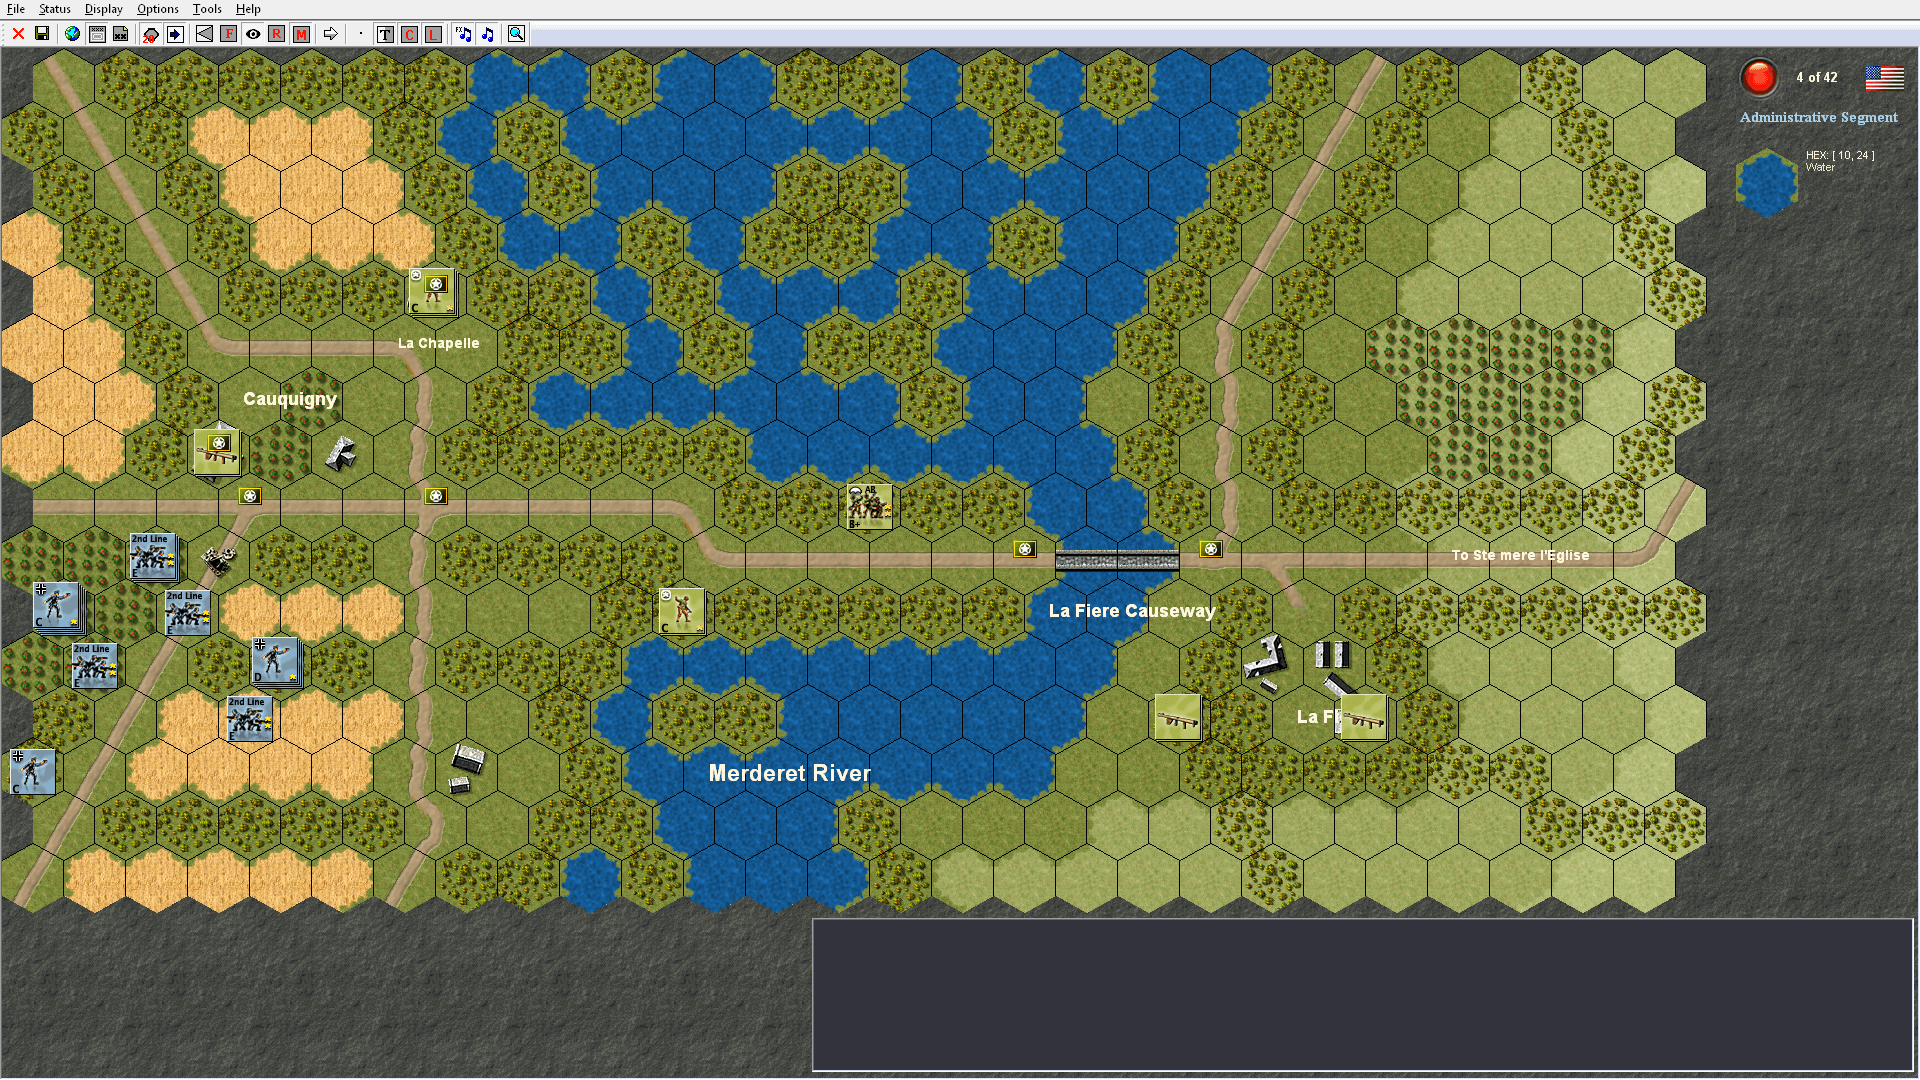
The second campaign is ‘La Fiere Causeway’. Again part of the Boston Mission, but this time about the occupation of Cauquigny east of the La Fiere Causeway. Once again, I used the ‘Quick Setup’ button for my initial deployment. The troops were badly scattered and vastly outnumbered. For me, this campaign is about hanging on by your fingernails — no reinforcements until turn nine, and even then, it’s not many. You don’t really get much meat on the bone until turns twenty-five and thirty-seven! It was generally about trying to hold onto Cauquigny (which, in the screenshot, you can see the German army pouring into). Then, it was mostly attempting to stay out of their line of sight until I could garner some more manpower. This one was also hugely entertaining, although quite bloody for the Allied side. The Germans were relentless in their pursuit of La Fiere Causeway. It was like an old-school, fifteen-round, heavyweight boxing match.
Tigers on the Hunt: Normandy is an excellent, albeit asymmetric, addition to the base game. Maybe if I had gone through it all as the Germans first, I wouldn’t feel like I’d had the hell beaten out of me. Of course, just guessing here, I’m not sure it would have been as much fun… for me, anyway. I like a challenge and Normandy definitely had the brain cells in overdrive.
I’d be remiss if I didn’t mention this, though: unfortunately, the one thing that’s bothered me all these years of playing Tigers on the Hunt still persists. When you select a stack or even a single unit, you still have to go over to the left side and select it again to give orders to them/it… A simple double-click on top of the stack/unit to select them would fix this annoyance of mine.
Other than that, good luck in Normandy — you’ll need some to go along with your strategy.
You can purchase Tigers on the Hunt: Normandy on Matrix Games’ website.