In Spire of Sorcery, you control three mages escaping from the Sanctuary for the Corrupted. It’s up to you to guide them safely away from the inquisition and towards the Spire, a sentient citadel that has called them to it. We’ve taken a look at the first couple of chapters of its early-access offering. Here’s what we thought.
Disclaimer: We ran into a bug that wouldn’t let us continue or begin a game during this review, so were unable to go beyond four hours of gameplay. We have based our thoughts on the first few levels of the game, which we imagine are representative of the whole, but may have got some details wrong due to not being able to double-check.
Getting around
The story takes you between several different locations on the world map. In each, your party appears in its starting hex with one or more objectives spread across the local map. You can’t leave until the main quest is over, and this hex map is where you spend most of your time in-game. Moving around it is a little odd at first – you get five movement points and can click on hexes up to five hexes away, but you only ever move one at a time. One step at a time makes sense, though, as every time you move, so do your enemies, and you might reveal something new that you want to head towards. If you move onto a tile with something on it, you initiate the encounter or pick up the resource.
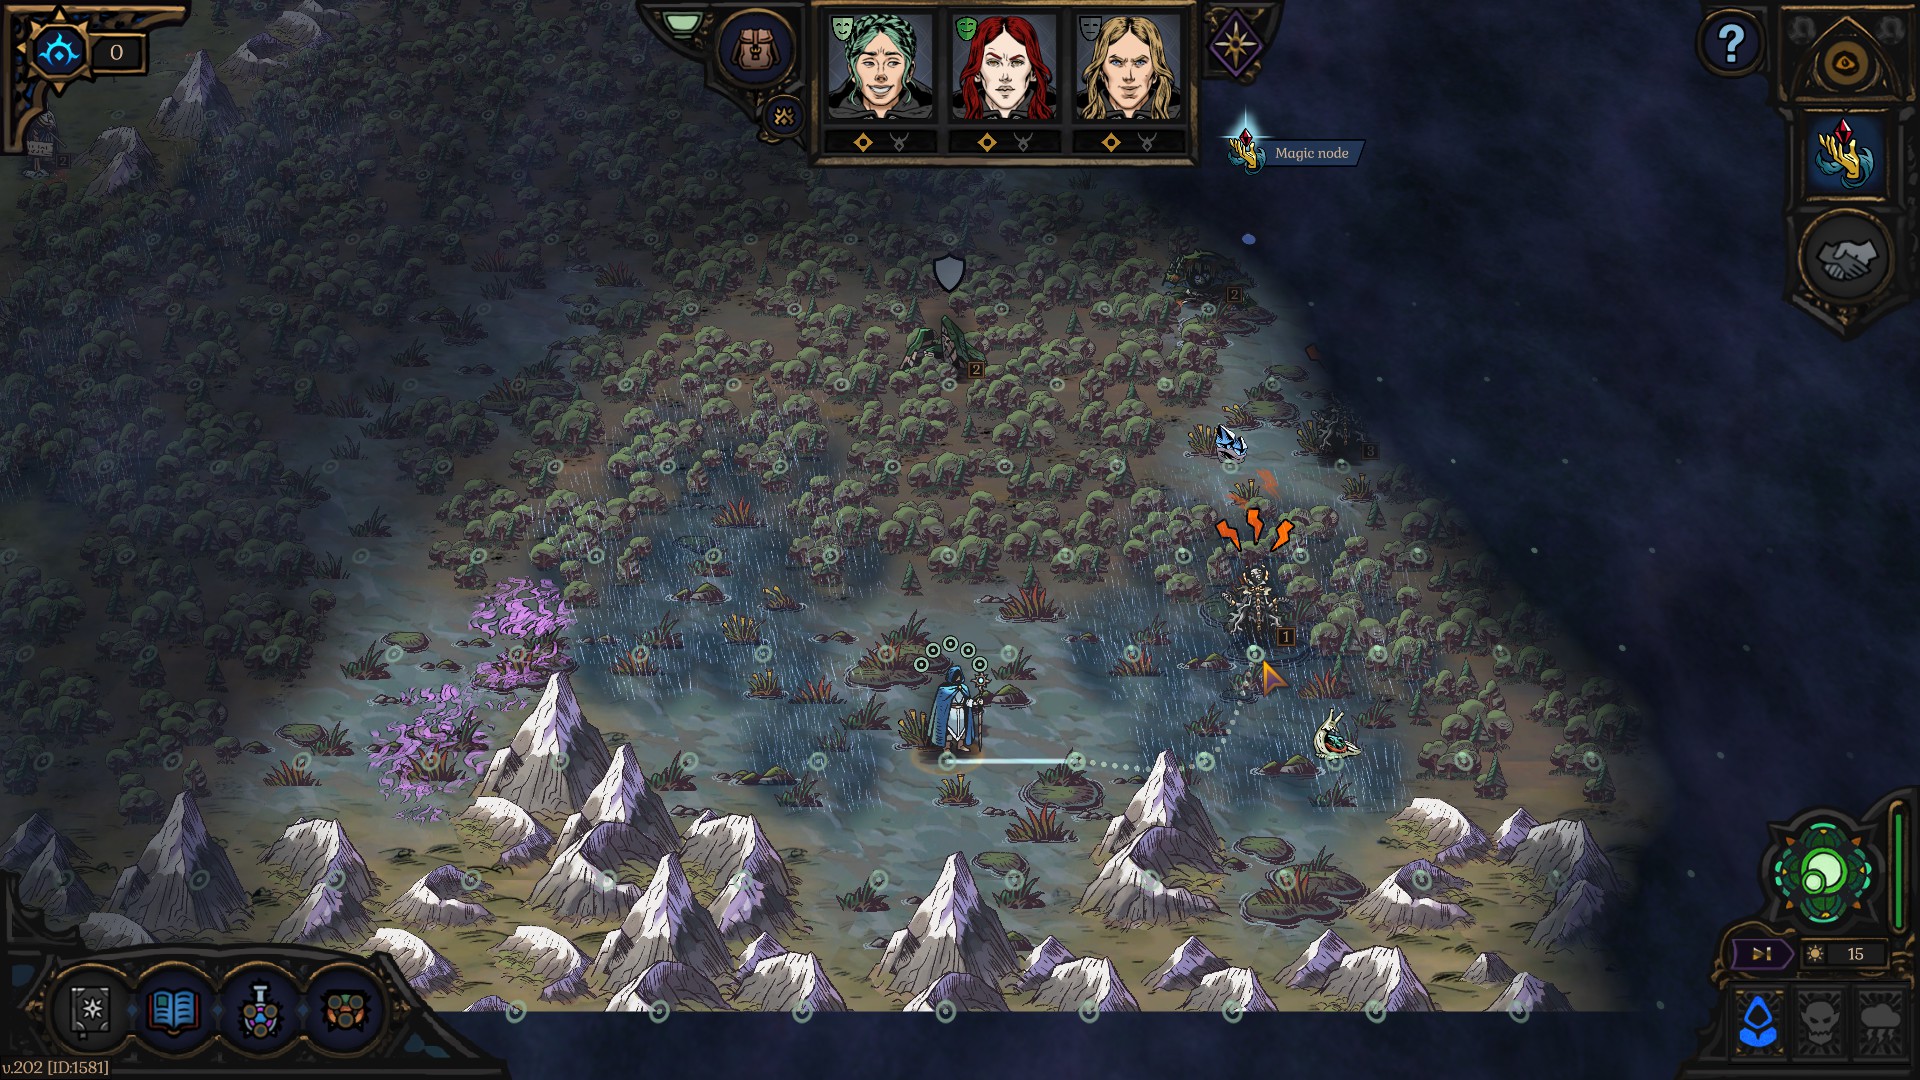
You need to be careful where you wander, of course. Get too close to enemies and they’ll start following you – some of them can move alarmingly fast. More importantly, every type of terrain confers a different status effect. Perhaps your party members get sad or fatigued as they travel through it, or perhaps during battles, every action you take is more expensive. Getting ambushed in the wrong environment is a death sentence. It’s an interesting aspect to consider when you need a resource somewhere inside a patch of bad terrain.
Characters and statistics
But what does it matter if your party members get tired? Each character has a set of statistics: accumulated wounds, morale, traits and six core stats that delve into specific aspects of their health, like their energy levels, gut and general physical health. They also have what looks like a class, but the symbol for this didn’t have a tooltip at the time of writing, so we couldn’t be sure. This highlights a key issue of Spire of Sorcery’s current UI and the key feeling we took away from our playthrough: overwhelm.

There are far too many icons. Where each core stat has its own, it also has a ‘negative’ version that accumulates against it when that stat is attacked. The colours don’t even match between positive and negative symbols, so you’re left thinking ‘well which stat does this symbol match up with?’ when you’re trying to work out exactly how something’s going to hurt you. When you’re hovering over an effect and you don’t have a character sheet open at the same time, you’re left thinking ‘that’s great, but what does it mean?’. Add to that that every spell can do damage of different types, each represented by its own icon, and uses different tiles, also represented by their own icons, and that’s a whole lot of information to parse at the same time. But we’ll get to combat a little bit later.
Food and alchemy
As you move around the map in Spire of Sorcery, your characters grow hungry, so you have to keep them fed via the cooking menu. This isn’t particularly hard to keep on top of once you have the hang of it, as a few ingredients are enough to keep your party fed and you soon unlock recipes that taste nice enough not to make everyone miserable. You can assign a designated cook as well, which is useful when you have someone with the trait that lets them make two of everything. You can also access alchemy through a different menu, which draws upon different ingredients to craft things like health potions (for each core stat), permanent stat increases and combat items like a skull that sets the area on fire.
Combat
That brings us onto combat, which is a bit of a meaty subject to unpack in Spire of Sorcery. You can have three characters in a combat party (with more in reserve that you can swap in between battles). Each has their own collection of spells and their own deck of tiles. Combat is turn-based, alternating between the players and the environment.
Examining your opponents
The first thing you want to do is hover over each of your opponents in turn. That shows you a tooltip listing the damage a creature can take before something happens. This appears in the form of ‘number of symbols required’ next to another symbol that indicates the effect this damage has. Yes, more symbols. You can right-click on pretty much anything for more information, but that’s not something you want to have to do all the time.
In any case, this list will help you choose the spell you want to cast on them. If all your enemies share an effective damage type, great – you can pick an AoE spell that affects all of them at once.

Casting spells
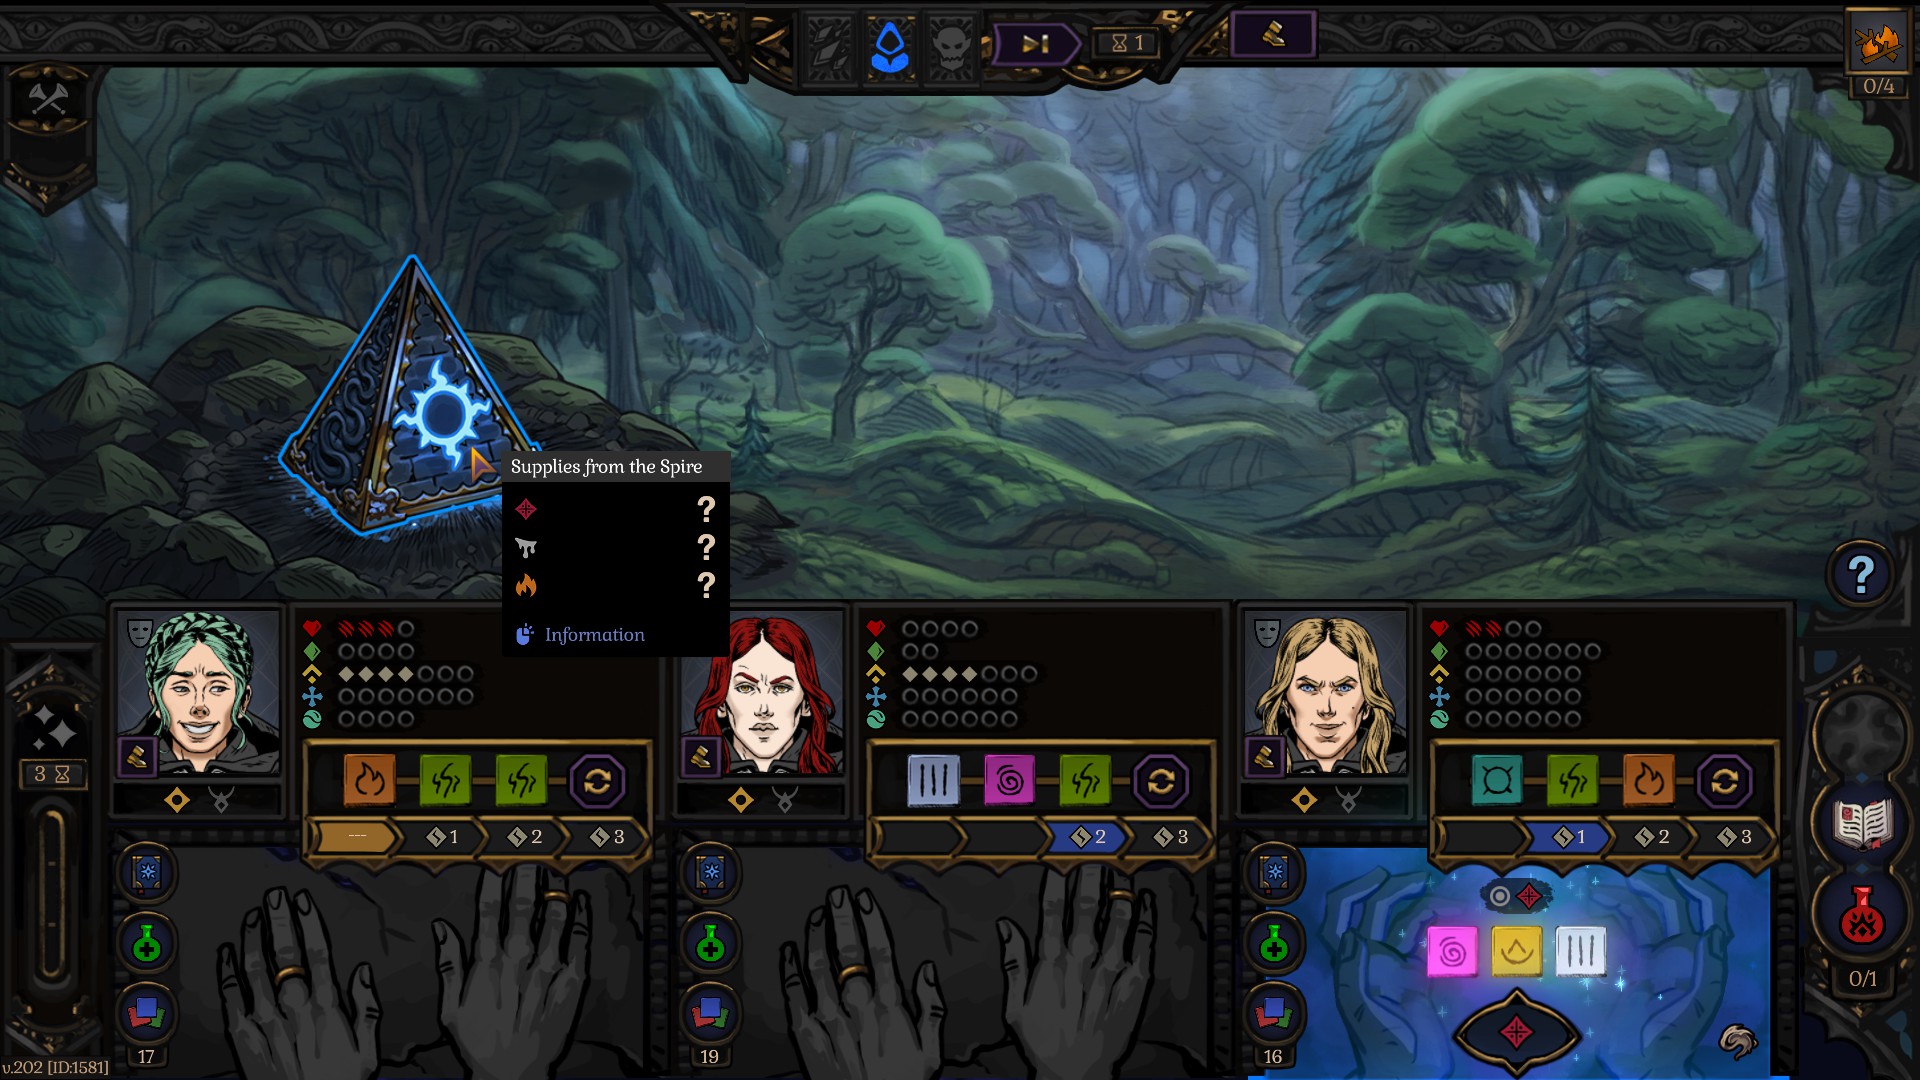
Spire of Sorcery’s spellcasting system is quite unique and involved. First, you pick a spell from one of your characters’ spellbooks depending on the damage you want to deal. Each spell requires certain symbol tiles, and each character can have three tiles from their deck in their hands at a time. Once you select a spell, you can click a matching tile from a character’s hand and click the empty symbol on the spell to use it. When you fill all the empty symbols, a button pops up to cast the spell. Click that, then the enemy you want to target, and that’s your spell done. It’s a lot of clicking – often doubled, as some clicks don’t register in early access. Each character can have one active spell, so you could be accumulating tiles for three at once, and you can use any character’s tiles on any character’s spell.
What if none of your characters have the right tiles in their hand? You can refresh their hand, but this adds fatigue counters, and the number of fatigue counters added goes up each time you take an action. You can end the turn, but that means your enemies and the environment have a chance to hurt you. It’s an interesting juggling act, but it does have issues.
Snowballing damage
The problem with fatigue is that too much of it can damage you. It’s pretty easy to stack up fatigue icons – especially as it’s not very well explained, if at all, in-game – and once you have enough to fill your character’s energy track, they gain a physical damage icon and their energy track is cleared. The whole fatigue system is quite unclear – you seem to get it for everything, and it’s very frustrating to have damage coming in from all corners without a clear indication as to why. We initially thought the enemies got an attack of opportunity if we took too long casting spells, but that was even before we realised there was an ‘end turn’ button. (Watching the tutorial videos is somewhat essential for understanding the early access.)
On top of that, if any one of the core stats is filled up with negative icons, you get a physical damage icon. Every time you fill the physical damage track, your character gets a permanent(-ish) injury that reduces the number of slots in a stack or carries some other penalty. If you don’t know what you’re doing, it snowballs and you have no idea what’s going on. If you do know what you’re doing, you know what to look out for, but it’s still an awful lot to balance with an awful lot of visual ‘stuff’ to interpret on the fly.
You can use alchemy items during combat to counter some of these effects, but a character can only use one item per turn, they all confer negative morale for consuming them and you regain the damage so fast that most of them just feel like a drop in the ocean. It’s good to make you really think about what to use and when. Perhaps if other elements of gameplay in Spire of Sorcery were streamlined, it would be less of an annoyance.

Enemies and environment
Once you’ve run out of actions or energy, and if your enemies are still alive, it’s their turn to fight. (Enemies go first in the turn order if they attack you by moving onto your hex; you go first if you attack them by moving onto theirs.) This is fairly standard, and the type of damage enemies deal varies depending on their species. The environment gets a turn as well. If you’re fighting on a tile with bad terrain, the tile’s effects will come into play here. So everything on the screen (both your characters and your enemies) may take a point of poison damage, for instance. Sometimes your enemies will be immune to that type of damage but from what we can see, your characters never are.
You can use this environment round to your advantage by using one of your alchemy items. Of course, if you set the place on fire, your characters will also take damage. You can counter this with a protective item, but unless you had the foresight (and recognised the enemy icon to know it would take that damage in the first place) to use the item before attacking, you would only be able to use one item on turn one and the other on turn two. In either case, that’s an extra turn to take damage until you reach the situation you want to be in. If only your characters could learn to not stand in their own AoE attacks. (Bizarrely, we found fire environmental effects did physical damage to enemies instead of fire damage on at least one occasion, which seemed to defeat the point and ruined our strategy of using items to stack fire damage tokens.)
A drawback here is that you can’t currently click on an environmental effect to find out what it does, and there is no search bar in the very large Discovery Book to look it up yourself.
When you defeat an enemy, it disappears, and you may get a loot drop if you defeated it using the right damage type. It can be quite frustrating when certain damage types are out of your reach and you go a long time without any loot – we get the idea behind making you try different spells for different results, but you already sort of have that in the different enemy types, and here it feels like another layer of needless frustration.
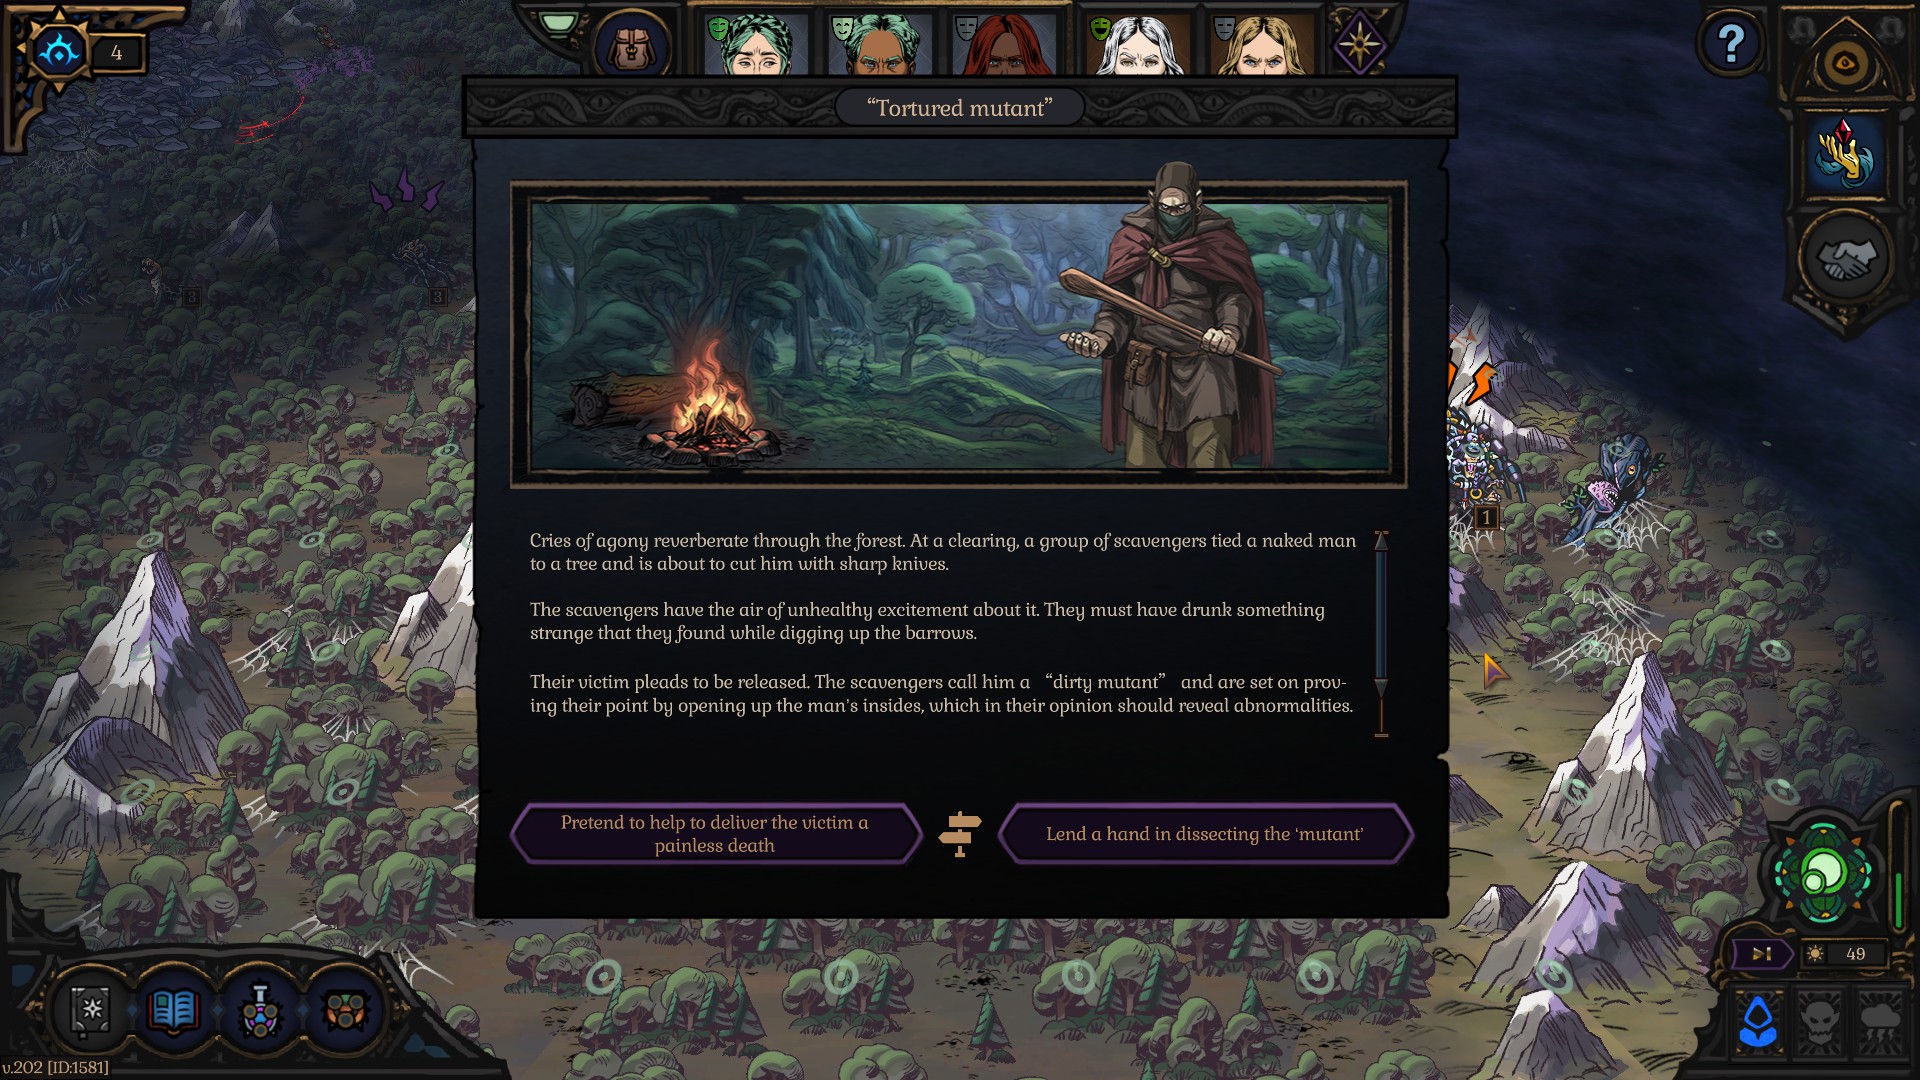
Special enemies
Some encounters are different. They might be a boss fight, or there might be a chest you have to open. It might be a location where you can pick up a new mage for your collection. In these cases, you have one main opponent that needs a lot of damage tokens to beat. For things like chests, this might not be a great worry. Bosses, however, don’t come unaccompanied. Other enemies appear with them, and keep respawning after their death. Spells that target multiple enemies are best here, and knocking out the boss is issue number one.
The titular spire
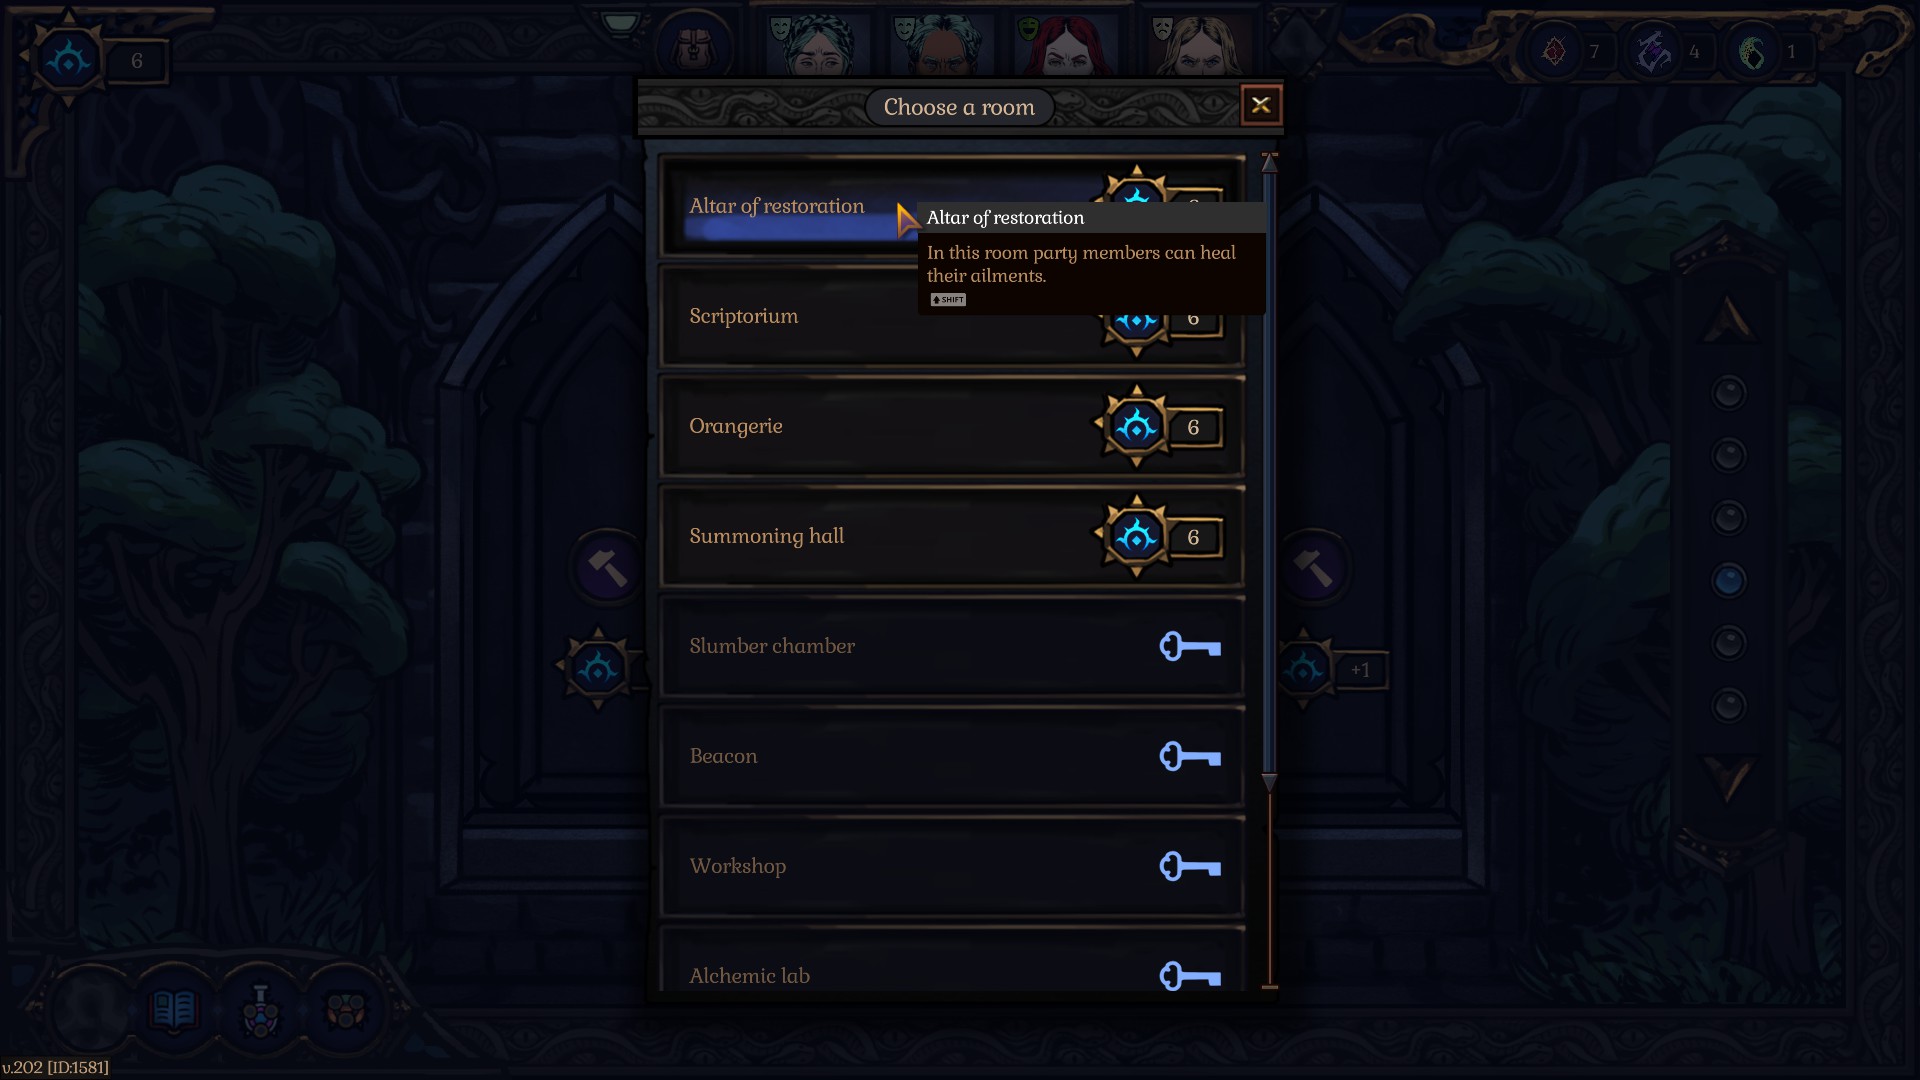
There are no healing spells, only damage spells (that we know of), so forget using anything other than bad-tasting alchemy products to patch your characters up. It’s a relief, then, to finally reach the spire once you finish a map, where your characters can rest up and lose their accumulated damage icons. They don’t lose their permanent injuries, however. To fix those, you need to build a special room in your tower, which you do using a number of three different types of special tokens that drop as loot from battles. Yup. More icons.
Obviously, the healing room was the first room we constructed (using yet another token type to do so). This was great, and let us heal up most of one character’s injuries. Unfortunately, there are some issues with this in the long term.
First: Those special tokens we mentioned are the same tokens you use to unlock new spells for each of your characters. They’re also the same spells you use to unlock combo spells (via another room you can construct) and we guess you’d end up using them for things in the other spire rooms you unlock, too. That’s a lot of locations across which to spread a very limited resource.
Second: Despite the spire being what the game’s named after (unless we’re mistaken) and the fact that you travel to and from it via portals, you can only ever travel to the spire once you’ve completed a level. You can also never revisit a level if you want to go back and collect resources or spend more time familiarising with the combat system before moving to a more difficult area. Once you realise that, you can dedicate more time to collecting those precious special tokens, but enemies follow you all across the map and can often move faster than you. They also don’t disappear, only run away, once you defeat them. So the longer you spend on a map, the more of a swarm you’ll have following you around, the more you’ll end up in combat, the more injuries you’ll accumulate, the more healing you’ll have to spend those precious points on.
Conclusion
Spire of Sorcery is a beautifully illustrated bundle of novel concepts, but it’s a big, convoluted bundle. Some people, no doubt, will love the level of complexity and the steep learning curve. Others may not. If you’re unsure, the developers have made a demo available for this exact purpose. For us, we think it could do with reducing the amount of visual overwhelm and simplifying the number of different things tacked to broadly similar concepts. It could also benefit from a more integrated tutorial beyond YouTube videos, but of course this is perfectly understandable in Early Access when the gameplay is still in a state of flux.
We also think it would be a good idea to let players customise the symbols in each character’s deck of tiles. It would be great to go into a battle pre-prepared with blue and pink tiles because you know you’re going to be fighting an enemy that takes physical damage and those are the tiles you’ll need.
You can find Spire of Sorcery on PC.