
Rurik: Dawn of Kiev is the latest design from Stan Kordonskly (previously known for Dice Hospital, among others) and the first big-box game from Piecekeeper Games. Rurik is a eurogame with worker placement, bidding and area control aspects and it is rather unique among its brethren for several reasons that I can’t wait to explain.
A few years ago, a new kind of board game emerged in the wake of its champion — the award-winning Eric Laing design known as Blood Rage. Blood Rage popularised the Ameritrash or Dudes on a Map genre, bringing area control together with combat and drafting. The latter aspects of this design were the important bit since Laing demonstrated that it was possible to create war-themed games that didn’t actually focus on the combat elements.
Since Blood Rage, we’ve reviewed some fantastic examples of similar games including both Cry Havoc from Portal Games and Lords of Hellas from Awaken Realms, which just happened to be my number one game of 2018. You might be asking why this is important, and that’s because in my opinion there are enough unique things about Rurik: Dawn of Kiev for it to be considered of the same calibre as Blood Rage, and that’s kind of a big deal.
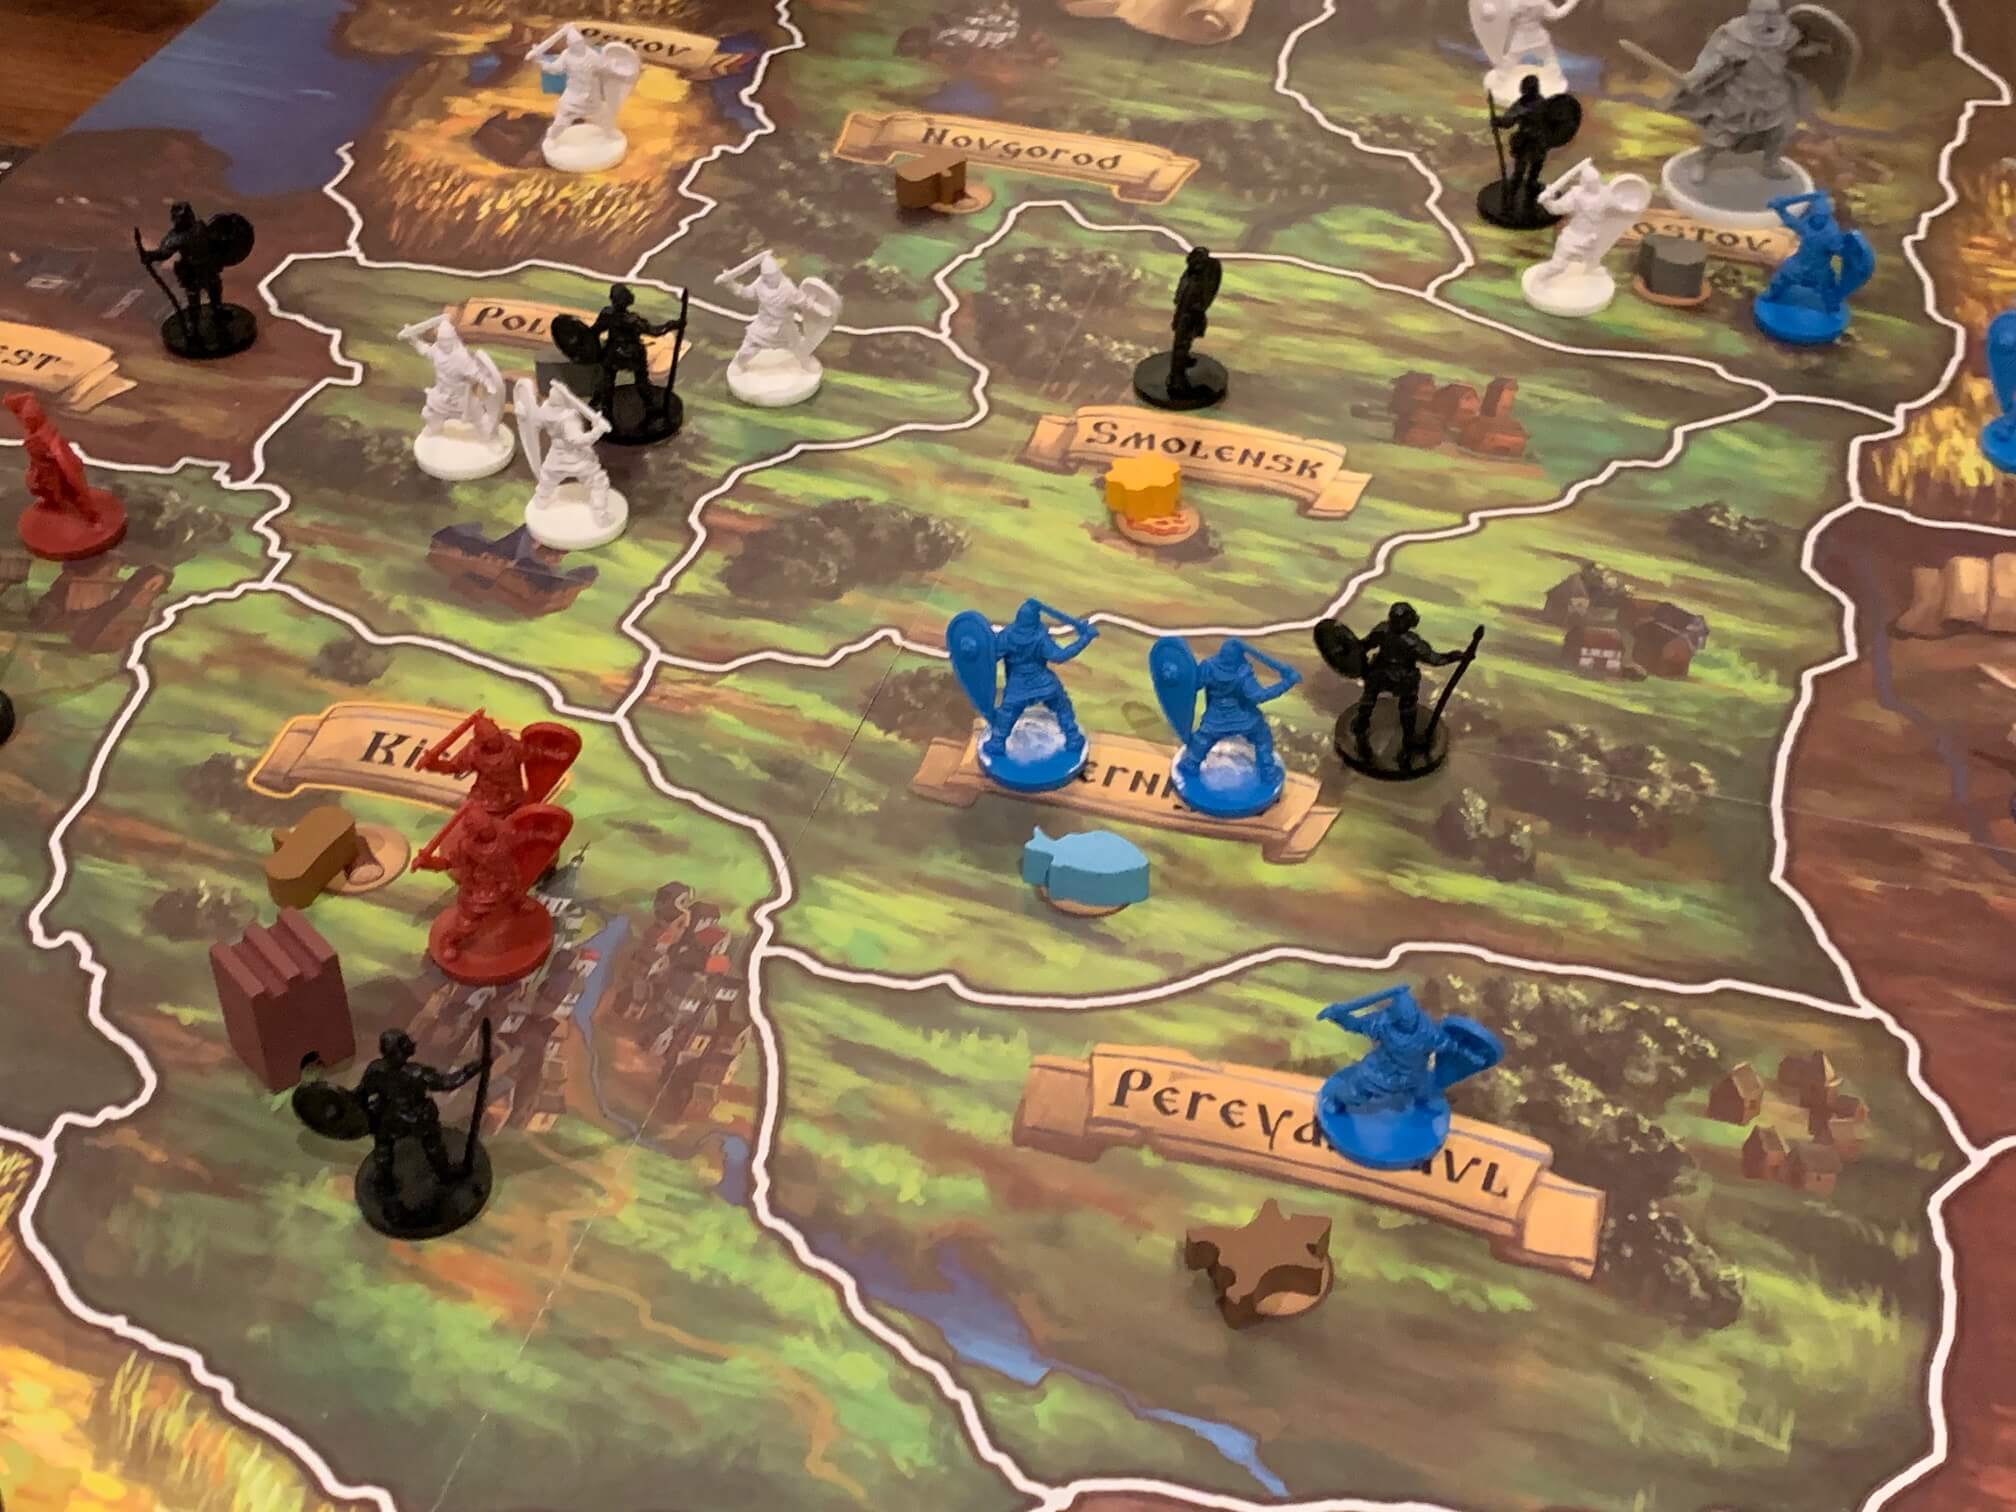
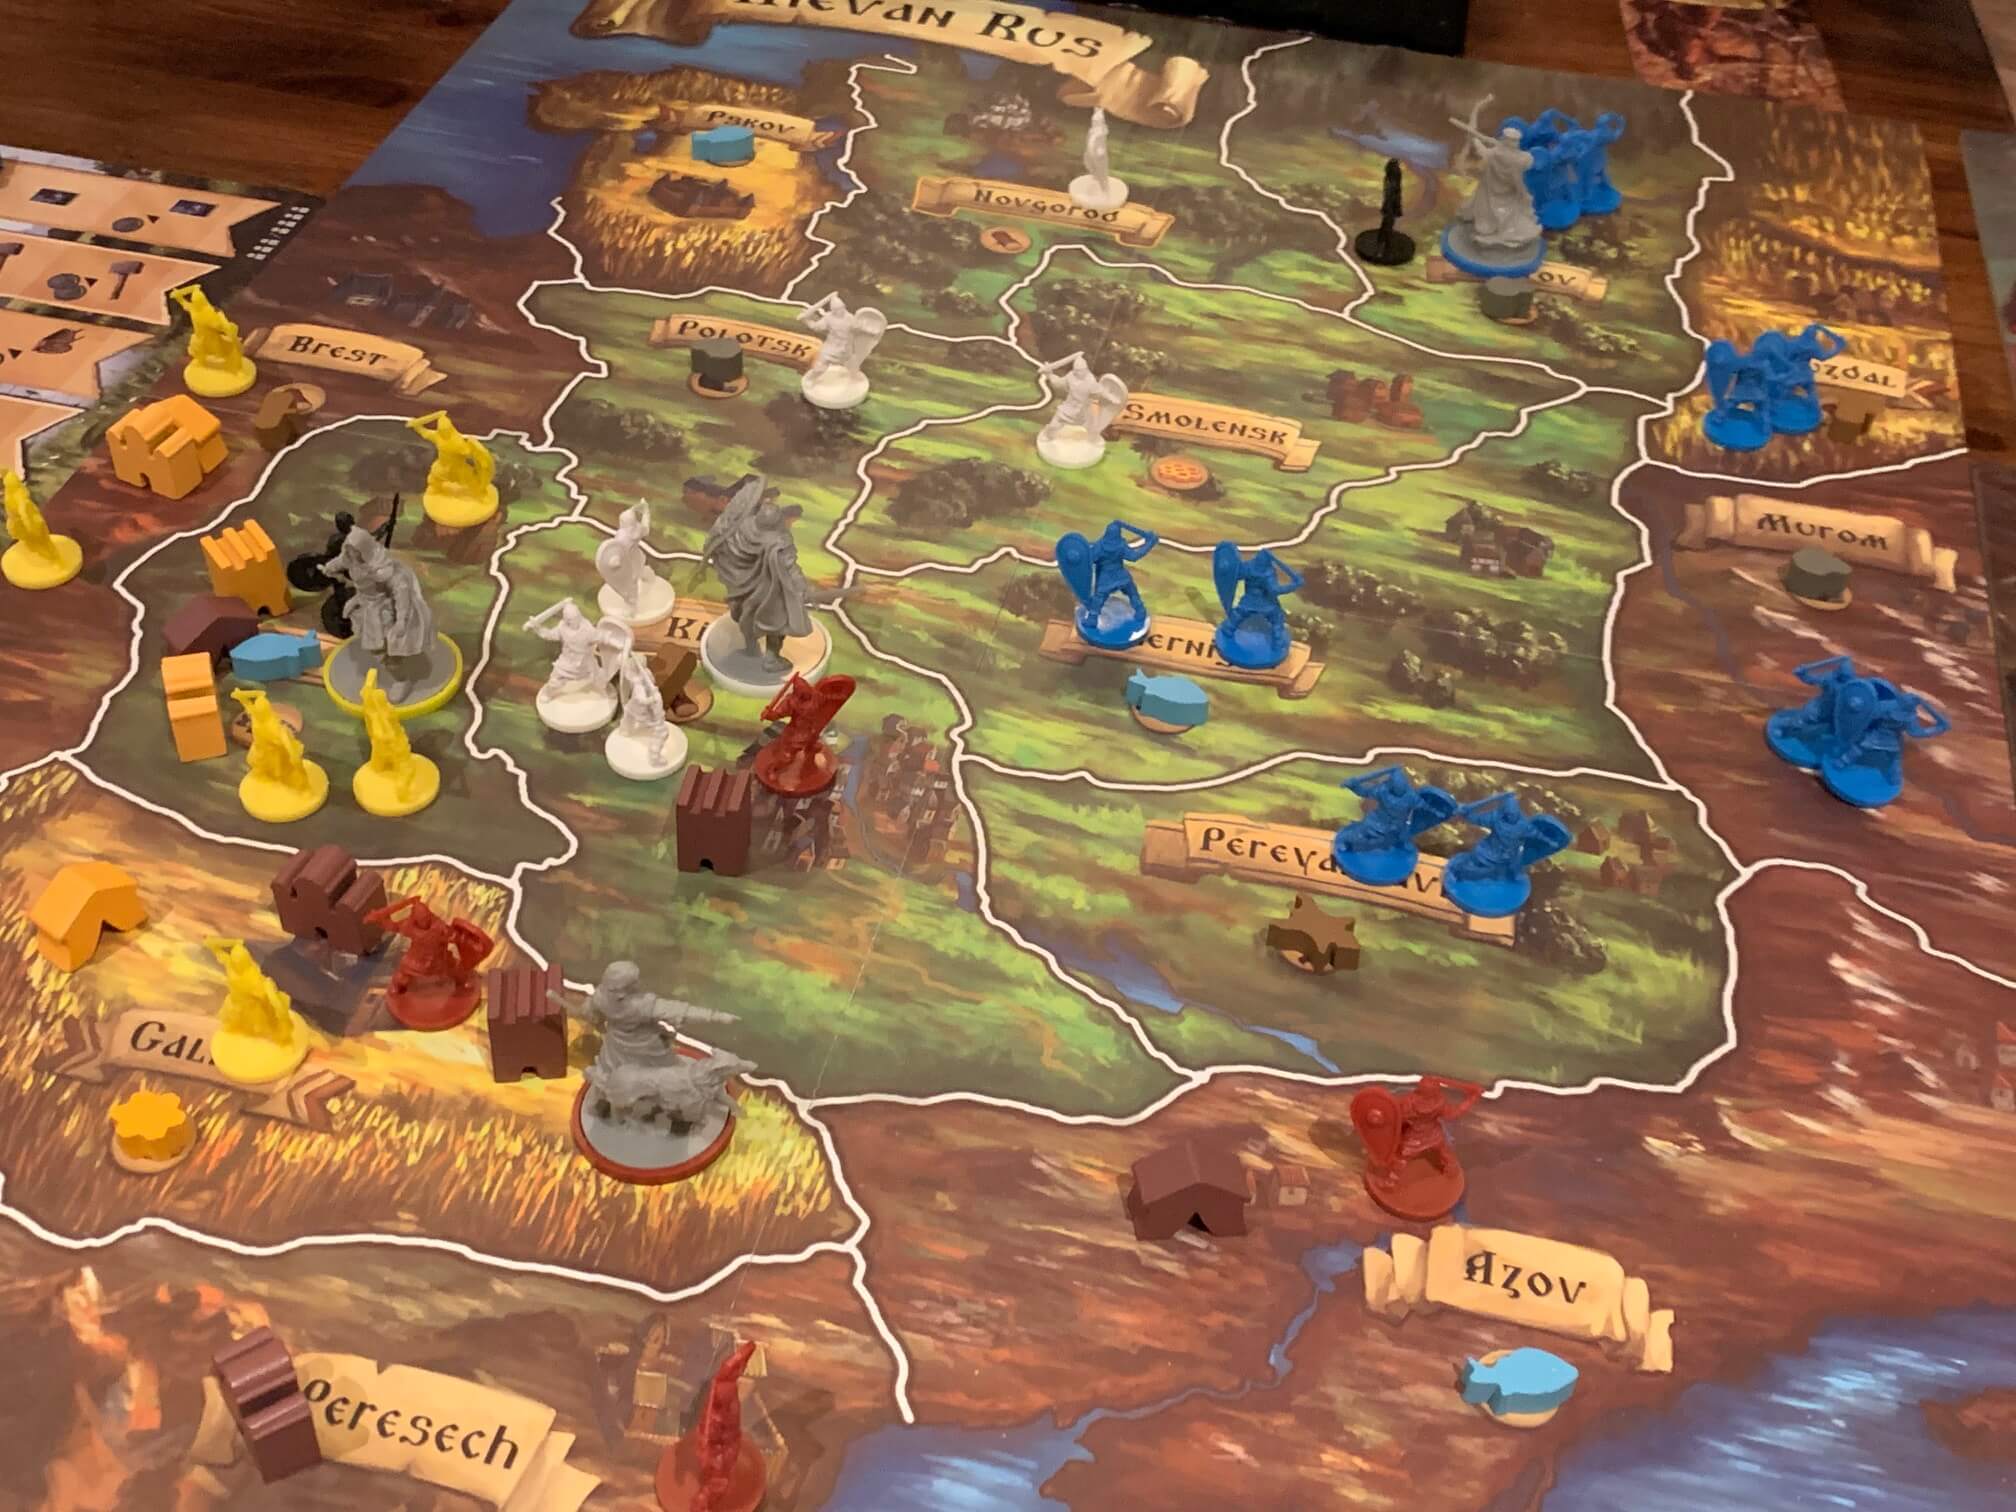
By way of background, Rurik: Dawn of Kiev is set in the Kievan Rus during the eleventh century, just after the death of Vladimir The Great. Each player takes control of one of Vlad’s offspring and leads them to taking control of the vacant throne. Vladimir’s legacy is such, however, that mere force of arms will never do — the people expect a strong ruler, a powerful general, a shrewd negotiator and an accomplished builder to lead them.

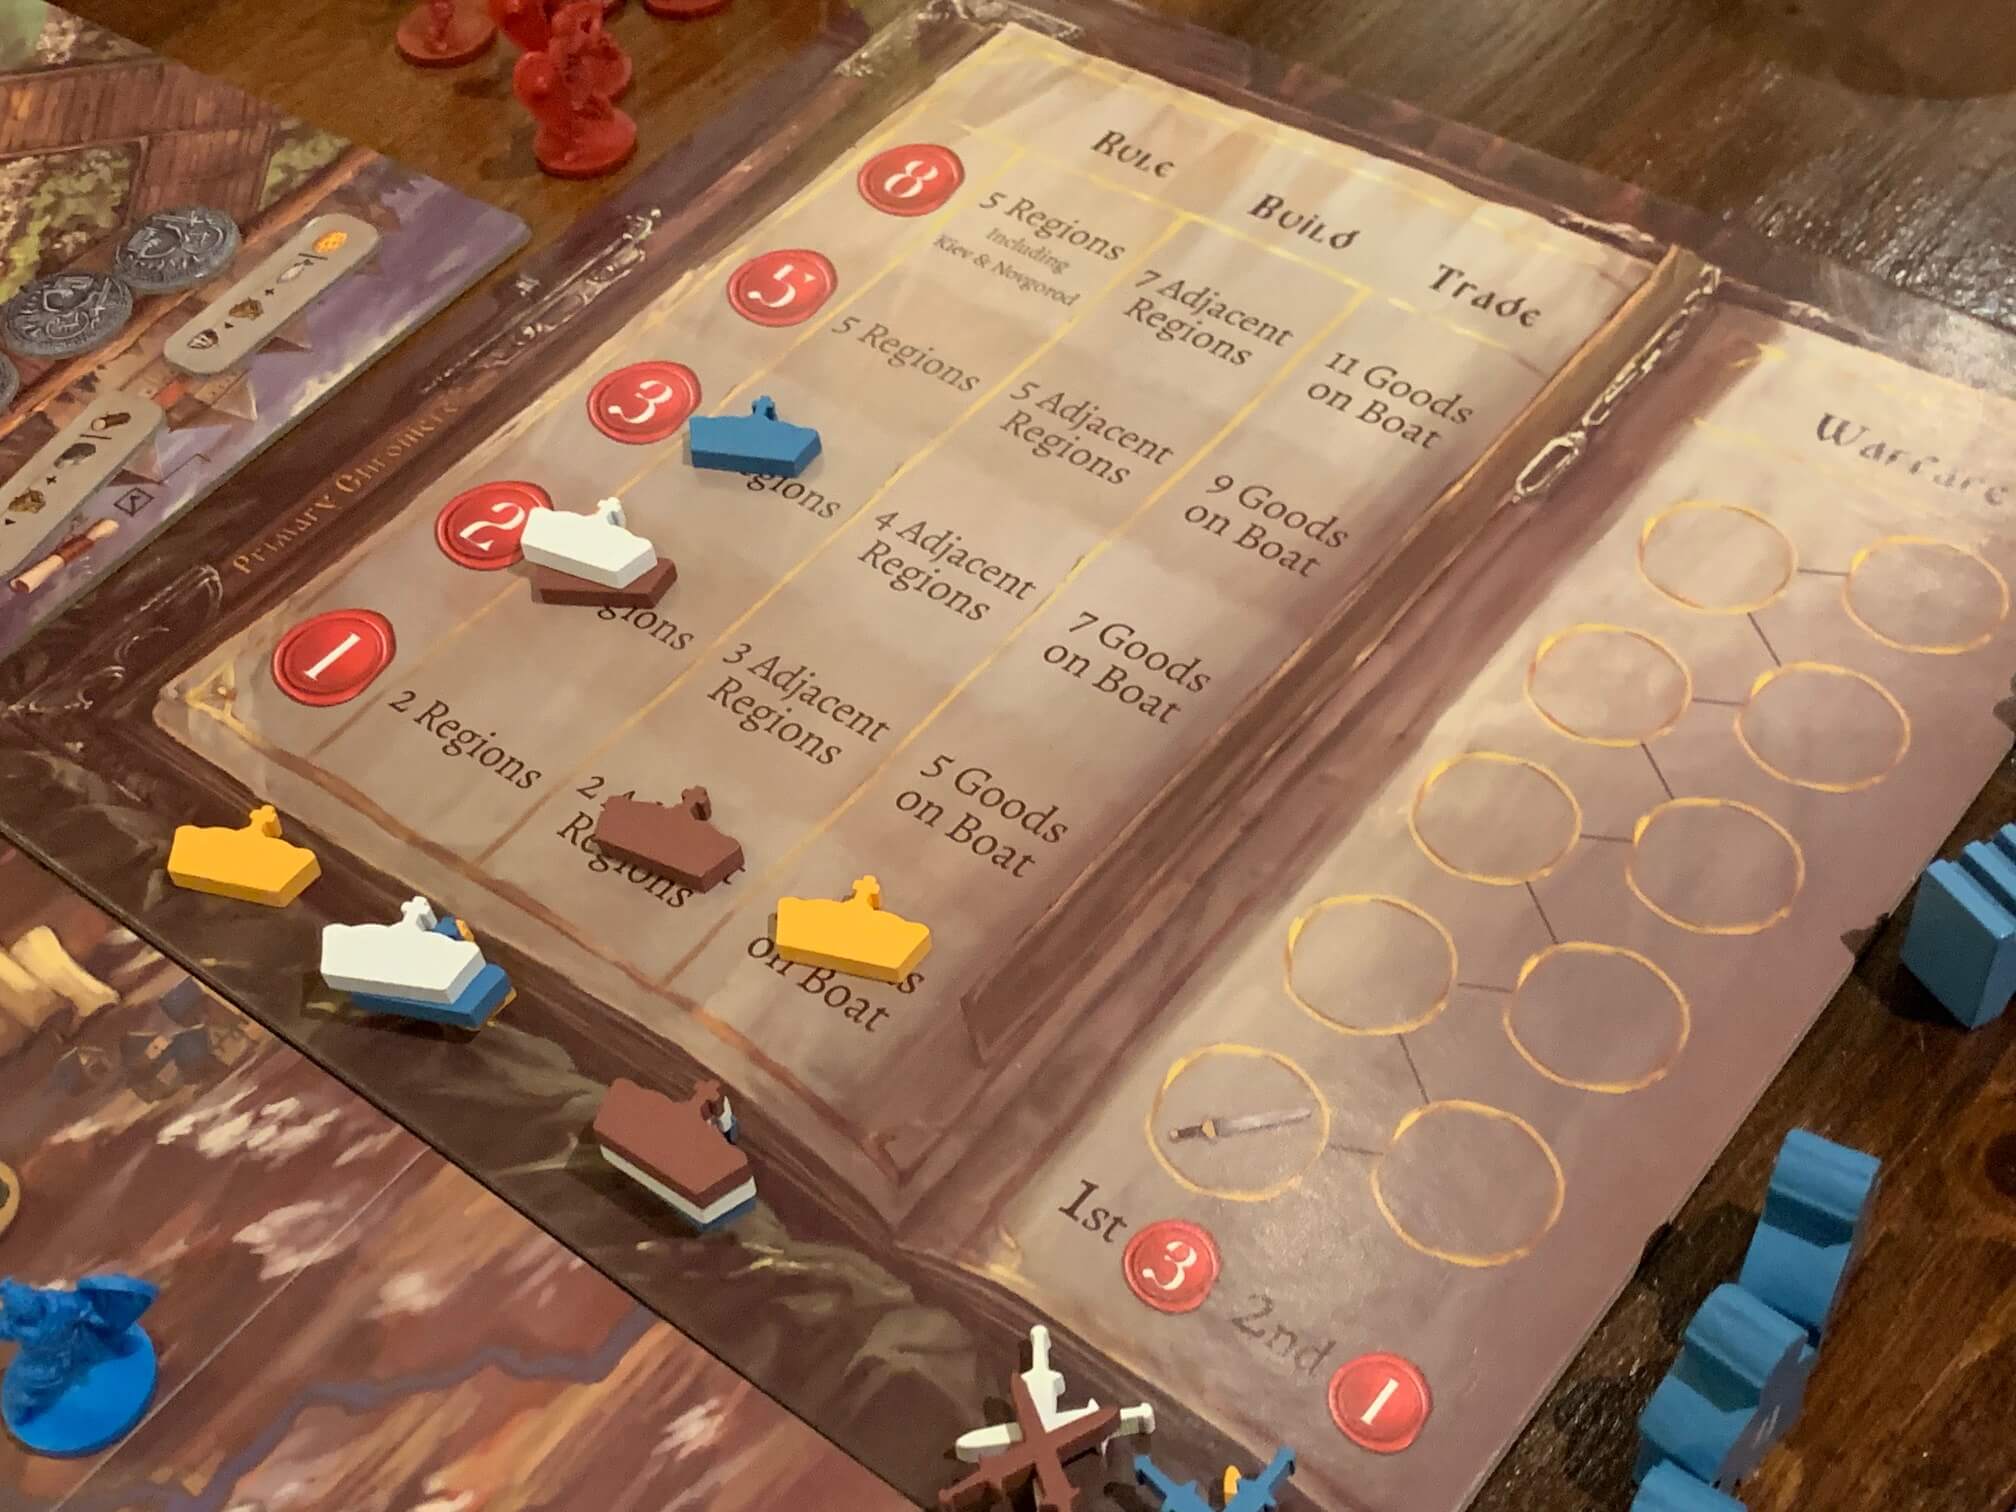
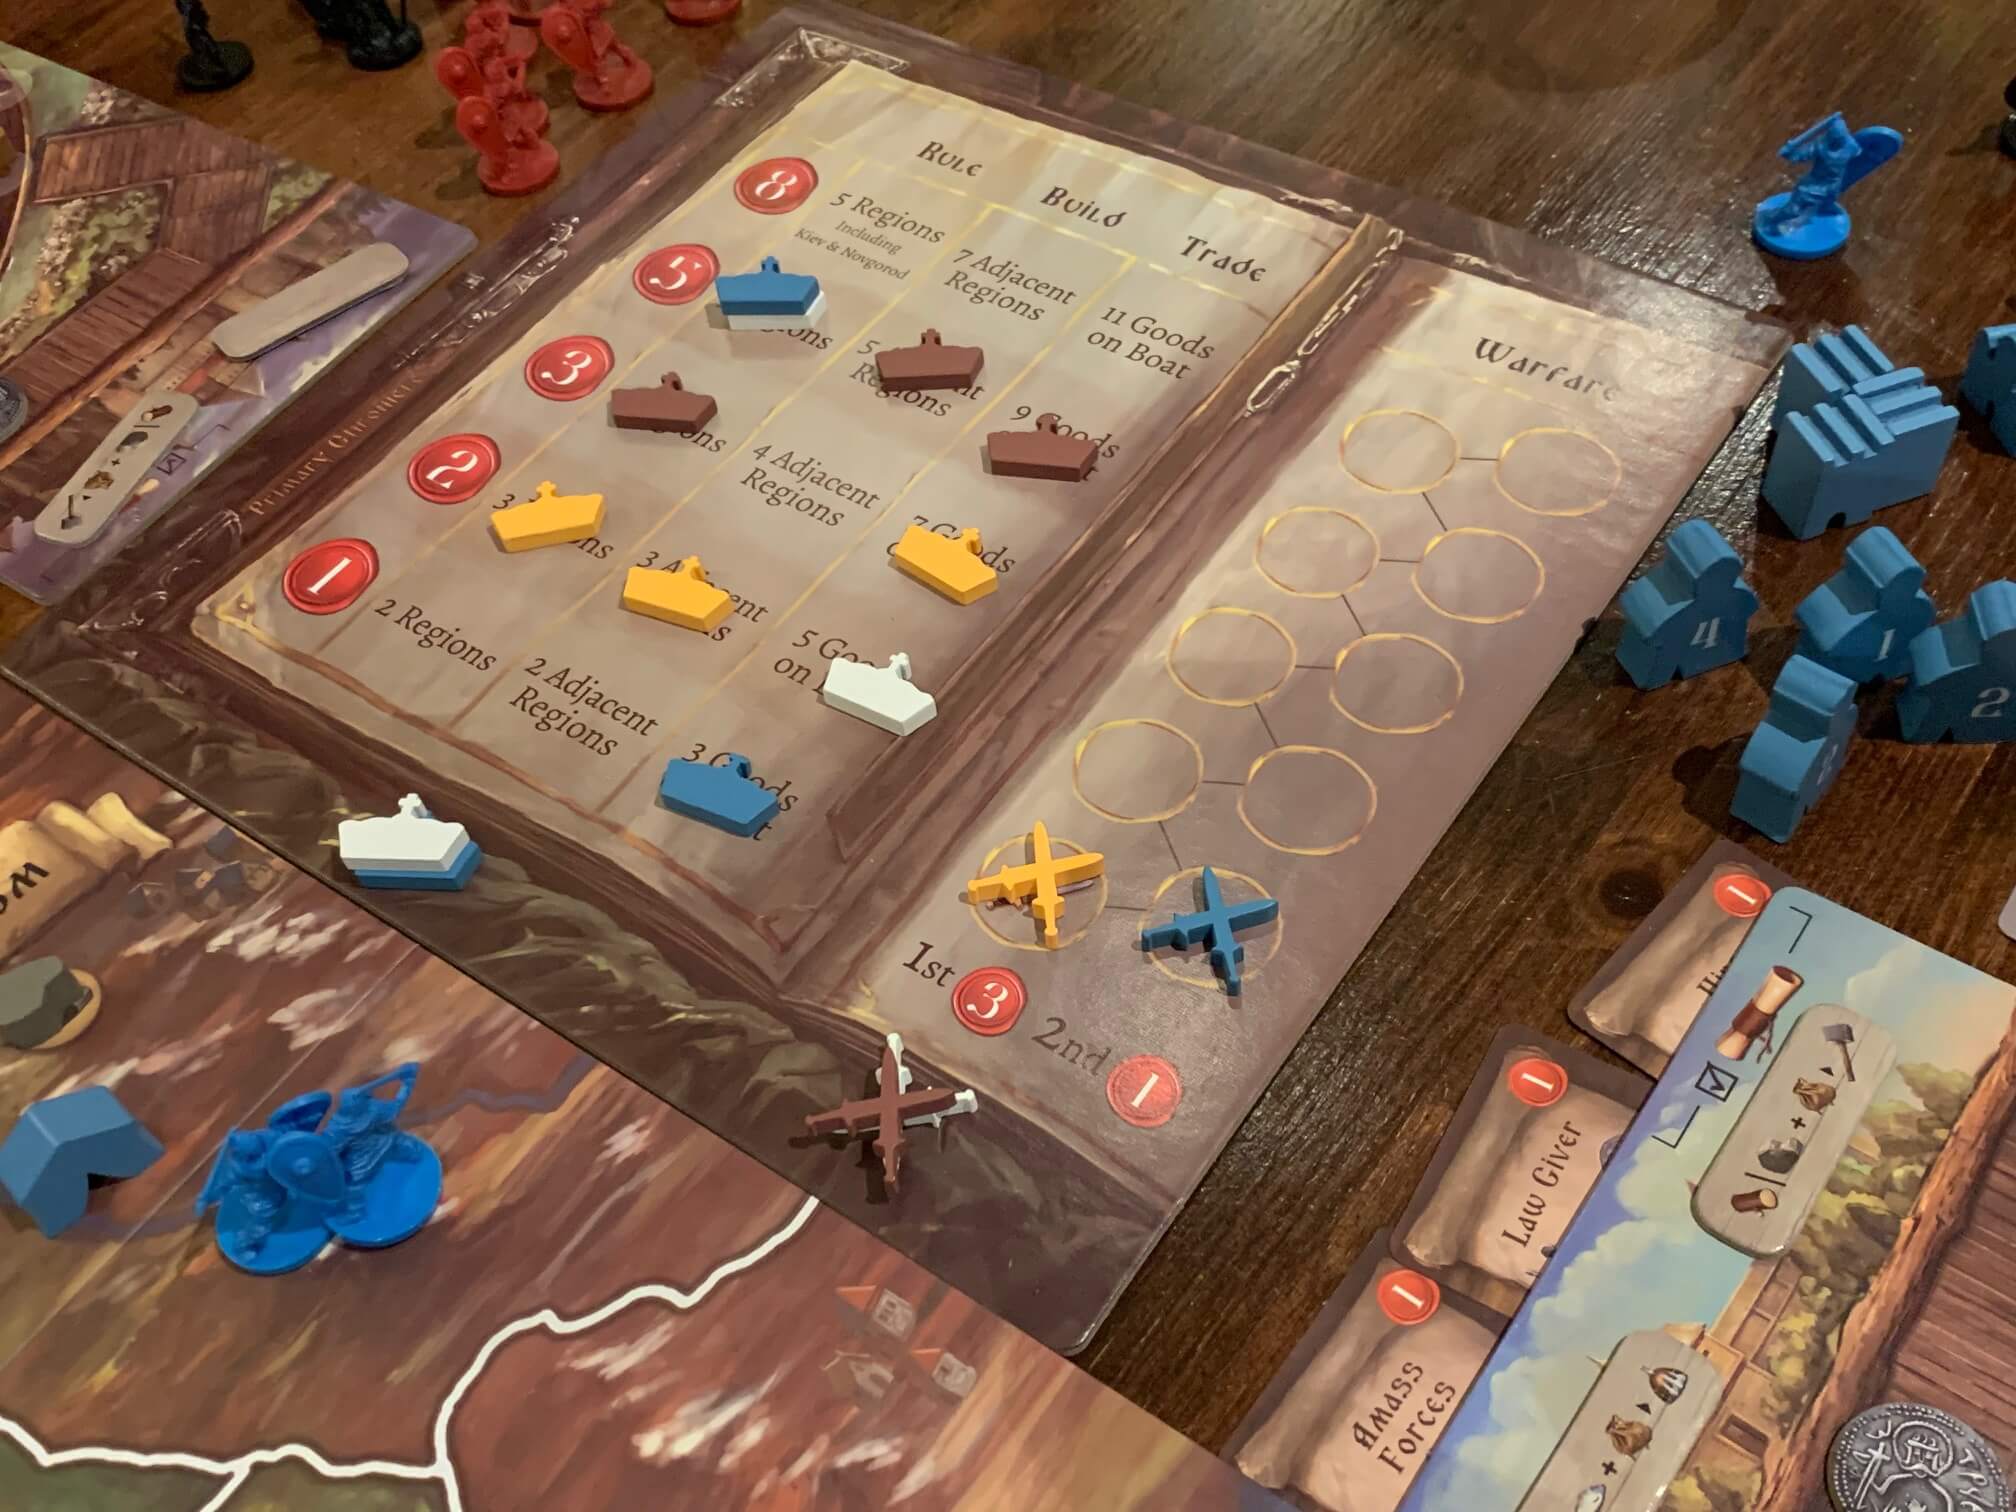
These things manifest themselves in the form of the claim board, which is a simple series of columns indicating possible endgame scoring bonuses based on how much of a given task has been achieved. The number of provinces you have simultaneously ruled, the number of buildings in adjacent provinces and the number of goods you are trading are the main three tracks. The final one, indicating warfare, simply moves up one space for each attack declared against another player.
The points that each player will score on this track are transparent to all players, and each player has a marker indicating their current place on each track. An unusual aspect of Rurik: Dawn of Kiev is that once a player has moved up on any of these tracks, they cannot move down — so you may only have had fleeting control of five provinces, but nonetheless, you’ll move up the board and stay there.
This is one of several aspects in Rurik: Dawn of Kiev that feel generous and help to mitigate the occasionally frustrating nature of games that involve direct conflict between players. In this case, if your whole army is then wiped out, you won’t have the double-whammy of being pegged back down the scoring track.
In addition to these tracks, players can also score their own hidden agenda card (usually for something like finishing highest on a track) and a number of deed cards, each of which involve doing something specific during play. Again, these deed cards open information once completed and will be tucked under the player’s personal board face-up, with just the points value (usually one) showing.
Rurik: Dawn of Kiev is always a low scoring game relative to many others, and a single point here is very valuable. Many games at four players will finish with all players scoring somewhere in the teens, and a winning score might be as low as fifteen and rarely higher than twenty.
To achieve the things required on the claim board, players will move through two phases of play each round, and the game consists of four rounds per game. During the first of these phases (the Strategy Phase) players will plan their actions by placing numbered pawns onto the strategy board. This board sits on the opposite side of the main board to the claim board, and this time has six columns each of which show in-game actions.
Players will place their pawns one at a time, with the numbered value of their pawn indicating its strength. The highest value pawn will always go to the top of the column onto which it is placed, whilst lower value pawns will slot in wherever they fit numerically… As an example, if a player places a two value pawn onto the tax column, but then the following players place a four and a five value pawn respectively, the two value pawn will be bumped down two spaces (with the four and then the five above it).
At the point at which a pawn is played, a player may add a number of coins to their pawn to increases its value one step per coin. So in the example above, if our two value pawn had four coins in it (for a total of six strength) it would stay at the top of the column, with the five and four value pawns behind it. To further exemplify this, if the player with the five value pawn added just two coins (for a total of seven) when they played, they could hop over the two value pawn with four coins on it.
The placement of pawns in Rurik: Dawn of Kiev continues in this way until every player has placed all of their pawns. In a four-player game, each player begins with four pawns and will gain an extra two value pawn at the end of the second round, whilst in a two or three-player game, players gain the same extra two value pawn and then a further three value pawn at the end of the third round. This means that players begin the game taking four actions per round, but will then move up to either five or six actions depending on player count.
On the subject of actions, the Strategy Phase is only about planning actions, not taking them. With all the pawns placed, players will now resolve them beginning with the first player and working from the lowest value pawn upwards. In effect, the first player will pick up their one value pawn and resolve it, then the other players will do the same. The first player will then pick up their two value pawn and resolve it, and so on.
An important note here is that before actions are resolved, the players will remove all coins placed on their pawns and discard them to the supply. This means that a one value pawn with four coins on it might have forced its way high up a column, but will still resolve first. The order in which pawns resolve is very important for planning your turn, since if you end up moving before you muster, for example, you might not actually have any troops to move.
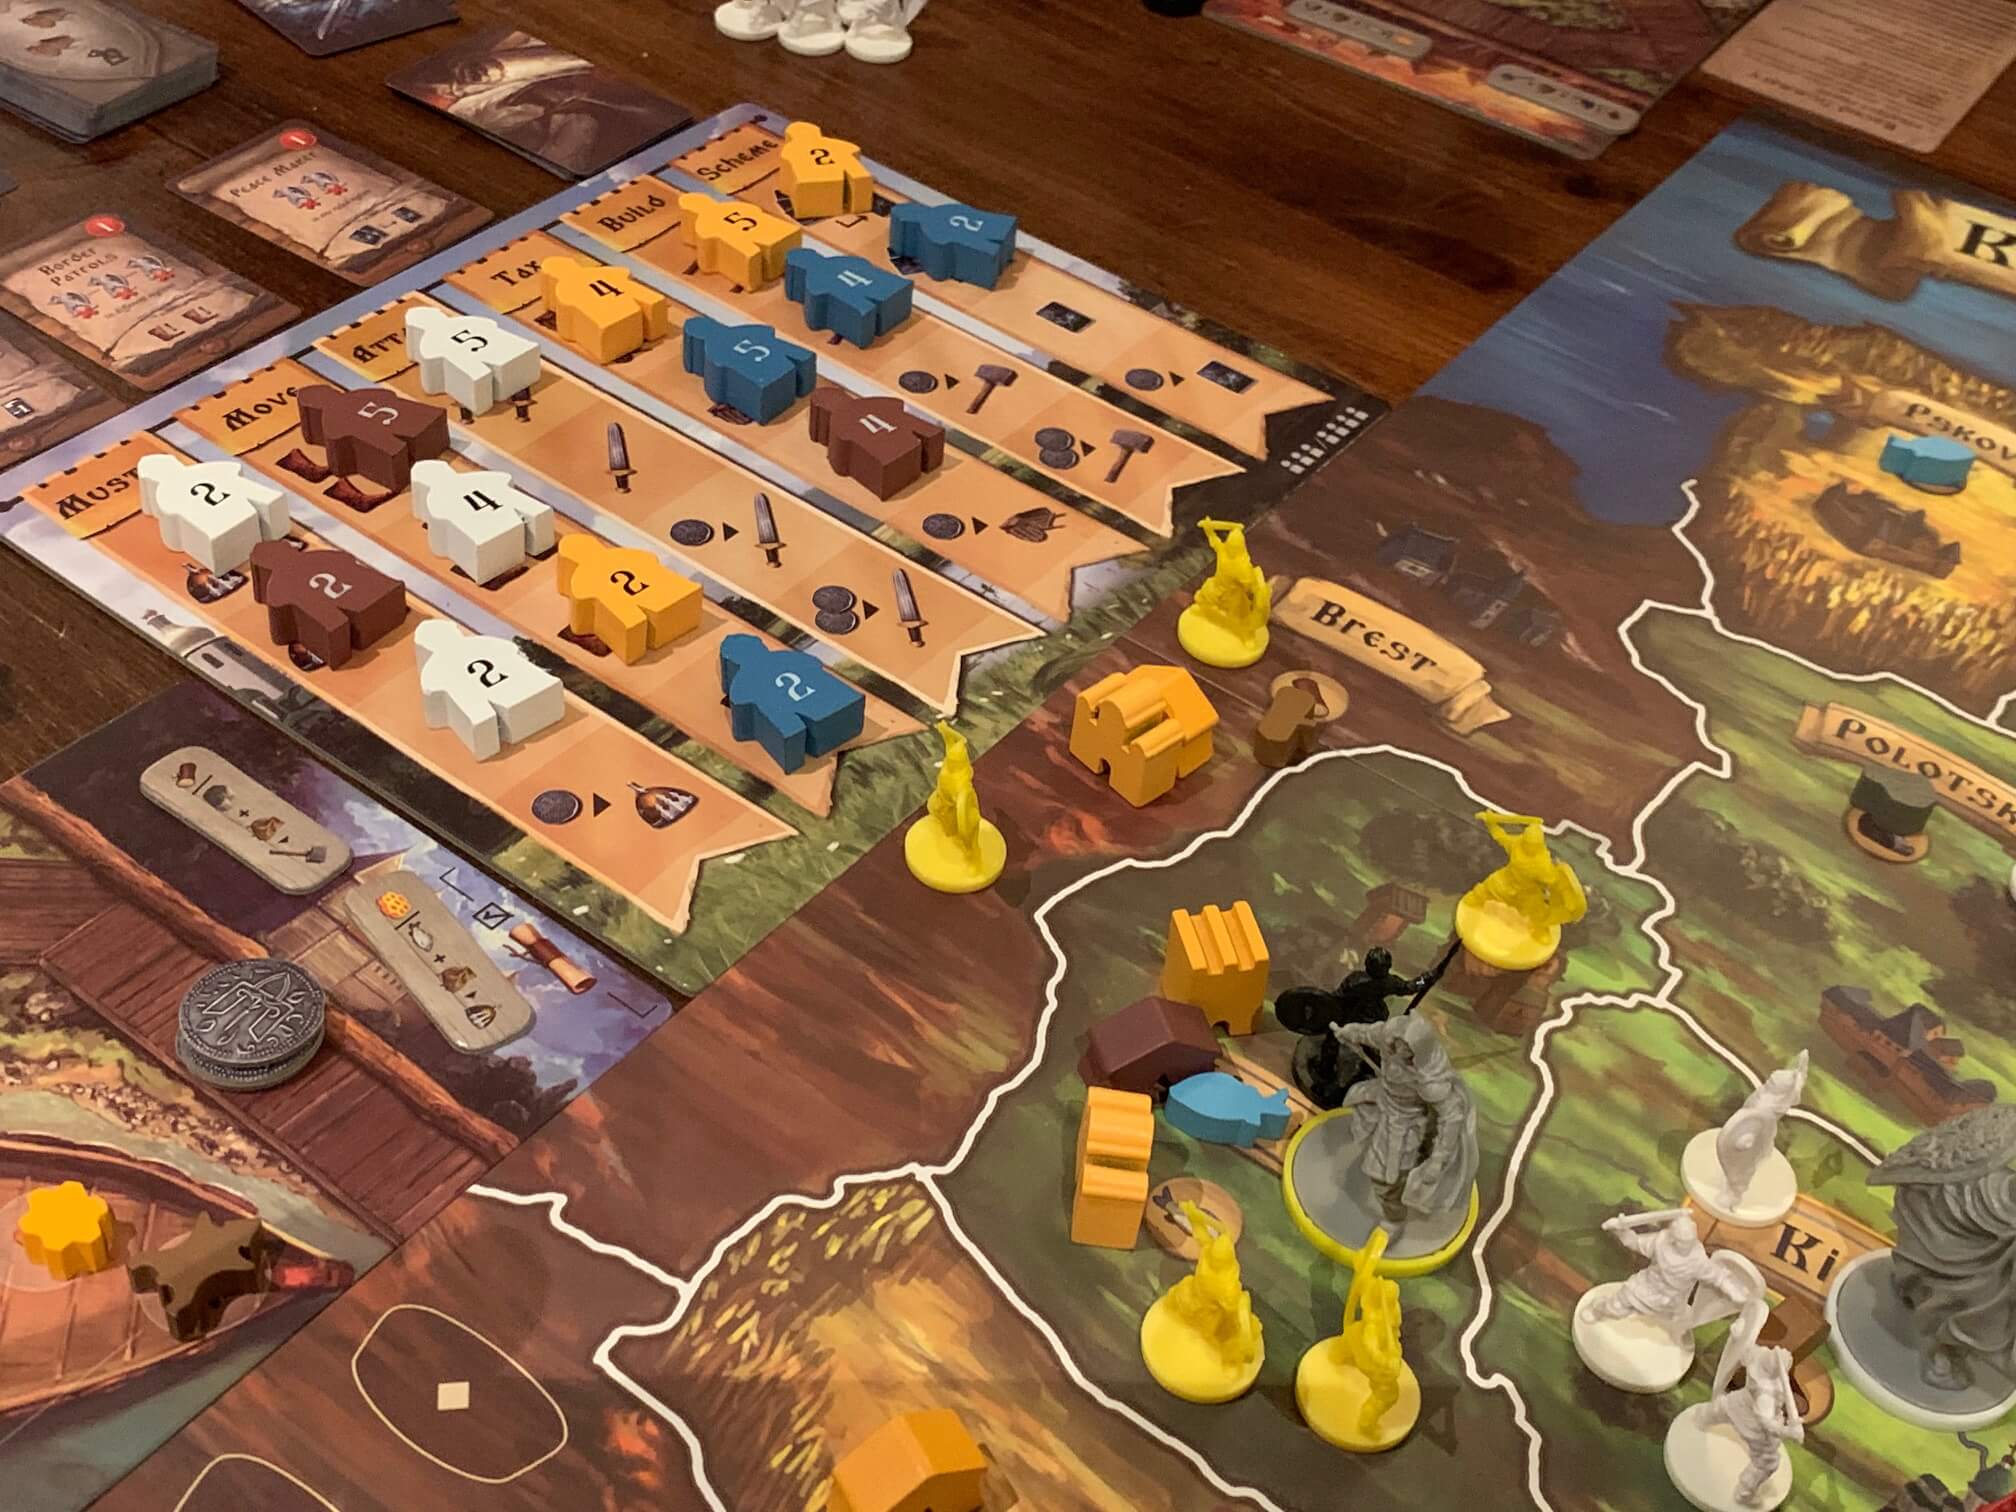
The six actions that players can take this way are simple. Mustering allows players to place new troops in any location where they already have troops, moving allows players to move those troops, attacking allows either rebel (black) figures or figures belonging to other players to be removed from provinces and tax allows the player to tax a region. The building, of course, allows players to build, whilst the final action, scheme, allows players to take a scheme card.
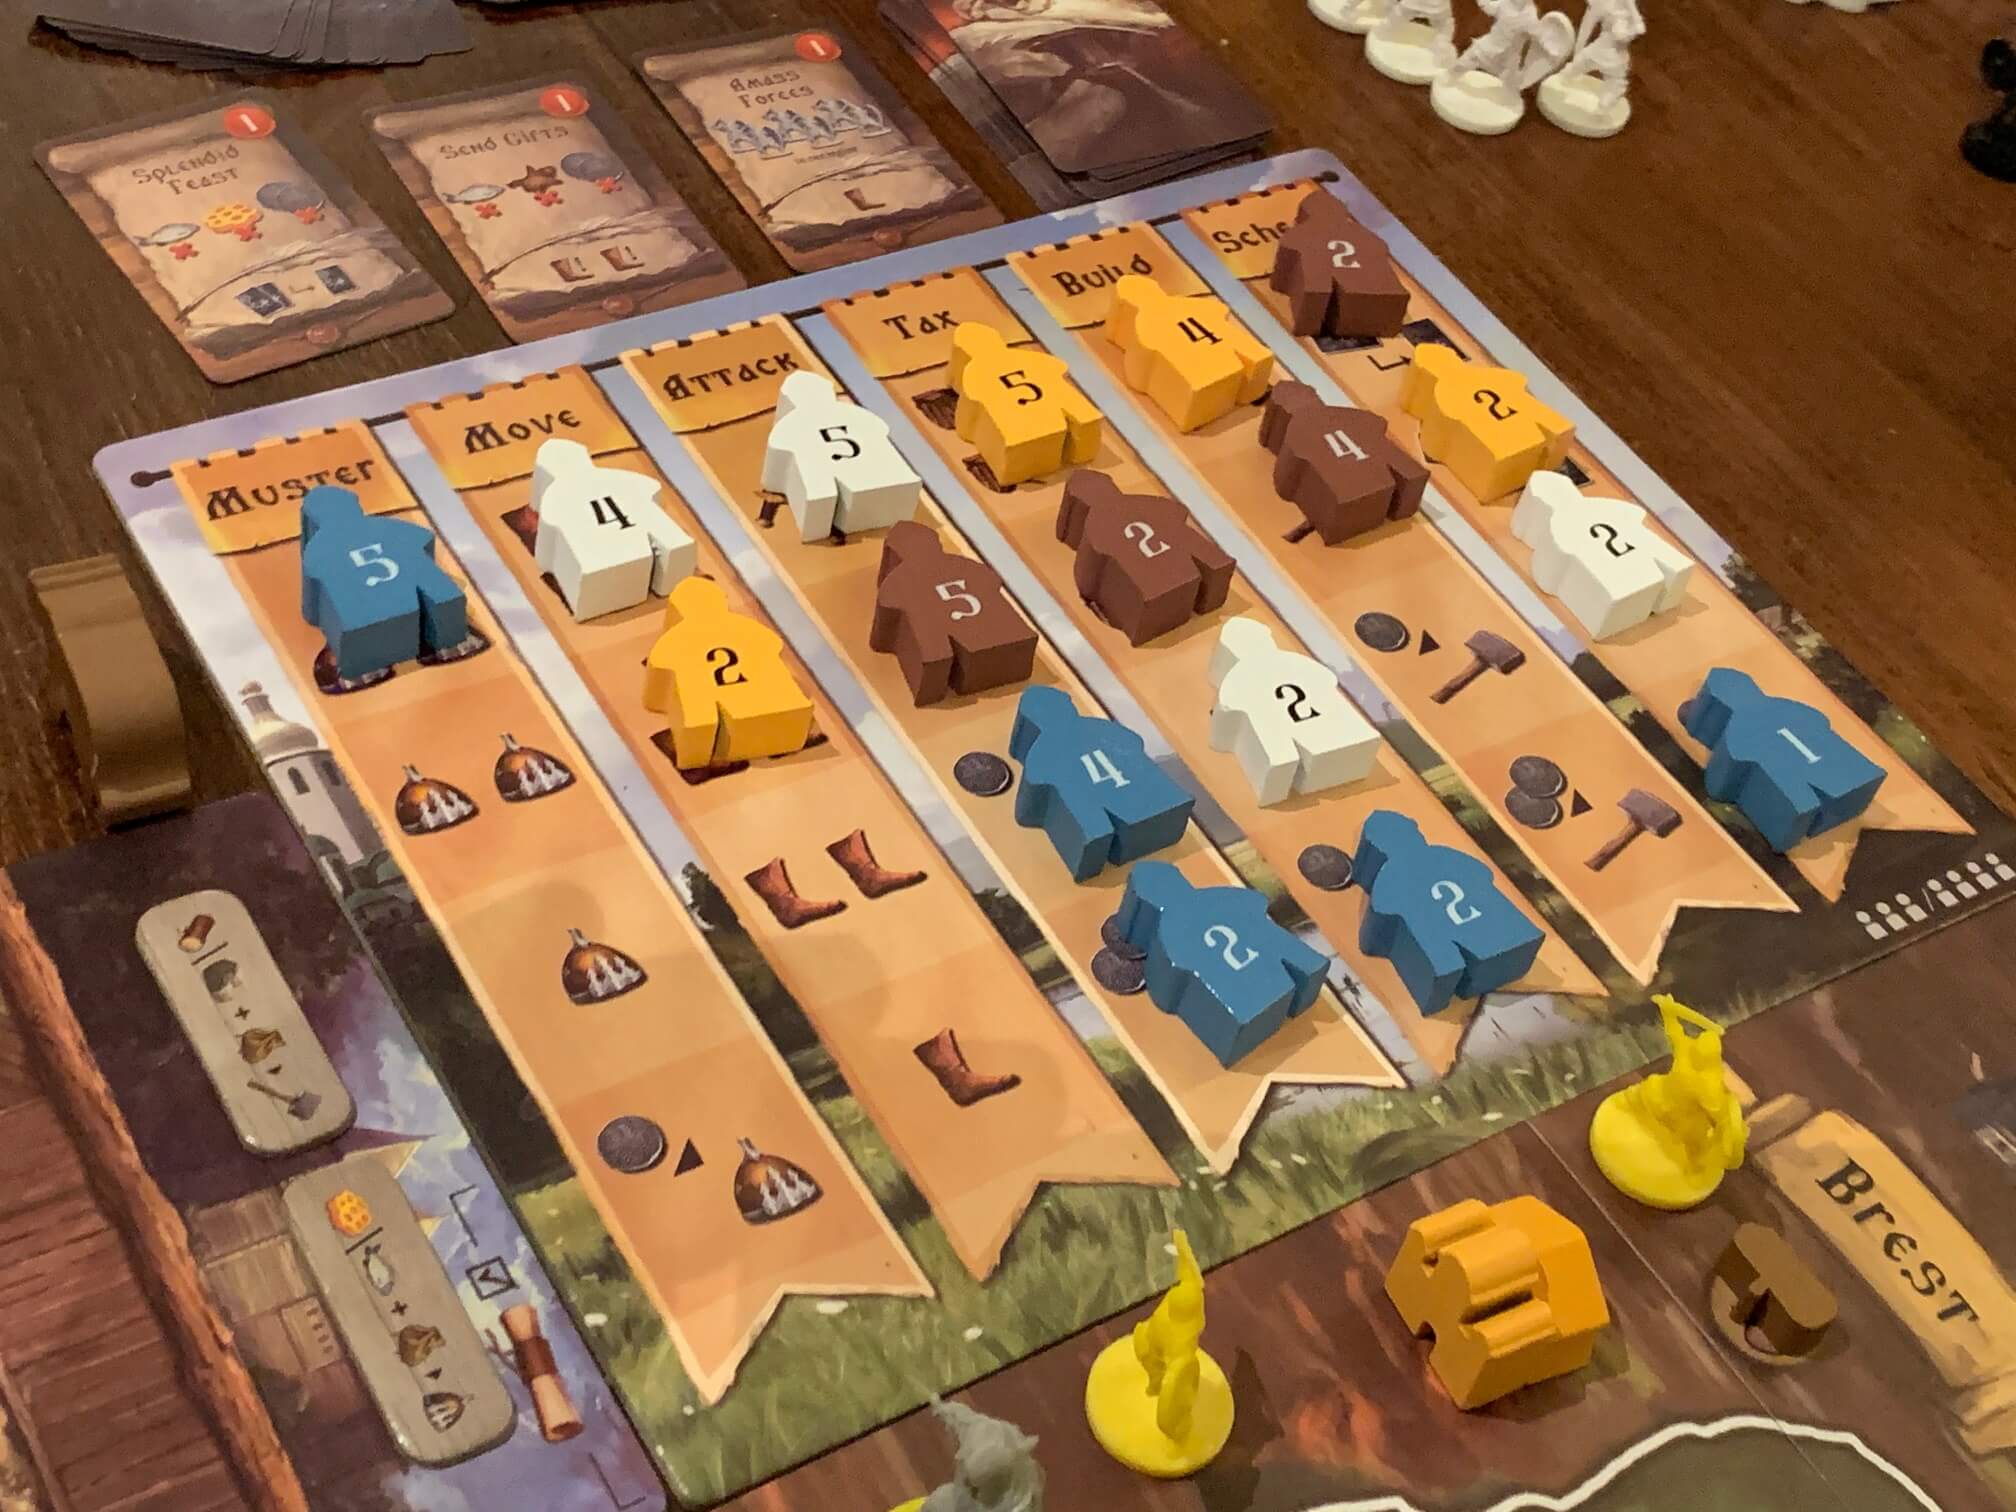
I could leave it at that, but there’s a bit more nuance here than meets the eye. Firstly and perhaps obviously, the higher up a column on the strategy board a pawn is, the more powerful the action will be. If we take the attack action, for example, the top space allows the player to make two attacks, the second one, the third is also one, but the player must pay in coin to make their attack. The fourth? Well, the fourth space on the attack track allows one attack, but the player must spend two coins. Is it really worth it?
Sometimes yes and sometimes no, but critically, if yourself picking up a pawn that is on a space that you either cannot or do not want to perform the action from, then you can always just take one coin instead. Again, blocking one space on a column to then just take a coin is a valid strategy, but I should also mention that players can only place a second pawn in any column once they have a total of three on the board — giving all players ample chance to claim column space if they desire.
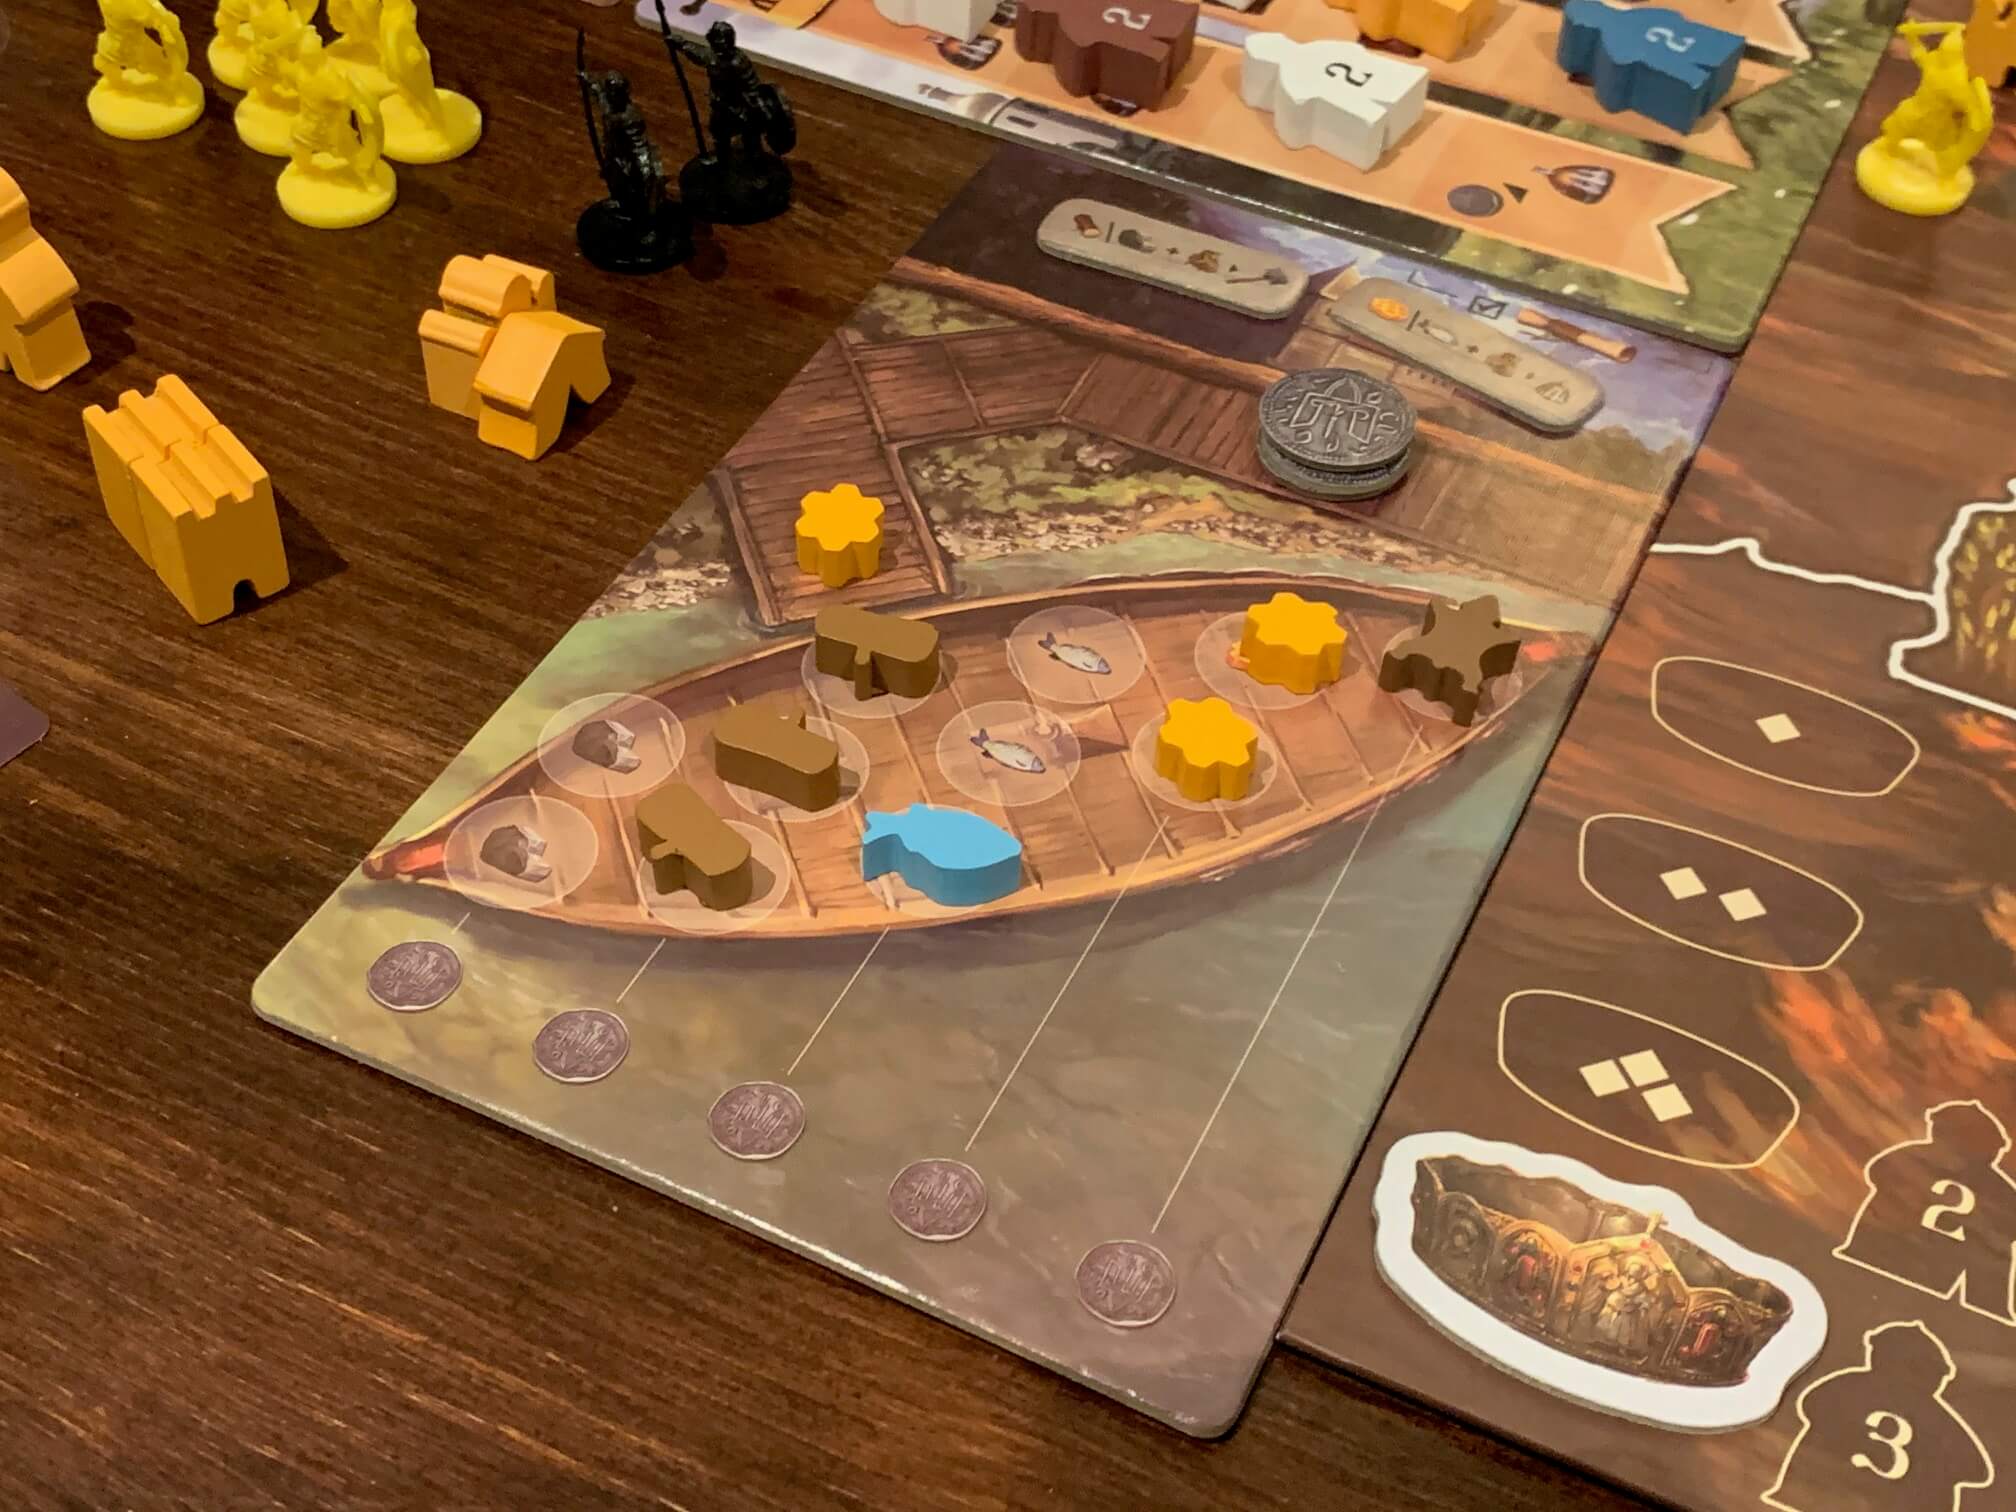
Whilst muster and move are completely straightforward, the other actions are slightly less so. Tax and build are similar, allowing the player to pick up the resource in a province when they tax or put down a building in a province when they build. Each of these costs just one tax or build icon respectively if the player has control of the province (by having more troops than anyone else) or two if the player does not have control. If a market building is in a taxed region, the player doing the taxing may take the resource off the board and then a second resource or a coin from the supply.
Buildings all do slightly different things, but each one is straightforward. The market, as mentioned above, increases tax yield. The stronghold simply adds one strength to the region for whoever builds it, and also makes attacking that region more dangerous (which I’ll explain shortly.) The church allows the player placing the building to convert one rebel or enemy troop to their side, giving an immediate two-point swing in power.
Scheming is also simple, but there are several ways in which it happens. The top space of the column allows the player to draw three scheme cards and keep one, second is draw two and keep one, third is take one and keep it and fourth is take one if you pay a coin. Scheme cards are underrated by new players and offer very powerful benefits since each one tends to offer an additional ability that can be played on any turn in addition to (or in support of) the action taken by the pawn. For example, scheme cards often have muster, build, attack or move icons on them and can be used just so, often with modifiers such as gaining a coin.
Finally, attacking is the most complex action, but it is still straightforward once you understand it. The player will spend one attack point for each attack they wish to make and can attack anywhere where they have troops (regardless of the number of troops on each side). When an attack is declared, the attacked unit (whether rebel or player) loses their piece immediately (unless some effect says otherwise.)
If the piece was a rebel, then the attacking player looks at the sticker on the bottom of the miniature and takes the resource shown, and that’s it. If the piece belonged to another player, then the attacking player will move one space up the combat track on the claim board, and will then draw one or more cards from the scheme deck. In this case, the player isn’t taking the scheme cards, they are looking for casualty symbols and if a figure is shown on any of the cards drawn, they will lose their piece too.
Now, the number of cards drawn depends on the situation. One card is always drawn when attacking another player, even if the attacker is dominant in the province. If the defender has control, then two cards are drawn, and if a stronghold owned by the defender is present, then one extra card must be drawn.
As such, the most cards drawn will be three, and the least one. Just for clarity, no card is ever drawn when a rebel is attacked, and it is perfectly fine for any number of troops from any number of players to coexist in a province peacefully. Remember, we’re all siblings in this game and thematically, combat feels more like minor skirmishing and disagreement than all-out war, although players can certainly warmonger if they wish.
With the Strategy and Action phases done, players will move onto the claim phase, which simply involves moving up the tracks that I described earlier. Having control of provinces, building in adjacent provinces and placing trade goods (obtained via taxing) onto your personal boat are all scored here, and remember you’ll never move down the tracks should you lose provinces or sell goods, for example. Players cannot destroy each other’s buildings, but it is possible for a player to discard their own buildings due to various deed cards — again, that player would still stay where they were on the claim track.
At the end of the fourth round of play, a final scoring occurs, with players adding up their positions on all three claim board tracks as well as the warfare track, then adding any deed cards into the equation. The private agenda card is also scored if it has been achieved and hey presto, you should have a winner. A couple of tiebreakers exist because scoring can be so close, but if there is still a tie after these, a joint winner can be declared.
So, why do I love Rurik: Dawn of Kiev? Well, it might not seem like it, but it’s just very straightforward, very clever and very fun. It has that really exciting close that all the best worker placement games have where on the last turn or two you’re brain will work overtime to decide the best way of getting every last point. Players will be going through a process of saying to themselves “If I just place here, then I can move there, but I need to muster first so can I trade two coins and some goods to do this deed card, which gives me a bonus muster action, or do I take a coin instead and then use the scheme deck to try and draw into a better action?”
This, certainly, can lead to analysis paralysis later in the game because there are a lot of variables, but by splitting the Strategy and Action phases up, players have to stay focused because their action will only allow them to do one or two things when they pick up the pawn. And that, also, is why the Scheme cards and other infrequent bonus actions become so important – because they are powerful and unpredictable.
Despite the weight of the decision making and the tightness of the play, Rurik is also relatively easy to teach and learn. This comes from having a logical flow and because it is mercifully light on caveats and prerequisites. Things like mustering and moving don’t come with reams of rules and restrictions – they just do what they say. The other actions may be more complex, but the extra rules associated with them draw a perfect ring around common sense and don’t really need elaborate explanation.
I likened Rurik: Dawn of Kiev to Blood Rage because I think it’s up there as a genre-defining game that has the potential to change the way that future games of this style are made. The strategy element and the sort of mini-auction or bidding aspect to it feels completely unique, whilst the area control and combat elements again show that war games don’t have to be about war.
When players do decide that all they want to do is kick the other players heads in, it’s very difficult for that player to maintain the aggression since they will need to spread their actions onto taxing, mustering and building in order to get any real payoff, thus again opening up the attack spaces to other players who now bear a grudge. In many ways, Rurik: Dawn of Kiev demonstrates that combat is often the least effective way of waging war, which is a really nice message that shows through the gameplay.
This is certainly a game that you should consider checking out if the theme or gameplay sound even remotely appealing, and I do think it will surprise a lot of players with its tightness and how clever it feels, despite looking like classic Dudes on a Map. Euro game players definitely tend to leave the table feeling much more satisfied than they expected to, whilst fans of area control and similar will be right at home, albeit they may also find the worker placement twist draws them the other way towards more euro games in future!
Rurik: Dawn of Kiev can be purchased on Amazon.